A pocket hole jig can be used for many purposes. One of the most useful things you can do with it is join boards edge to edge. I can’t tell you how many times I find myself edge joining boards with a Kreg Jig. It allows me to create table tops and other flat surfaces for all kinds of projects.
Find which Kreg Jig you should buy here
I have used a pocket hole jig to join boards in this fashion for a bunch of projects. My wooden flags can be made this way. I created the back of my entryway organizer like this too:

This post will cover the basic ways of joining boards edge to edge. If you already know how to do this, then you can move on with your project. Otherwise read on and you will be familiar with it in no time.
Relevant Links
- Best Pocket Hole Jig
- Pocket Hole Screws vs Regular Screws
- Kreg Jig Settings Chart
- Why Use a Pocket Hole Jig
[toc]
Traditional Methods
Before pocket hole jigs were popular, there were a few other ways that people normally joined boards edge to edge.
Wood Glue
The most obvious way is simply using wood glue (read about PVA Glue here). Simply apply glue to the edge of the board and clamp them together for enough time to dry solid. It is a great way to do this.
There are a few disadvantages compared to pocket holes, however:
- Wait time for glue to dry
- Clean up of glue is critical
- Need several clamps to hold boards
- Limited by clamp size, quantity
- Boards can shift without you realizing it
Some woodshops will be set up perfectly to use glue, and I highly recommend you own all the tools you to do this anyway. A crucial component of being a good woodworker is being able to perform a task in a number of different ways. I have done it this way several times and the results have ranged from bad to great (hence why I say clean up of glue is critical).
One way to improve the process is by drilling holes for dowel pins to help hold the boards in alignment, as shown in the video below.
Credit to: SPHS Woodshop
Biscuit and Plate Joining
Some people like to use biscuit joining and plate joining methods to help align the boards when butting them together.
These tools generally create a slot where a biscuit, dowel, or other type of insert is placed and aligned with a hole on the adjoining board.
I do not think these are necessary unless you are joining longer boards that may be harder to keep aligned.
Some advantages of biscuit joining are:
- Easily aligns boards based on tool depth setting
- Quick and easy to use
- Aligns longer boards
- May or may not create a stronger joint (some research shows it does not help any compared to gluing flat)
Disadvantages include:
- Requires plate joining tool and insert materials
- May be an unnecessary step
- Have to use glue and wait to dry
Kreg Jig Method
If you are wondering why not use the methods above, find out here why you should own a pocket hole jig.
Using a Kreg jig accomplishes the same thing that the previous methods do, except that it is very easy for a beginner to accomplish. This is my favorite thing about using pocket holes. It is straightforward and simple.
And when something is simple to do, it gets done more often. Therefore I end up making more projects.
There are really just three components to joining boards with a pocket hole tool:
- Drill/driver
- Pocket hole jig
- Drill bit and screws
Since most people already have a cordless drill of some sort, having the correct tools in mostly a non issue (and pocket hole jigs can be bought for an affordable price).
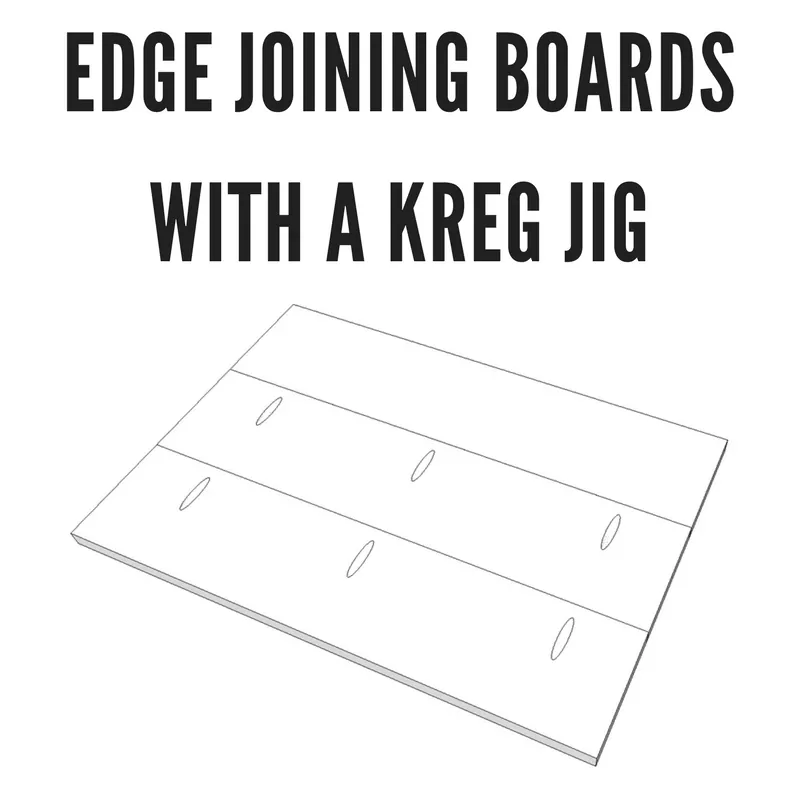
Edge to Edge Joining
So how do you join boards edge to edge with a pocket hole machine? It is very simple.
You will first need to adjust the jig to the correct setting. You will know what setting you need depending on your board thickness. Use my chart here to help determine what that is.
Once you have that figured out, drill the holes (using the bit provided with the jig) into the side of the board towards the edge you plan to butt against the other board.
It is only necessary to drill holes in one of the two boards. You can space the holes out similar to the photo below: (this is from my how to build a wooden flag tutorial)
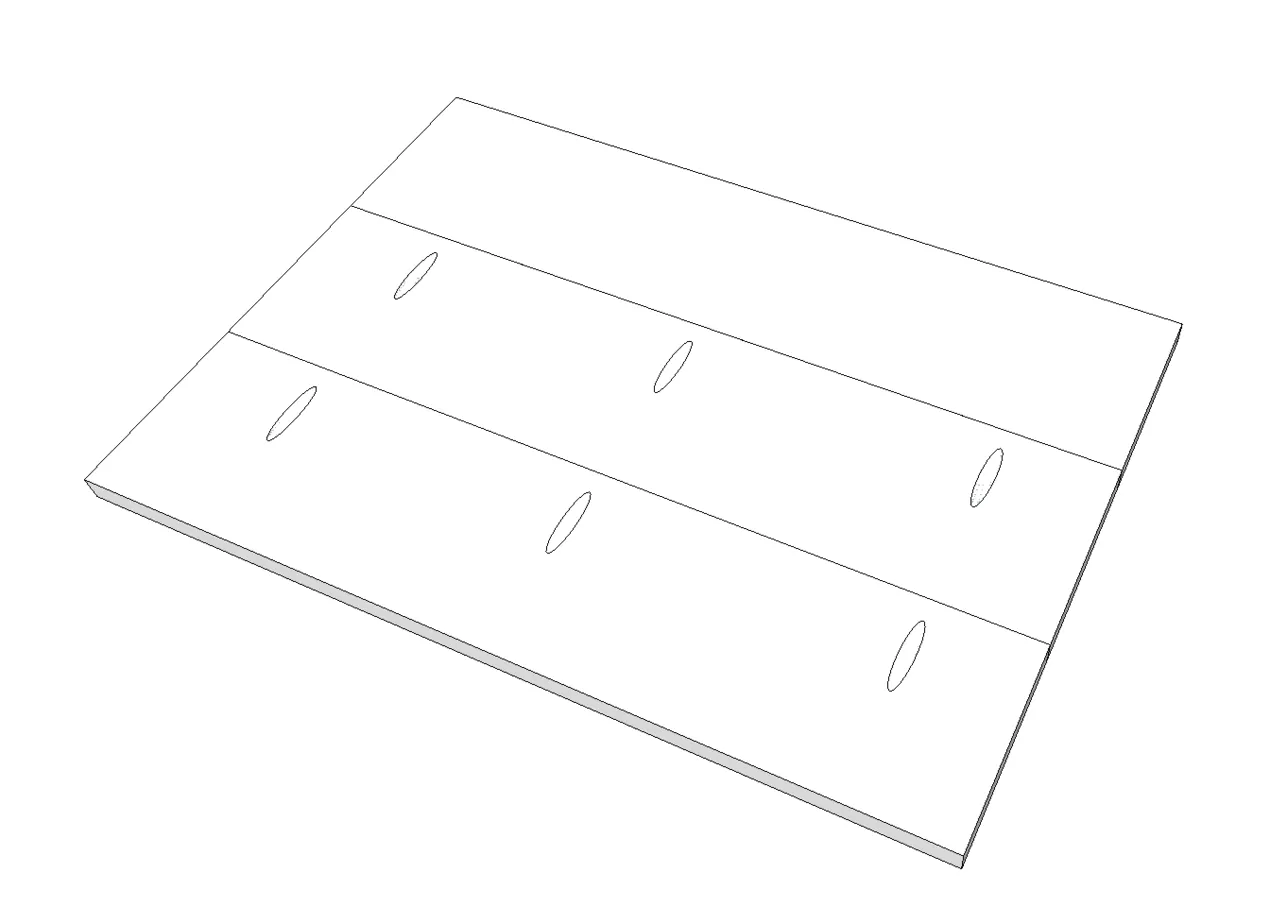
Then you need to butt the boards together, choose the correct screw, and drive them in the hole. The pocket holes normally require special screws for this purpose. I talk about why pocket hole screws are needed here.
Sometimes it helps to clamp the boards together, but this is not at all necessary. Once you drive the screws the boards are connected, no need to wait for any glue to dry. And this joint is just as strong as the others previously mentioned.
For a in depth video tutorial on this process, check out the video below:
Credit to: Kreg Tool
Conclusion
A pocket hole jig can be used for many different purposes, and edge joining is one of these.
Find which Kreg Jig you should buy here
Any woodworker will encounter a situation where they need to join two boards edge to edge. If you are like me, you will eventually use all types of methods to accomplish this task. You will find that you favor some ways of doing things more than others.
For me that means using a pocket hole jig more often than not. It works great for edge joining boards and I will be using it for the foreseeable future.