
Although I love buying 2x4s and creating projects with them, running into warped boards is very common. Even with the cost savings of simply buying basic studs at the lumber yard, sometimes you may think it is more trouble than it is worth. There are some strategies you can use to salvage these boards, however, and there may be some ideas here that you haven’t thought about.
Below I will talk about out some ways you can:
- Use slightly warped or twisted boards with little extra effort
- Use your equipment to create a straight and true board
- Work around these defects
- Restructure the actual board to make it straight
One thing to consider, of course, is that some boards will simply be warped beyond most uses. You can sometimes use these extreme cases in small projects where a little crosscut piece will work fine.
Most of this work truly starts at the lumber yard where you pick out your lumber. I know it is common to feel rushed in this process, but I’ve always felt that it is the lumber yards responsibility to provide you with good quality lumber. If that means you have to pick through a whole stack to find a couple boards, then so be it.
Tools for the Job
Planer and Hand Planer
A benchtop planer can do this job, although a full size shop planer is obviously the best. I only own a benchtop planer, and from my research the best one is likely the DeWalt shown below.

It is also helpful to own a hand planer, both powered and non powered. A couple of my top choices are shown here.

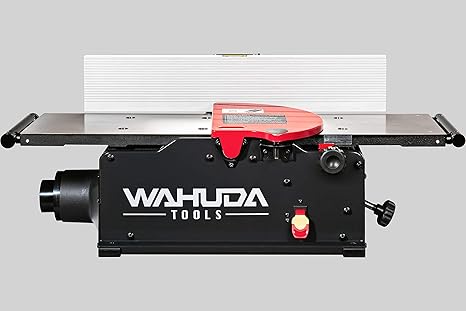
Jointer
Last in this list is the jointer. Some people say they don’t use theirs enough to justify owning one, but I like to have it on hand anyway. I own the jointer shown below (previously known as CuTech).
Strategies Depend On Warping Issue and Usage
Not all warping is created equal, so the procedure required will depend on what issue you have (and the severity of the issue).
There are many ways to deal with warping, and if you browse around the web you will find many heat and moisture techniques, laying flat with pressure, using an iron, etc. I won’t be covering any of those, mainly because their effectiveness can vary wildly with the situation. I’m not condemning any one technique, just focusing more on what I know you can control regardless of the use case.
In the case of 2x4s, it doesn’t make sense to go to a whole lot of trouble trying to straighten a board. They are cheap and common, so if it really requires a good bit of effort, then just move on to the next board.
Simply Avoid Defect
One of the best ways to deal with 2x4s that have defects is to use a part of the board that does not have the problem.
This means if a board has a bad twist at one end, then you can use the other end for a shorter piece. I do realize this is not possible if you need the full length.
If the board is slightly warped or twisted, then it is sometimes possible to use the board in shorter pieces where the defect is not as noticeable. If it is still noticeable in a shorter cut, it might be easier to fix with the smaller piece too.
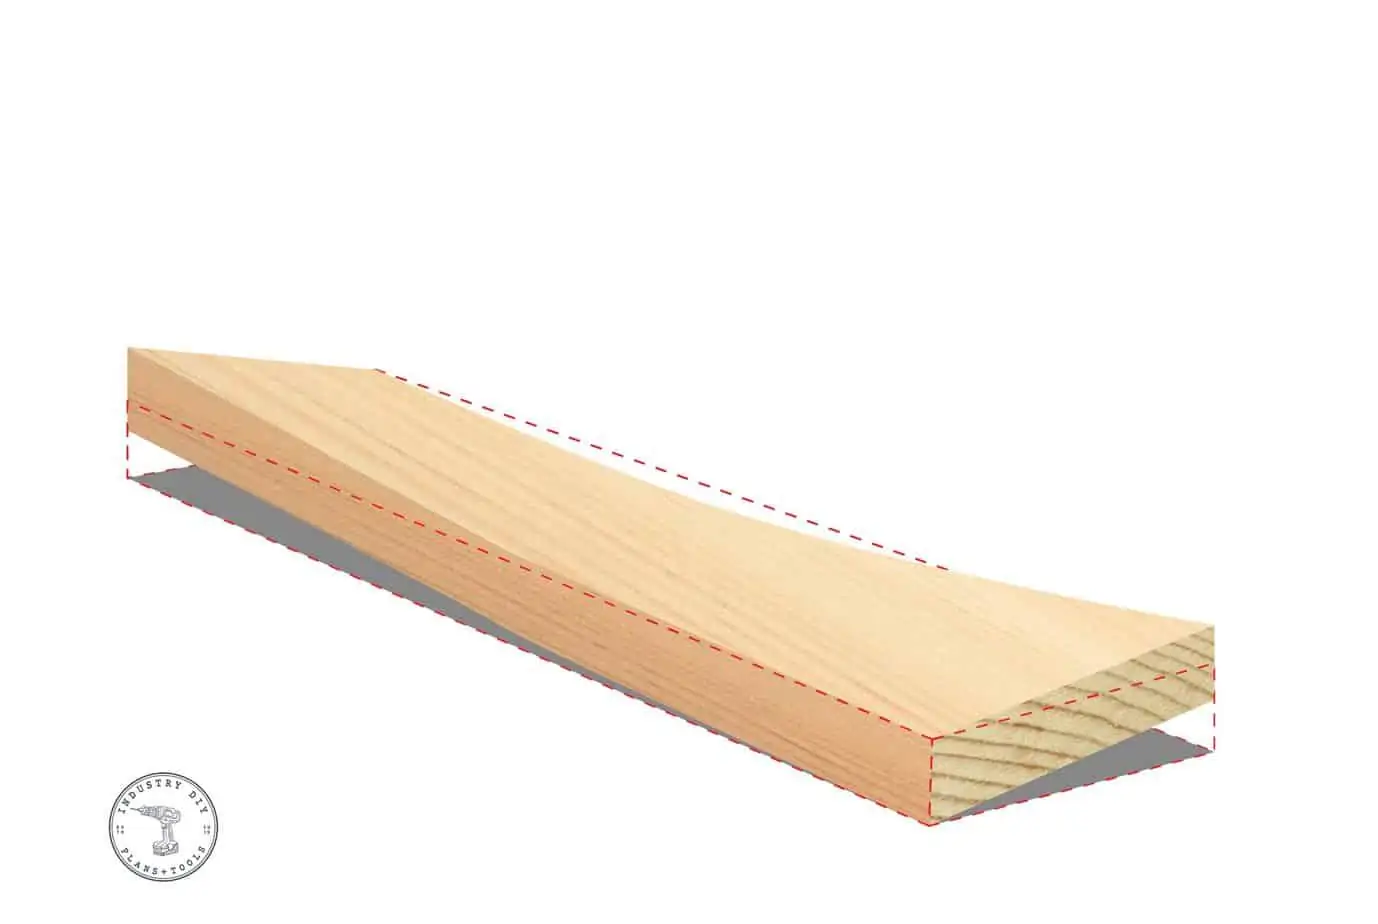
Dealing with A Cup
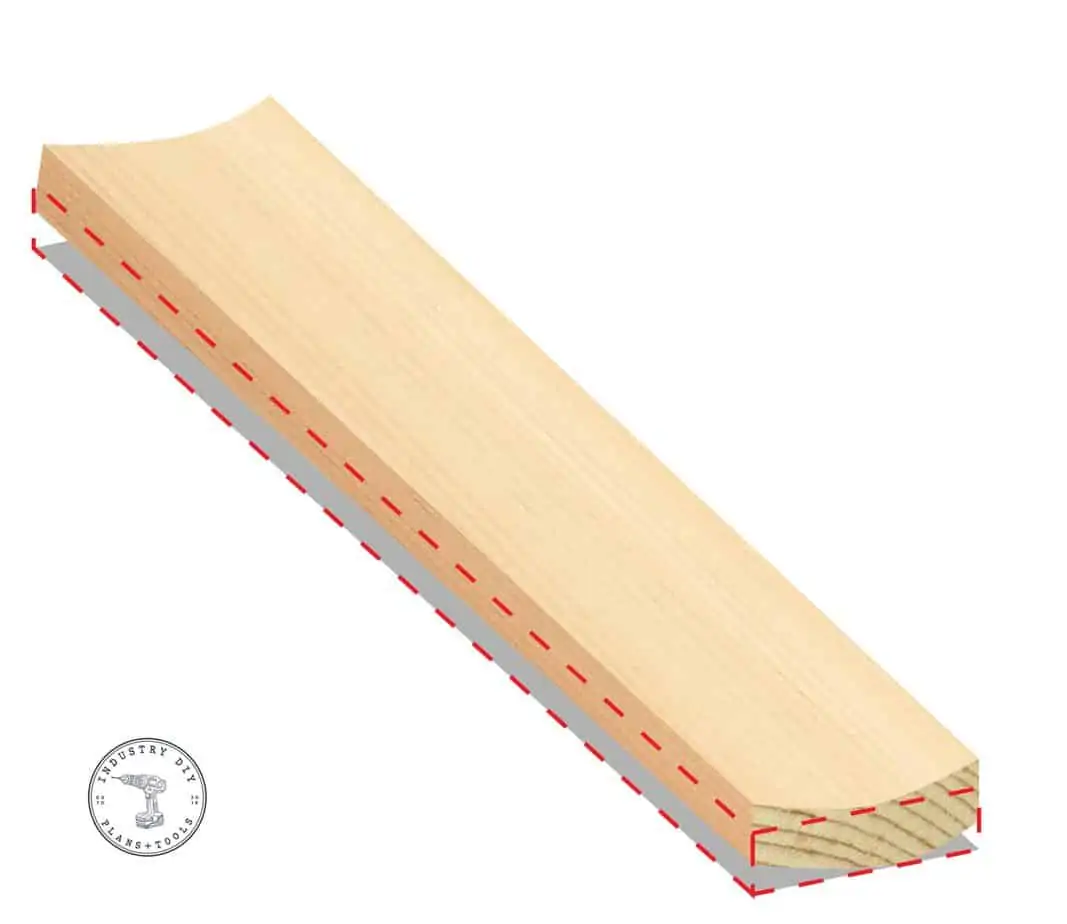
A cupped board is quite common with 2x4s. Sometimes it will be the entire length of the board and sometimes it will be worse at one end. Either way, if you want to fix this issue, read on below to see some possible remedies.
If you do not own a planer and a jointer, then using the method in this video is a good way to basically “band-aid” the problem. Now, with a 2×4 it could be more difficult to get this to work than with a wider board like in the video. I have not tried this, so I cannot vouch for this method.
For BAD cups some have said you can rip the board, flatten each surface, and then glue it back together. This seems like way too much trouble to me. Its fine in my mind to just say that some boards are not salvageable.
If you want to do woodworking for more than just a short amount of time, I highly recommend buying both a jointer and a planer. They are amazing tools to have.
Many will talk about whether you should get a planer or a jointer, and there are good arguments to be made for both. The easiest solution (as long as you have a little cash to spend on it) is to simply get both. There are good tools available for the hobbyist that won’t just break the bank.
A jointer is probably the less liked of the two tools, and some find that they just don’t use it that much. I still like it for certain situations. There is a learning curve, however, and it can be easy to make a board worse many times by using a jointer. Just take your time, be safe, and don’t use too much pressure. Let the blades do the work and you will learn how to flatten boards soon enough.
Using a Jointer/Hand Planer and Planer for Cupped Boards
The first step here is to use a jointer to flatten one side of the board. I generally like to keep the center portion of the cup on top, so that you are cutting on the outside edges of the board.
Jointing the center of the board first can result in a twist as the board can turn as you push it through the jointer. This CAN happen the other way too, but it is not as likely (from my experience).
Option B: Use a hand planer (powered or non powered) to cut the high spots down along the board. This method is just doing what the jointer was doing but in a controlled way. You can control more where you are cutting, so that if its worse on one end of the board you can focus your efforts there.
I have a powered hand planer. This is a good tool to use for this job because it doesn’t have to be precise, because you are going to run it through the big planer later on. And if you DO want it to be precise, then you can simply use a hand planer after you get the big deviations almost flat.
After getting one side of the board flat, you will want to run it through the planer to get a good consistent thickness on the board.
You should be aware at this point that your are losing some thickness from the stock 2×4 (or other kind of board). The worse the cup, the thinner the finished board will likely be.
Run the flat side of the board through the planer and cut the cup off the top. It should result in parallel sides of the board.
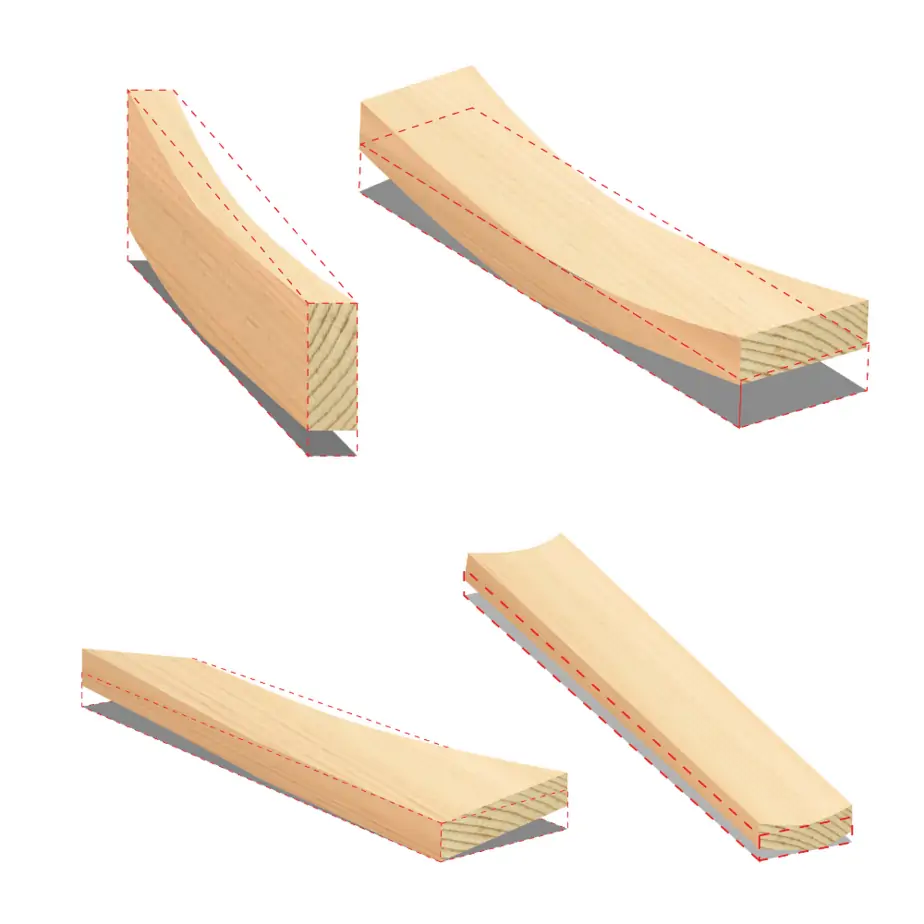
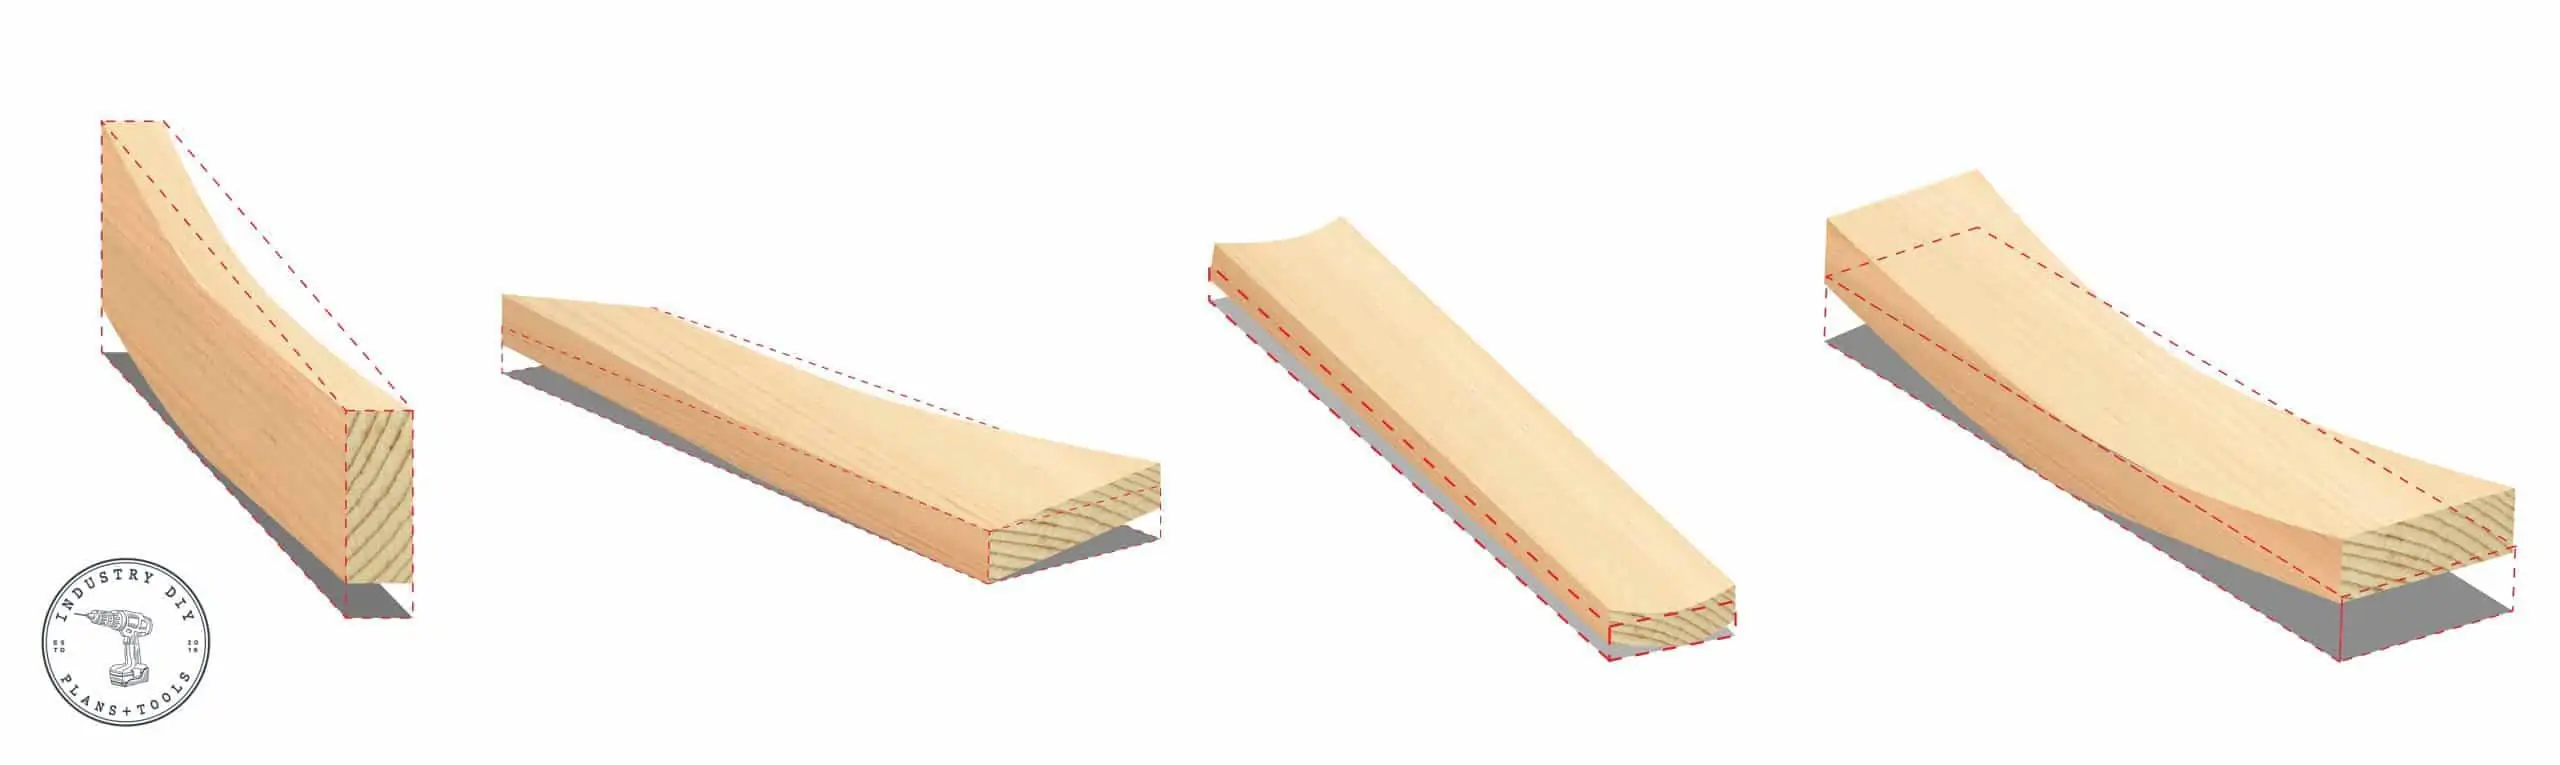
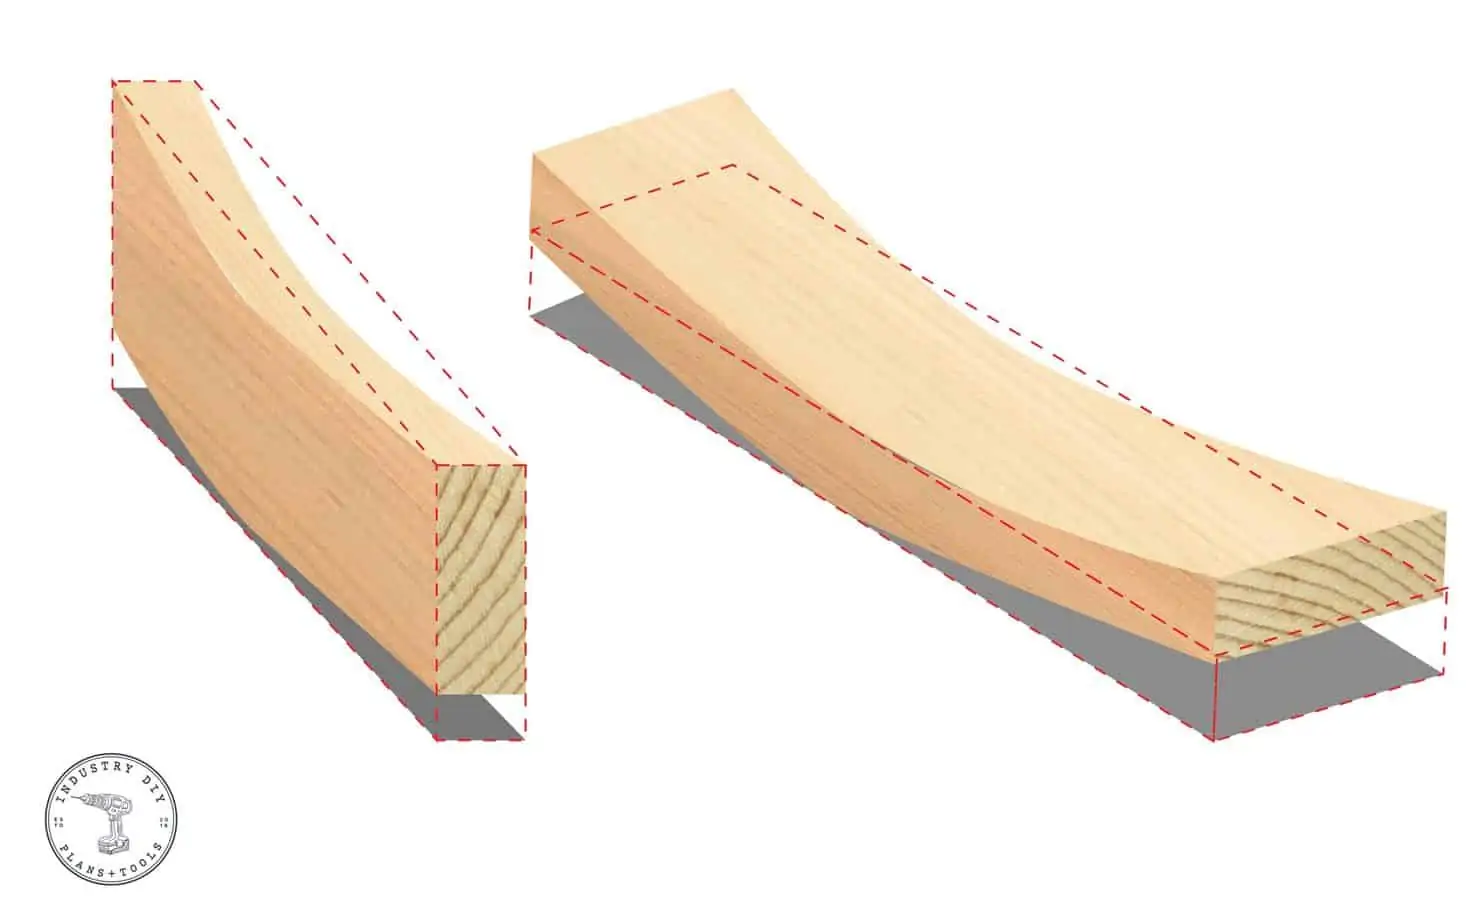
Dealing With a Twist
A twist is more difficult to fix than a cup. Below is a graphic I made depicting a classic twist.
As you can see from the graphic, if a twist is bad enough, the entire length of the board won’t really be usable, unless you go to the trouble of reconstructing the board (or you only need a fairly thin piece).
I certainly don’t recommend reconstructing the board if it’s just a 2×4. If it is a more expensive or rare wood, then it may be worth the trouble of cutting it and glueing it back together.
The best method I have for fixing a small twist is using a planer sled. This is a sled I made that sits flat through the planer. You set the board on the sled and shim under the high spots. When the board runs through the planer it creates a flat surface on top.
The purpose of the shims is to keep the planer blades from pushing and flexing the board down, thus negating any potential of a flat surface.
This is a little difficult to describe, so I plan on making a video on this technique, but there are some available on youtube currently.
Avoiding A Twist
If you can cut shorter sections of the board to use in your project, sometimes the twist is much less noticeable or not there at all. If it’s still there it may be manageable to actually fix as well.
Fixing a Crook or a Bow
A crook is easier to fix into a usable board than a bow. If a bow is bad enough it will be practically unusable.
A crook can be used by using a sled on a table saw. I actually use the same sled that I use on the planer.
A regular table saw sled will work as well if it is not a long board. For 8 foot pieces like full size 2x4s, you need a large sled.
The sled slides against the fence on the table saw while the 2×4 is cut along one edge in a straight line.
After you get a straight edge on the 2×4 you can turn it around, slide the fence in, and cut the other side of the 2×4 straight.
A bow can be addressed similar to a twist on the planer. Shim under the high spots and run it through the planer. Then flip it over and get a parallel side that is also flat.
Other Methods
Other methods include using heat, moisture, and pressure to straighten and flatten boards. While these can work, I do not do them myself. I think that a board could twist because of the internal stresses reacted as it dried, so adding moisture may fix the problem, but you are basically adding those stresses back into it.
Reconstructing a board is a good way to deal with really problematic warps. A kink in a board (similar to a crook, but with a more defined angle in the board) is one situation where you can do this. Cut off the slice of the board that is out of alignment and then glue it onto the other side. This method will require some creativity, but it is definitely possible do accomplish.
Important Considerations – Safety and Maintenance
As with any woodworking, make sure to safely maintain your equipment and practice appropriate safety measures.
Sometimes warped wood can have internal stresses remaining in it that can make cutting it and working with it dangerous. If, for example, you are ripping a board with internal stresses, you may want to have a riving knife installed so that it doesn’t try to pinch the blade after it is cut. This is only one example among many.
Storing Wood to Dry and How to Prevent Warping
Most lumber that you buy will already be dried and what you see is usually what you get. Sometimes the boards will continue to move and change, and the best way to keep this from happening is to keep it stacked with other boards. The weight can prevent it from getting out of shape.
This may not be possible, obviously, so the best thing to do is to store the wood on a rack off the ground in a dry area. Moisture is the problem here, so avoiding that will be for the best.
Conclusion
My hope is that this article is helpful to those working with all kinds of wood, not just 2x4s. I talk about 2x4s specifically here because I use them a lot and it is very hard to find a pile of high quality, straight 2x4s. Usually they have all kinds of warps and it takes some work to get them right.
These methods can easily be applied to hardwoods like oak, walnut, ash, etc. In fact, you are probably more likely to use these methods with hardwoods because you don’t want to simply scrap the wood if it’s not up to par (because it’s expensive obviously).