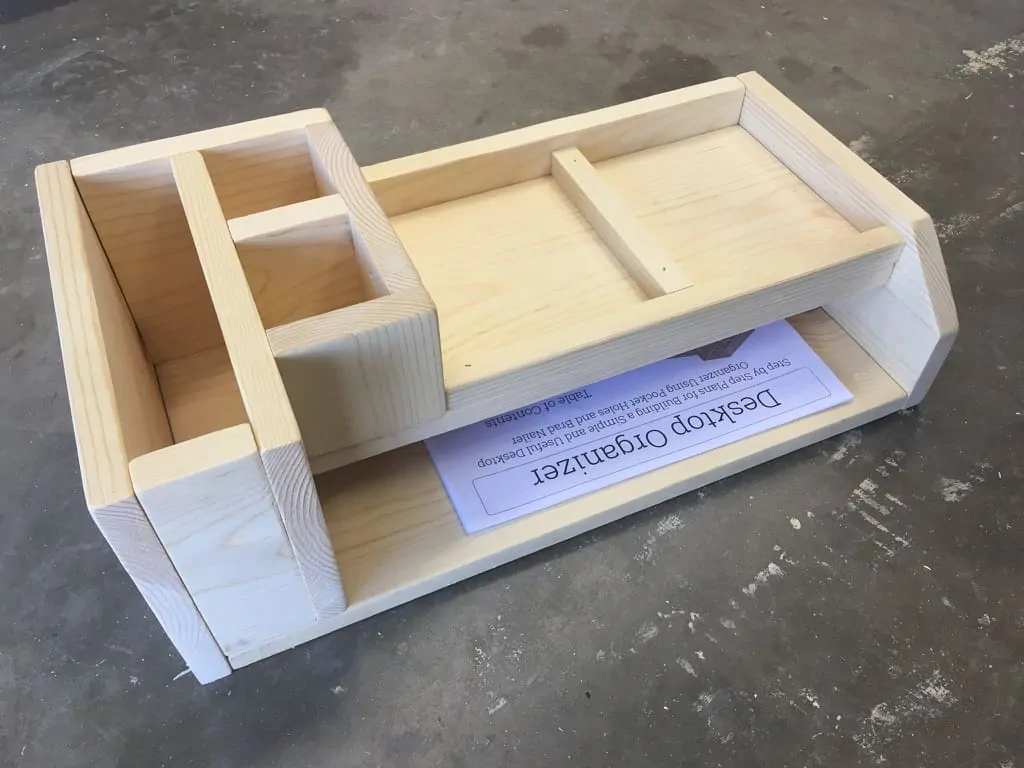
A desk organizer is a simple and easy project to build, and it is also very useful at the same time. My desk can be a mess sometimes, so anything that helps organize it is a welcome item.
I wanted to tackle this project for a few different reasons. Number one, it is a straightforward DIY task that is open to tons of customization. If you want to add another shelf or move the holders around somewhere else it is easy to do. The size is very customizable to fit whatever space you would like to put it.
The second reason I wanted to make this project is that it focuses on some key skills and principles of my own personal DIY design. I would not consider this project a “cool” or visually amazing project, but more of a practice in design and assembly. It will serve as the basis for more advanced projects that I will present later on.
For this reason I have included both the Sketchup and Fusion 360 design files for download, along with a PDF guide that includes a cut list, materials, and step by step plans. These are all free to download via email, simply click here to download.
Difficulty
This project represents the beginning of a series of simple and easy Kreg Jig projects. The difficulty will increase, but only at a level that should be accessible for most DIYers.
I categorize this project as Easy because it only involves basic woodworking skills and cheap, easy to obtain materials.
What’s Included
With that long and rambling introduction out of the way, let’s get on with the project. Below I have laid out a summary of the step by step plans along with commentary. For exact specifications and procedure, I highly recommend downloading the Project Plans PDF, in which I have put a lot of time and effort.
Tools and Materials Needed
To complete this project you will need a few different tools that you will probably have if you have been woodworking for a bit, but if not I do recommend looking into buying these. There isn’t anything here that isn’t critical to making nice woodworking pieces (assuming you want to use power tools of course).
Tools
- Table Saw
- Miter Saw
- Pocket Hole Jig – w/ drill bit and pocket hole screw bit
- Cordless Drill
- Jig Saw/Band Saw/Hand Saw
- Random Orbital Sandpaper
- 120 and 240 Grit Sandpaper
- 18 Gauge Nailer
- 18 Gauge Nails – 1-1/4″ long
- Tape Measure
Materials
Of course this can be changed depending on how you would like to build the organizer. Use oak, walnut, etc if you would like a more refined and clean look. Also adjust accordingly if you want to change the size and design.
- (1) 8’ 1×6 Pine
- (1) 8’ 1×8 Pine
- 1-1/4” Pocket Hole Screws Wood Stain
- Stain Pre-Conditioner
- Wood Finish (Urethane, Polycryclic, etc.)
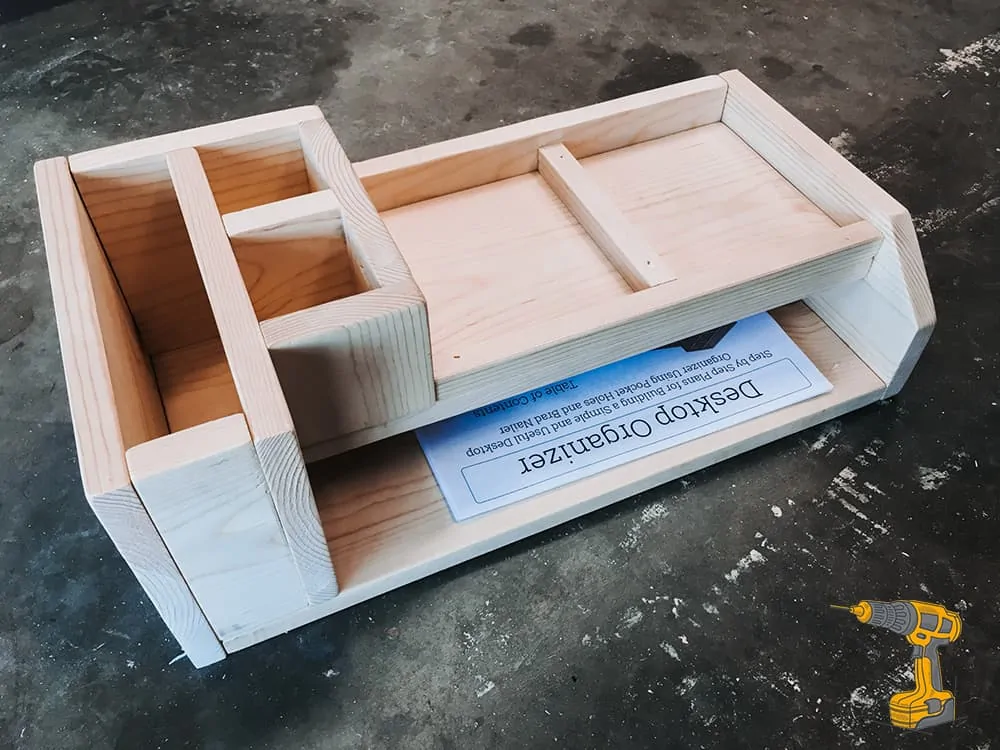
Cut List and Diagram
The cut list shows exactly the dimensions of each piece along with a diagram of how to cut the boards in an efficient manner.
To get a tight and correct fit for each piece I do believe it is better to cut each piece as needed throughout the project, but sometimes it is satisfying to simply cut every piece at the beginning.
Precutting everything is especially helpful if you need to get your table saw available and then stow it away when you are down cutting. It allows you to get all of the jobs done on a particular tool and move on to the next step.
To get the cut list and diagram please download the PDF for a clear and concise overview.
Step by Step Plans
There are really two ways of going about this project; you can either cut all pieces to at the very beginning, or cut them as needed.
If you need to get the table saw out of the way to continue with the build, it is probably better to pre-cut everything. If you can easily go back and forth between different tools, then I would cut the pieces as you go. This way you can account for small discrepancies within the build. For example, just because a piece says on paper it should be 2″ wide, you may find that in your build it actually should measure 1-15/16″. This can happen because board thicknesses may differ or because of a number of other factors.
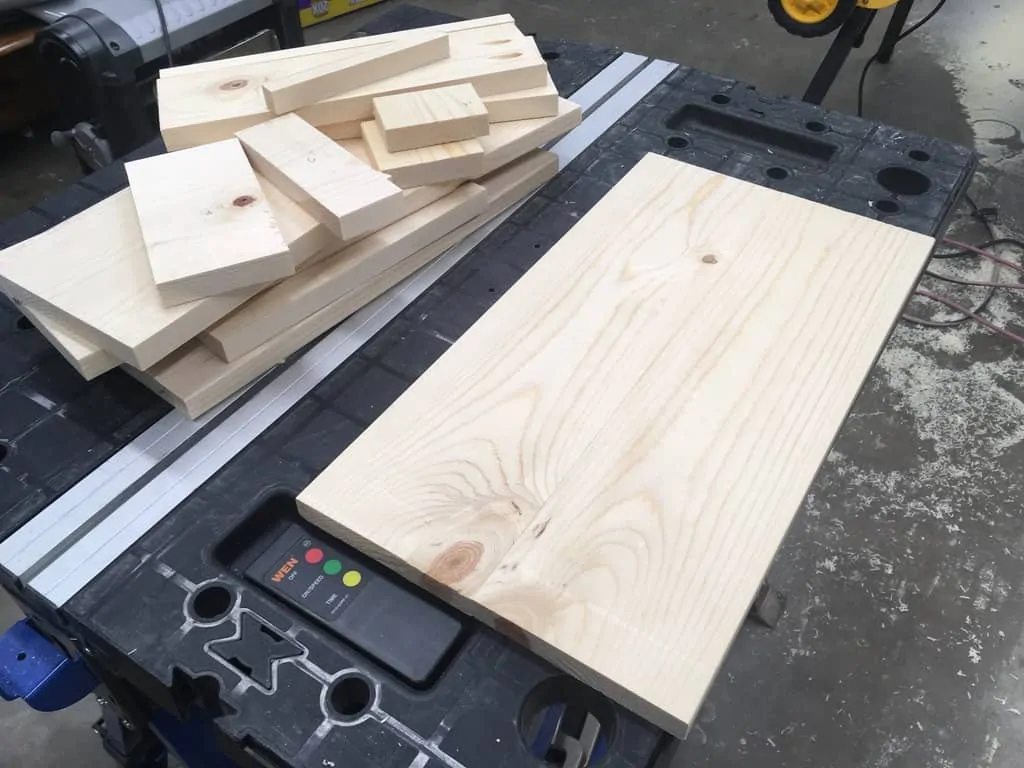
1. Cut Pieces (Or As Needed)
Follow the diagrams on the cut list for accurate measurements on cutting. You will need a miter saw and a table saw for this step.
I do not think it is possible to do this without a table saw because it involves ripping boards to different thicknesses. If you do not own or are not familiar with a table saw I highly recommend looking into one. I should soon have some resources myself on this topic (and I do have an article for help on buying a portable table saw here)
2. Sand and Finish Pieces
If you do not cut all pieces at once, you can either disregard this step or simply perform it for each piece as you cut them.
It is easiest to sand and finish all of the pieces before assembly, because once it is built together it will be difficult to access the smaller areas with finish or if anywhere requires a bit of sanding.
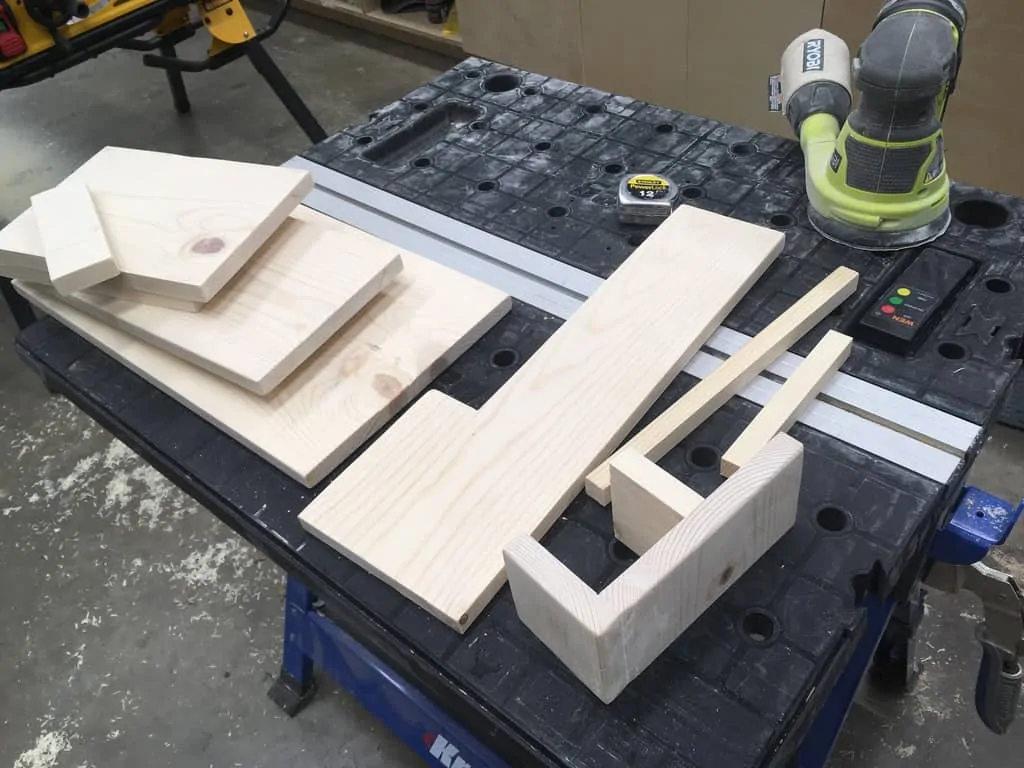
I used a random orbital sander for this step, although you can use any method you would like.
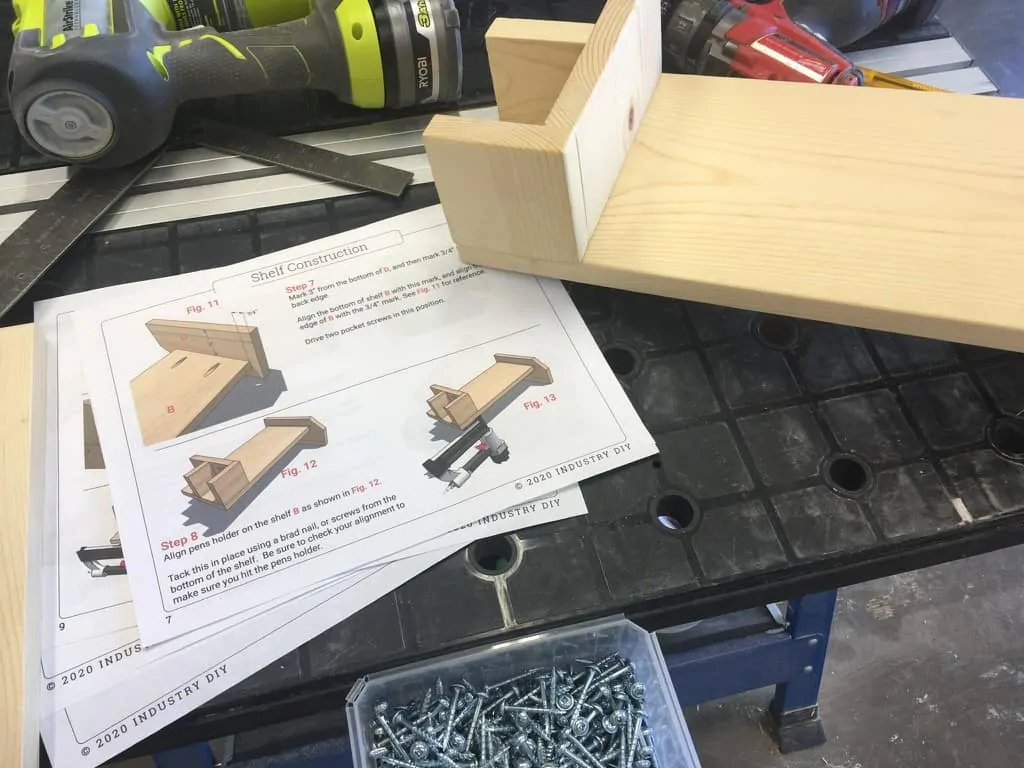
3. Assembly
This step involves several more smaller steps that are outlined in the PDF. It is important to do these steps in order, otherwise you may not be able to attach the pieces correctly.
Some of the pieces I cut before hand were slightly off of the precise measurements, but I was not dissatisfied enough to go back and re-cut anything.
For the assembly steps you will need to drill pocket holes, drive pocket hole screws and use a nailer to attach some of the pieces.
If you need more information about pocket holes or pocket holes construction, I recommend viewing my two articles here and here.
5. Finishing Touches
Although assembly includes several steps, it is pretty easy and straightforward. I like when the pieces are precut because its like an assembly line, you just put everything together.
There are some finishing touches you can take, like adding a felt bottom to the top shelf or some felt pads for the bottom like in the image below.
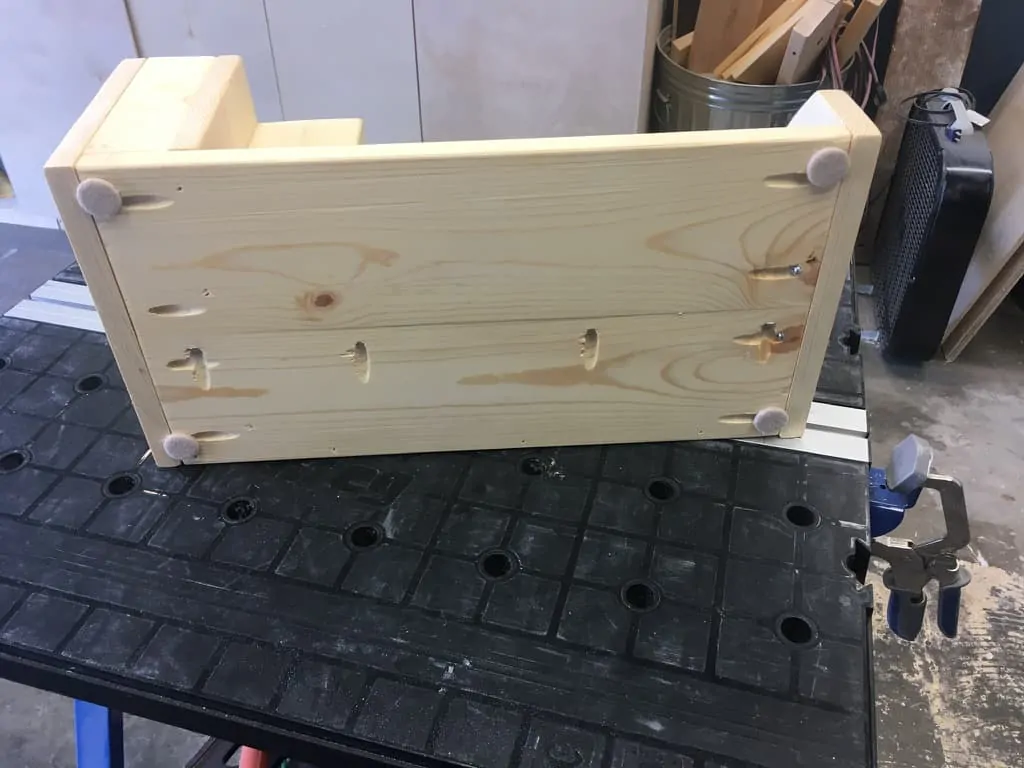
This allows it to sit softly on any surface without worrying about the screws or any rough edges scratching your desk.
A couple of my pocket screws were a little proud of the bottom surface, so it did not sit completely flat. These felt pads eliminated that problem.
Conclusion
This project is a good practice in some essential woodworking skills, and it also results in a neat organizer that you can use everyday.
Some skills we practiced during the process of this build:
- Ripping boards on the table saw
- Miter Saw Crosscuts
- Drilling Pocket Holes
- Jigsaw/handsaw cutting
- Driving pocket holes screws and brad nails
- Sanding and Finishing
It is also a good introduction to the system I am coming out with for my new projects: Sketchup files (Fusion 360 included in this one), a thorough PDF build guide, and video summary.
Stay tuned for future builds, including builds that progress naturally from the difficulty and skills that were needed for this project.