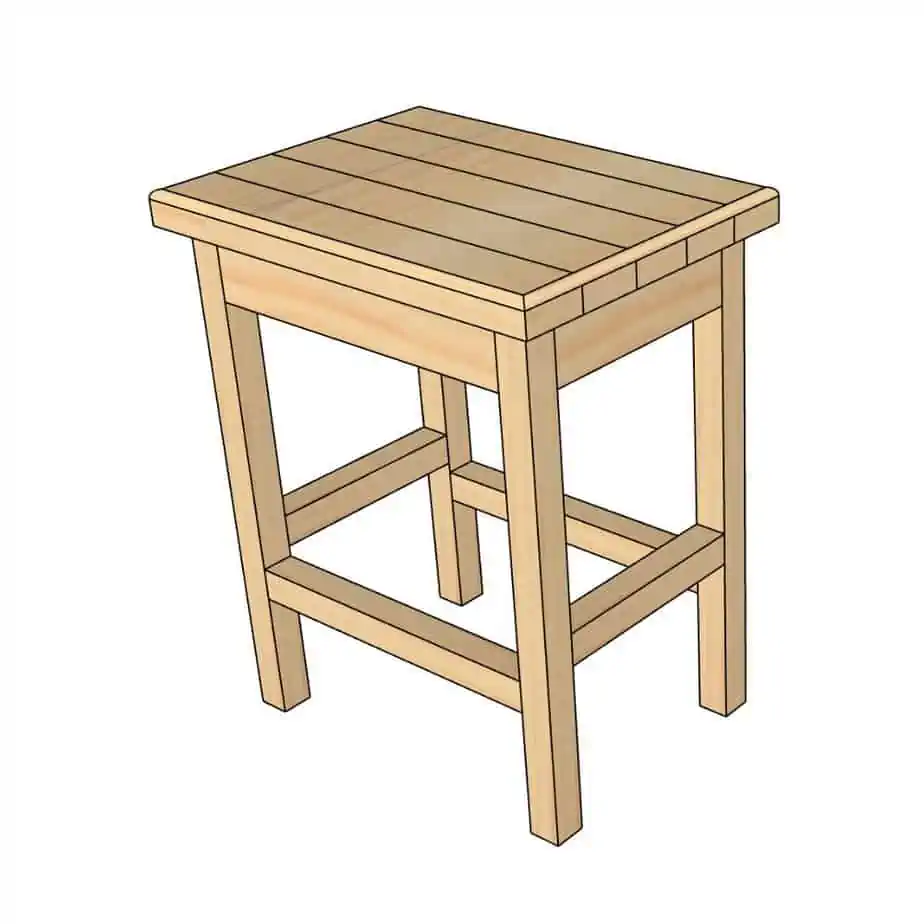
This 2×4 barstool is a great addition to your bar area, kitchen, or other spot in your home with high counter.
It is fairly simple to make and uses basic materials like 2×4 boards, screws, and stain. You can customize it to meet your needs, just be sure to download the plans and go from there.
Although this project is made to use 2×4 boards, you can use any kind of wood that you prefer. It will require some extra milling, but it is certainly possible.
One of the best parts about this project is you only need three boards to complete it. I enjoyed designing this one and I hope you find it well suited for your situation.

Determing the Size and Shape of the Barstool
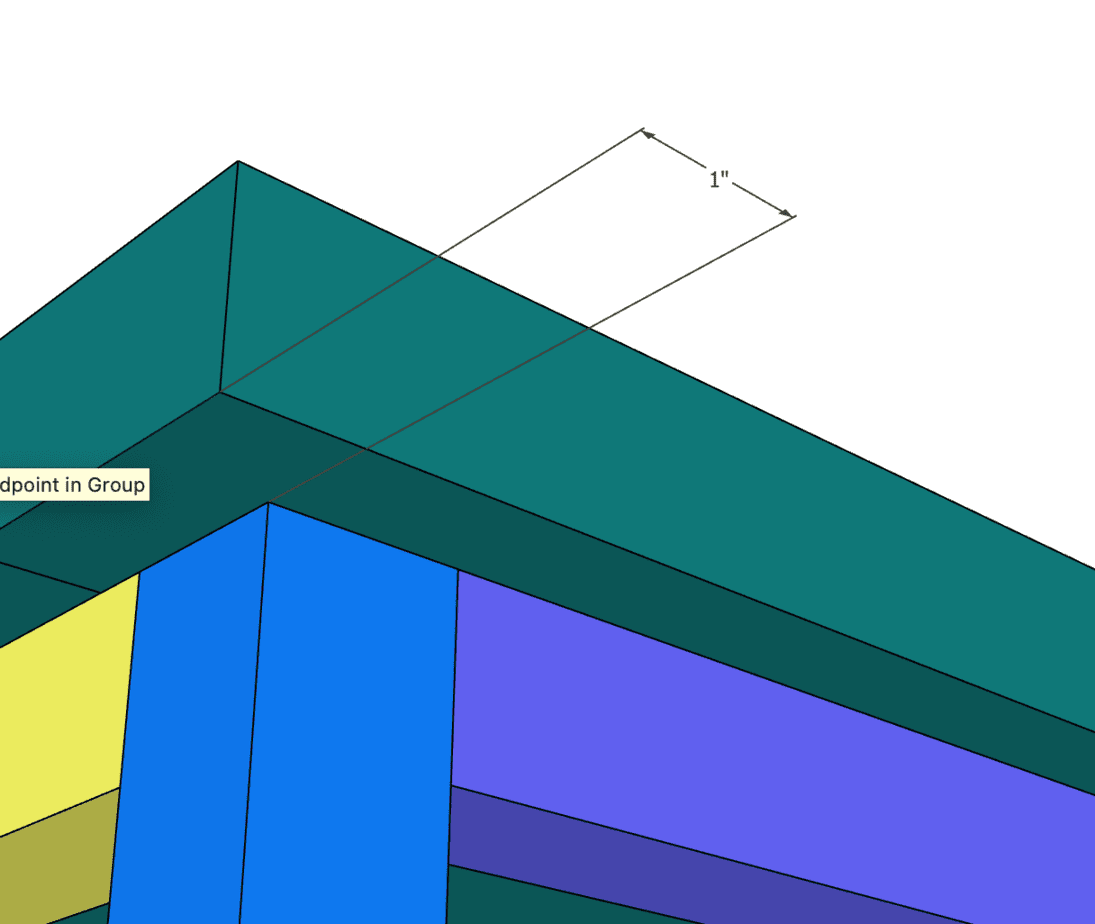
This barstool is made to be 24.5″ high, 20 inches wide, and 15 inches from front to back. The top of the barstool has a 1″ overhang all around.
I think you will find the height desirable, but if this is too short all you need to do is lengthen the legs. The rest of the structure should remain the same.
The top of the seat is rounded off along the outside edge with a roundover bit. You can use whatever bit you prefer, but I like a roundover because it is smooth. I don’t want any edges on this part where you will be sitting.
Required Materials and Tools
The tools required for this project are fairly basic, but it will require some beginning woodworking knowledge. You will have to make crosscuts and do some drilling and sanding.
Although a miter saw is preferred, there are of course other ways to make crosscuts in wood.
Tools
The tools required for this project are mostly basic woodworking tools. You should not need a planer or specialty tool for this unless you just want to use one.
- Table Saw
- Miter Saw
- Drill
- Kreg Jig with drill bit
- Sander – Random Orbital preferred
- Hand router and roundover bit
Materials
You will need some wood and some screws to complete this project. A stain or finish of choice is great as well.
- (3) 8′ 2x4s
- (32) 1.25″ Kreg Jig screws
- Wood Glue
- Wood Clamps
- Optional – extra screws for building seat
- Sanding pads – 80, 120, and 220 grit
Step by Step Plans
To begin, make sure your shop is clean and you are well versed in shop safety and best practices. That is the best way to ensure your safety and enjoyment while building this project.
Step 1: Rip 2×4
The first step in this process will be ripping one of the 2x4s.
The purpose of this is to create smaller, 1.5 x 1.5″ boards. You can create 2 square boards out of one 2×4 in this fashion.
The first step is to set the table saw at 3.25″ width from the saw to the fence. This way you can cut off the outside quarter inch as you rip the board.
One thing you want to avoid is putting the very thin part of the cut next to the fence. This is why we are cutting at 3.25″, and not .25″. It can create a situation where it squeezes against the saw blade, which is always a bad deal.
After ripping the board at 3.25″, we will set our fence to 1.5″. Now we can cut both of our 1.5″ wide boards.
Just be sure to run the freshly cut edge against the fence each time, so that we avoid using the rounded off edge that has not been cut.
Step 2: Cut Boards
Now with our single board ripped down to size, we have to cut all three with our miter saw (or circular saw if needed).
Make each cut before you mark the next cut on the board.
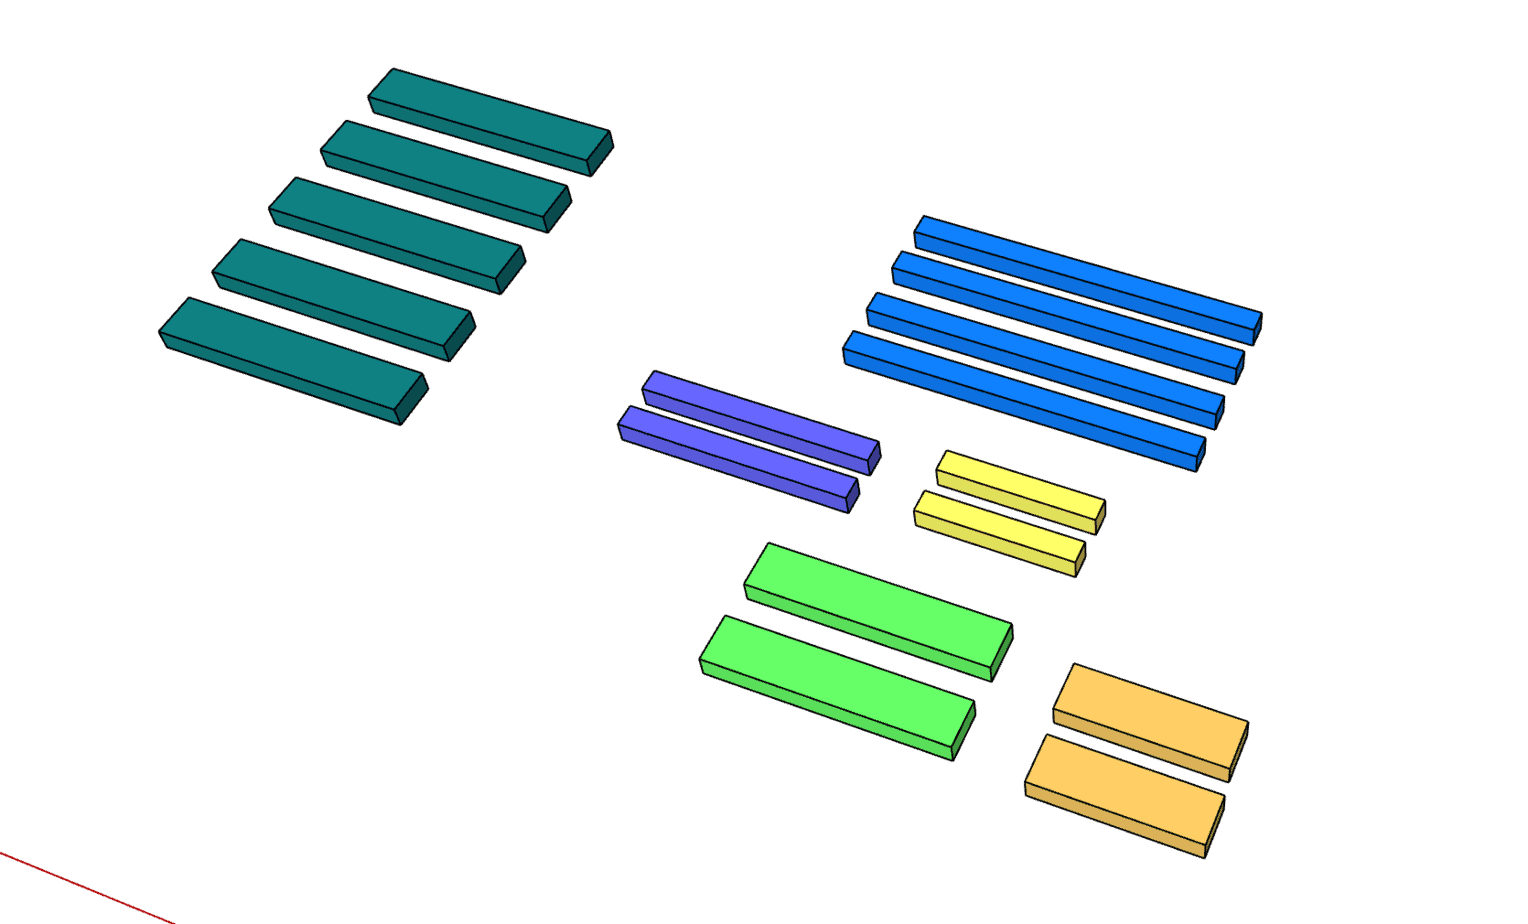
Use the cut diagram below for this task:

Step 3: Drill Pocket Holes
The next step is to drill the pocket holes so that we can attach all pieces together.
You will need to set your Kreg Jig to use the 1-1/4″ screws. Although we are using 2x4s, I would not set it for the type of thickness, as it might go too deep into the wood.
The pocket holes are marked in the cut diagram above.
Take your time on the smaller ripped pieces to ensure that the pocket holes do not touch the edge of the boards.
Step 4: Sand and Clean
We are going to sand and blow the dust off of everything so that we can have a clean workplace moving forward.
We will be glueing the seat together, along with applying stain and finish the entire piece. This is why we need to complete the sanding process now.
Use a random orbital sander and start off with an 80 grit pad. For 2x4s they will generally be rough and require a decent amount of sanding.
A lot of times you will find that there are marks and printing on the boards from the lumber yard. Be sure to clean all of these off by sanding.
Work your way to 220 or until you are satisfied with the feel of the wood.
Step 5: Glue Seat and Smooth
This part can be accomplished in two different ways.
Number one, which I prefer, is to edge glue the seat boards together and hold with a clamp.
The seat boards are the 20″ teal boards shown in the diagram above.
Brush a smooth amount of glue on the edge of four of the boards, then clamp them together as you also hold them flat.
If you need to you can get boards on the top and bottom of the seat to make sure they all lay flat during the drying.
Option number 2 is to use pocket holes to attach each board together. This is actually a great way to go, but I seem to like glueing better.
My results with glue are usually better than pocket holes, but that is sometimes subjective.
If you are going to use pocket holes, the main thing to keep in mind is to keep the boards aligned and flat as you pre drill and also as you drive the screws.
When you finish making the seat with all the boards, it is time to smooth the top and bottom. We want to do both so that it lays flat on the stool as well as has a nice top surface.
This should be done using a sander and low grit paper, working your way up just like usual.
If you have a planer on hand, you can also use it to quickly even out the boards (no matter how hard you try, they will probably still have slight variations in height).
We will wait to do any routing around the edge.
Step 6: Assemble Stool
This is the fun part, where it all starts actually coming together.
One important thing to remember is you will need to attach the shorter cross boards to the stool legs first. This way you will always be able to get your drill into the pocket hole without it being too tight of a space.
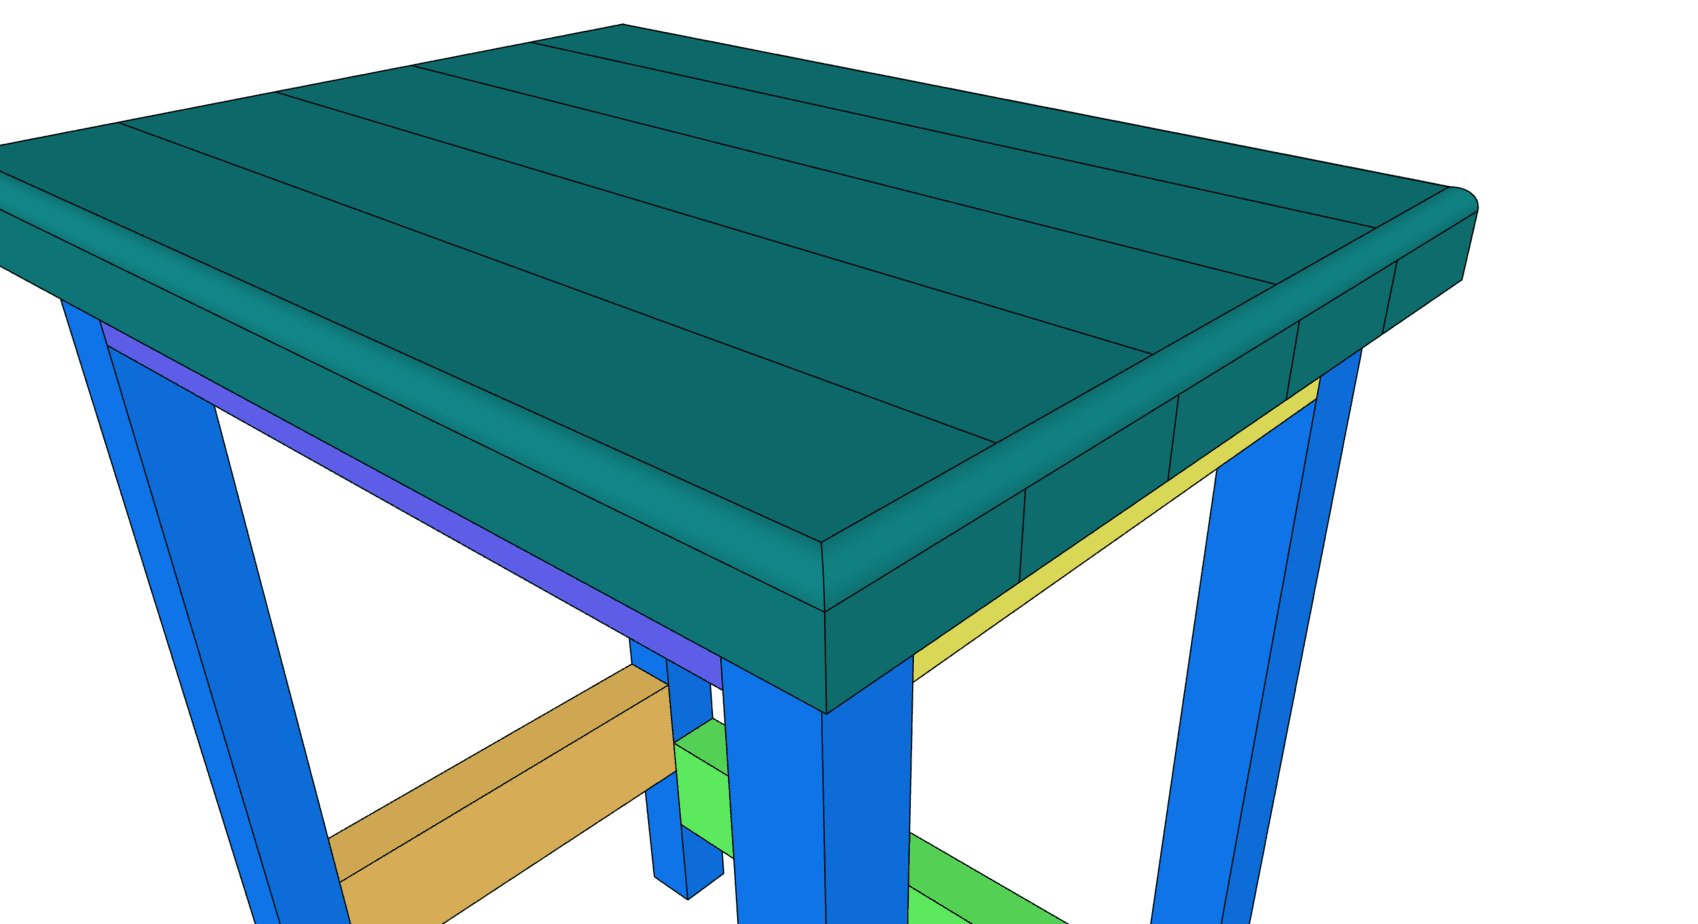
So take the 3″ wide cross members and these will go at the top of the legs just under the seat. You will want them to be flush with the top of the legs.
You can see in the image below that we will have the wide cross boards at the top:

Note: Attach both the short upper piece and the short lower piece to both legs before connecting it together with the longer boards.
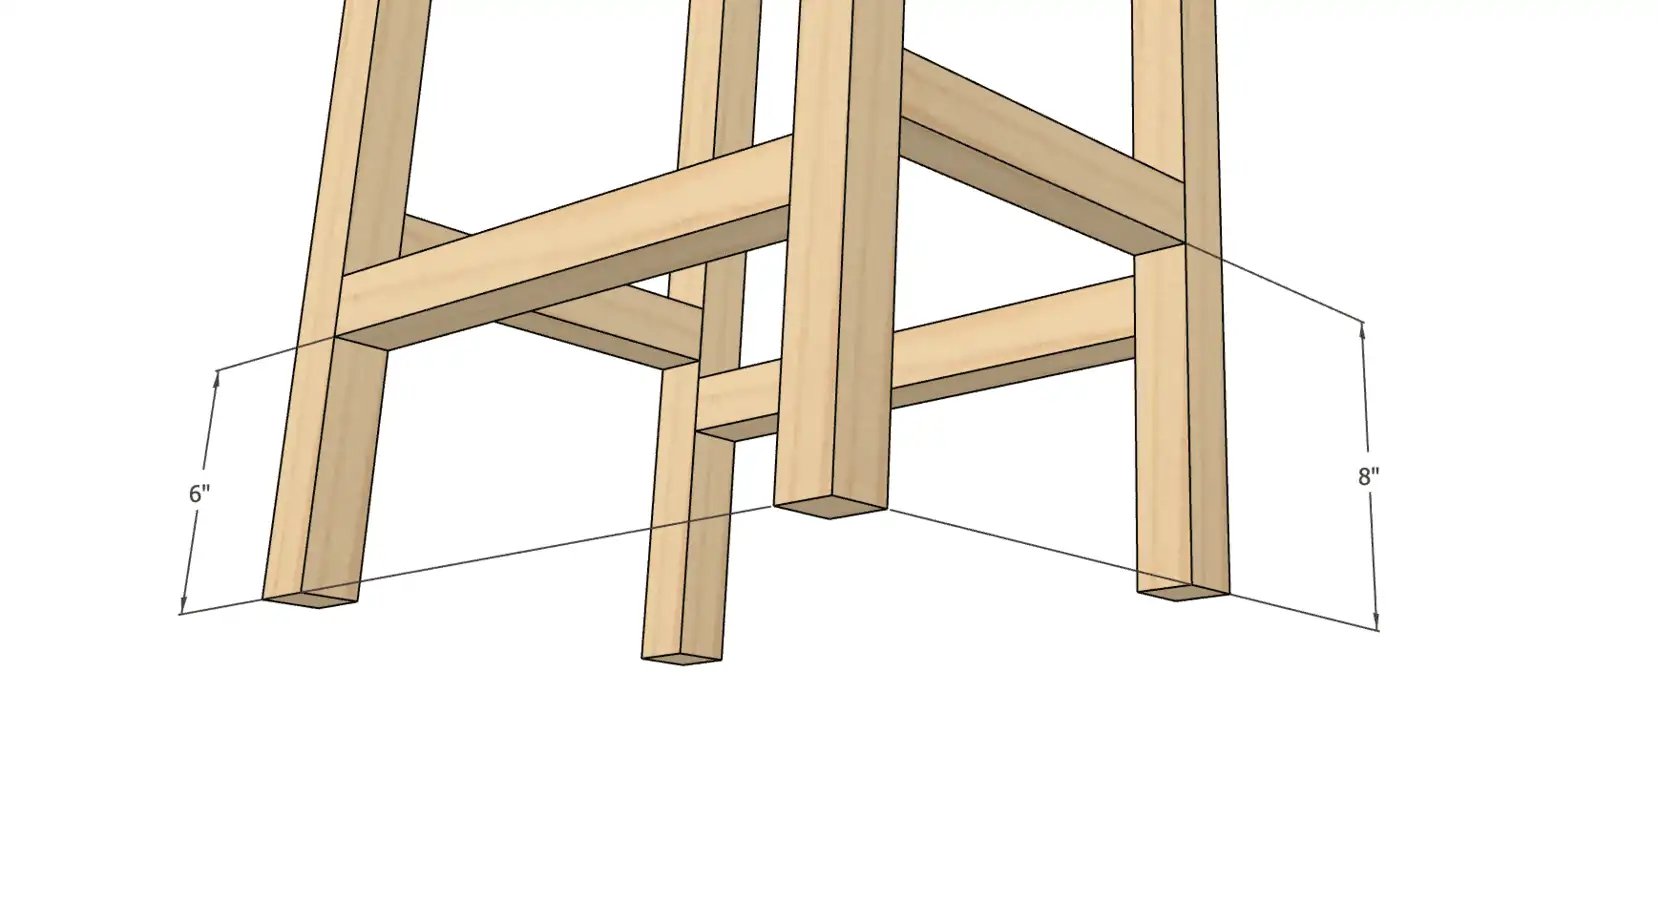
In the image below you can see the suggested height of the cross supports. This can be adjusted if you feel it is necessary.
Although it is not indicated in the image, I prefer the pocket holes to be on the bottom. This will hide them from sight as well as be plenty strong. The top support pocket holes will not be visible.
Once you have all the supports together, it is time to attach the seat top. There are two main ways I suggest doing this.
Option 1: Use pocket holes in the cross members.
This will required you to drill pocket holes in the cross members, but will generally be quite easy to do.
Note: this method isn’t going to allow for wood movement of the seat top. Since we are using 2x4s and this is an inexpensive project I wouldn’t worry about this too much.
Option 2: Use tabs in grooves to allow for wood expansion and contraction.
I don’t really recommend this because I am not sure if this will work that great for a seat top. If you insist on doing it this way then I am going to assume that you know how to do it. If you are really curious, I did it this way on my trestle table project here.
Note: You will have a one inch overhang all the way around the seat top.
Step 7: Put Edge on Seat
I like a roundover edge for the seat. This can be accomplished using a roundover bit on a router or simply using a sander and shaping the edge until you are satisfied with the shape.
Using a router can be fairly difficult, so be sure to secure the workpiece and wear proper eyewear when working the edge.
Step 8: Stain and Finish
Use a stain of your choice for this step. I like most of the General Finishes brand stains, but Min-Wax will work as well.
Use a high quality finish, like a General Finish polyurethane on the seat top to be sure it makes a durable finish.

Step 9: Add Furniture Pads to Legs
This step includes attaching furniture skid pads to the bottom of each leg. You will need 4 for this step.
You can choose what kind you prefer, but I would suggest going with a low profile rubber or plastic style. These will be durable, and the ones you can nail or screw into the bottom of the legs will work the best.
The other option is a felt pad, and these should work too but I wouldn’t expect them to last as long.
Project Plans and Tips
If you are interested in this project and want a easy to use guide for your workshop, be sure to download the free PDF plans for this project.
They include a step by step guide for each part of the process, similar to this article but in a format made for printing.
A few tips before you go: be sure to get yourself familiar with the table saw before using it. It is not hard to use if you are aware of how to stay safe and properly operate the machine.
Last thing: if you are interested in more 2×4 projects, be sure to check out the related projects below, and click here to access my 2×4 Project Plans along with a quick workshop on using 2×4 lumber.