
In this project I will show you how to make a blanket ladder with pocket holes and 2x4s.
Building a blanket ladder is a great project for beginners and experts alike, and it is a nice way to add an interesting feature in your house or even sell these projects on Etsy (you will find several available there).
I think the reason it is great for beginners is because you can easily build a basic diy blanket ladder with 2x4s and pocket holes, and it will look almost as good as an expertly built one with through tenon joinery with wedges.
While that type of joinery is something to strive for, I don’t believe it diminishes the quality of work that pocket holes can achieve.
This tutorial contains a general overview of the project, along with a video and a printable PDF plan.
Difficulty
This project is very simple, but it does require the use of a table saw. It will require some basic knowledge of woodworking and safety skills.
If you are new to a table saw and wanting to get more familiar with using one, this is a great project to include in your training.
Materials and Tools Required
The materials for this project are very simple.
Materials
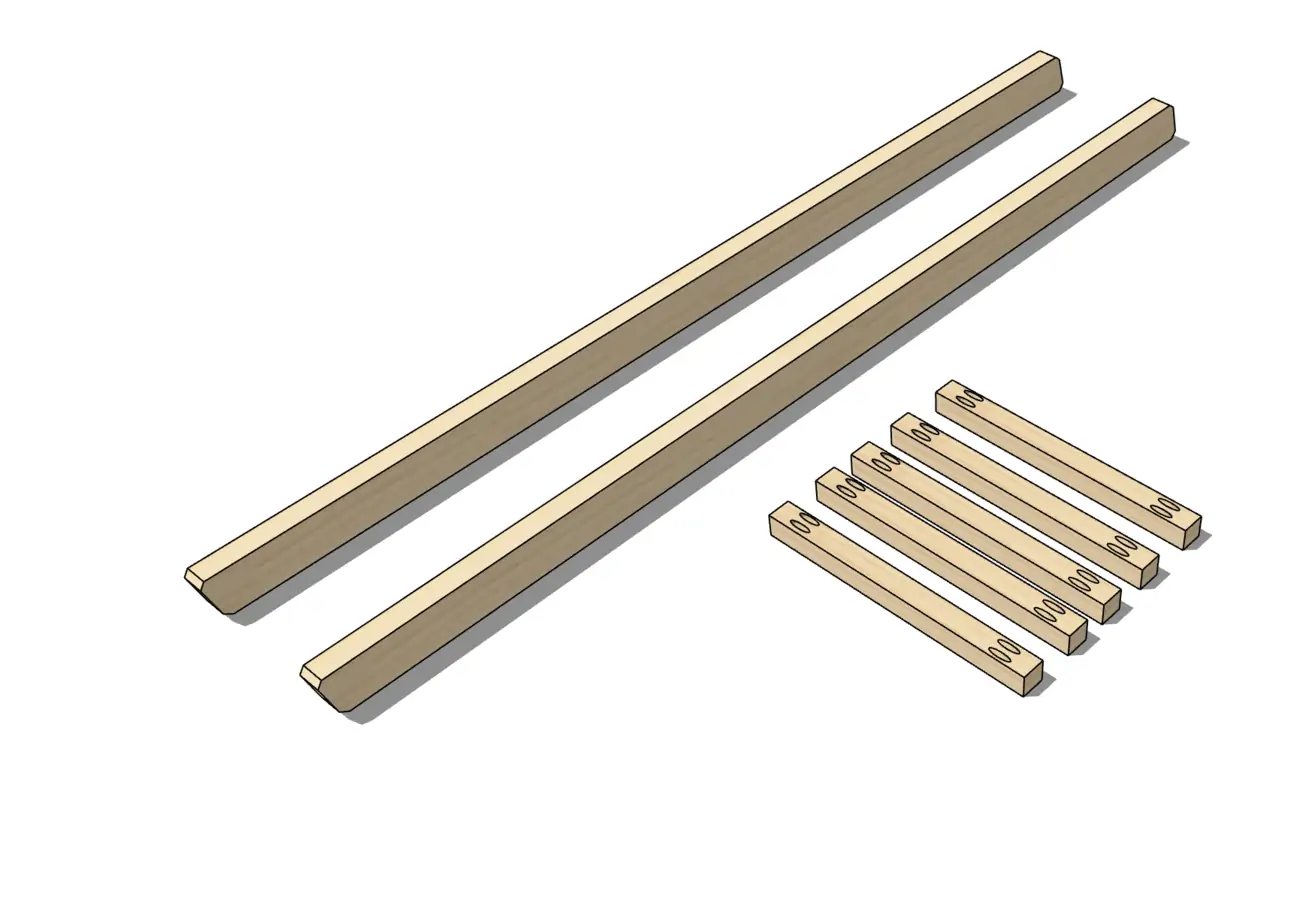
- (3) 2×4 boards 8′ long
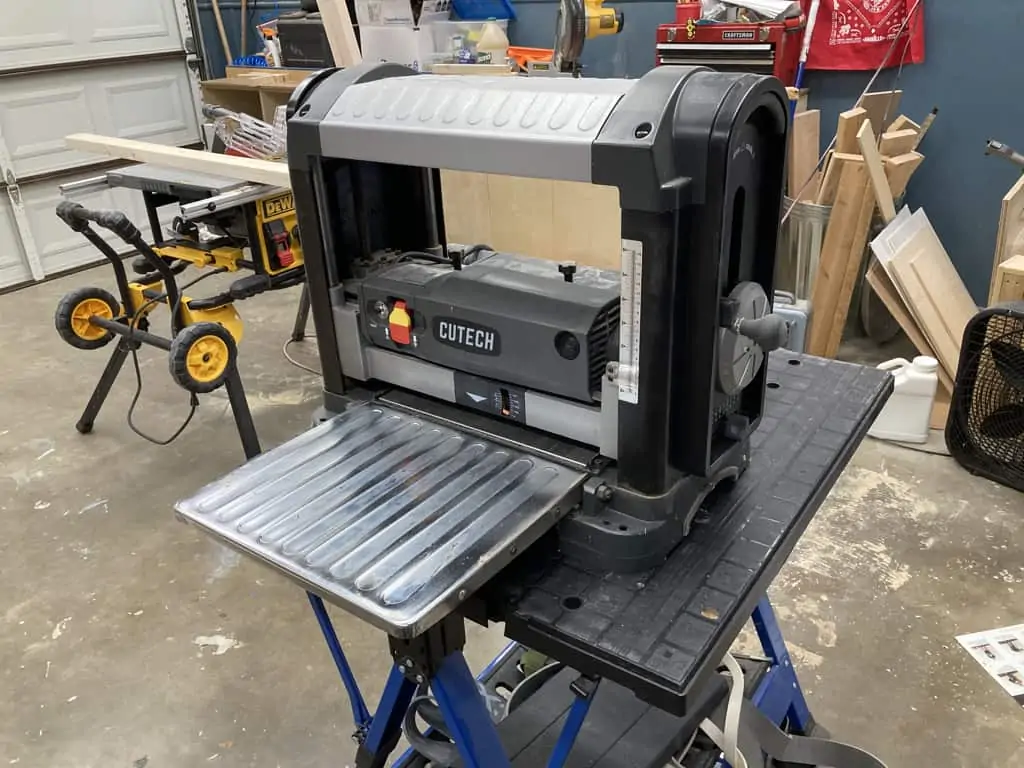
The tools will use pocket hole joinery along with general sanding and finishing techniques. You will also need a miter saw and table saw to make the cuts.
While it is possible to make the rungs without using a table saw, you will just have to use full width boards. The table saw is used to rip the rungs to 1.5″ widths.
Tools
- Table Saw
- Miter Saw
- Sander
- Sandpaper (120, 220)
- Protractor
- Tape Measure
- Pocket Hole Jig
- Cordless Drill and Bits
The pocket hole jig can be any kind that is used to drill the standard size holes that Kreg uses. To find the best pocket hole jig you can go to my guide here.
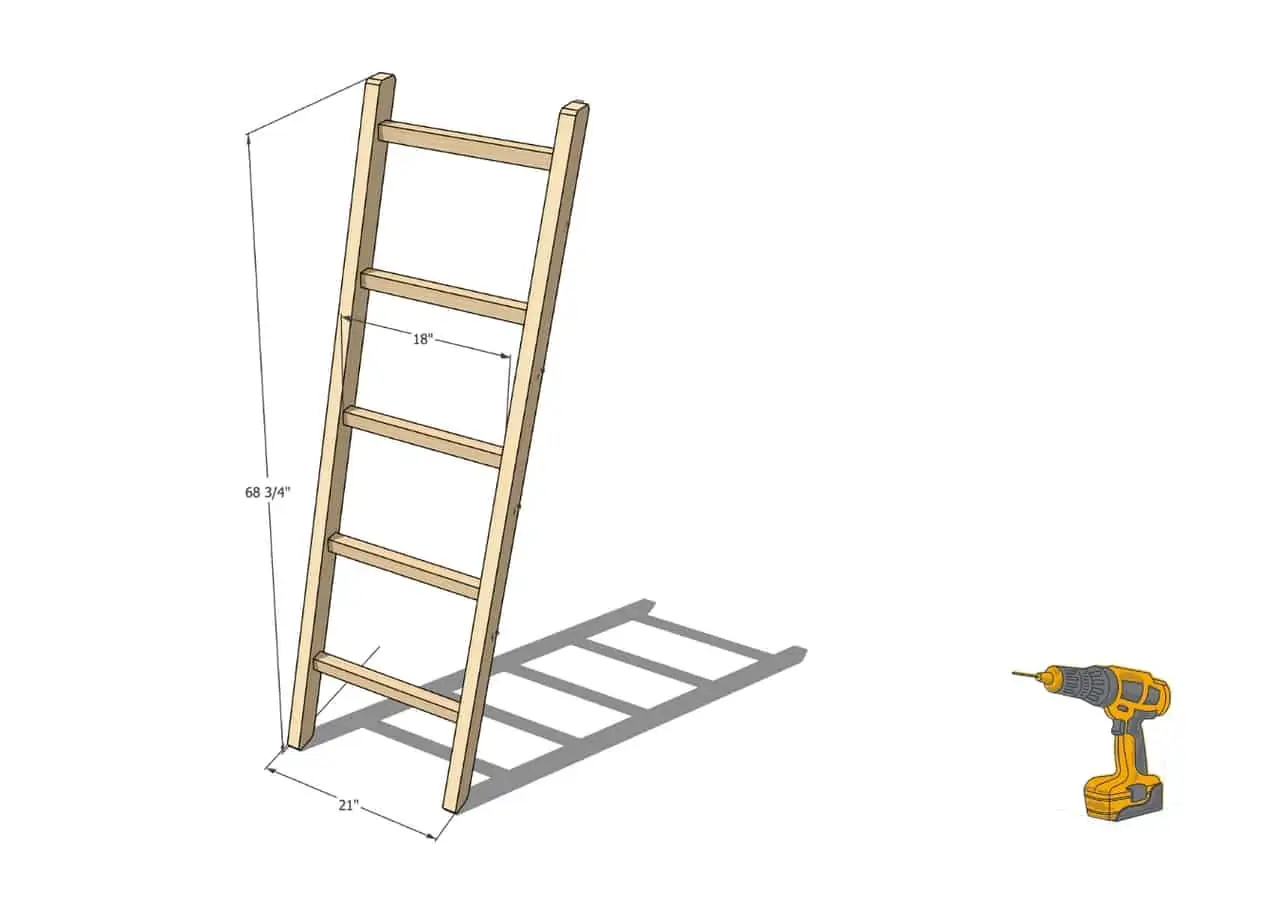
Cut List and Diagram
The cut list uses the three 2×4 boards that we included in the materials list.
The cuts include some crosscuts and rips on the table saw. You can of course adjust these sizes as needed.
A detailed and printable diagram is included in the downloadable PDF.
Step By Step Plans
I recommend cutting all of the boards to size at the very beginning. I like doing it this way so that I can use the miter saw for all of the cuts it will be doing, and then I will be done with it.
The same goes for the pocket hole machine. The pocket holes are drilled using the settings for 1.5″ thick boards and 2″ screws.
Making the Cuts
You will need to make the cuts for the rails of the ladder with a 90 degree crosscut, and then adjust the angle of the miter saw to make the cut for the angle at which the ladder will sit on the ground.
You can see the angle marked in the image below.
This angle is made at 15 degrees, and I am able to adjust my miter saw accordingly. I found that 15 degrees is ideal for my ladder.
You can adjust that as needed.
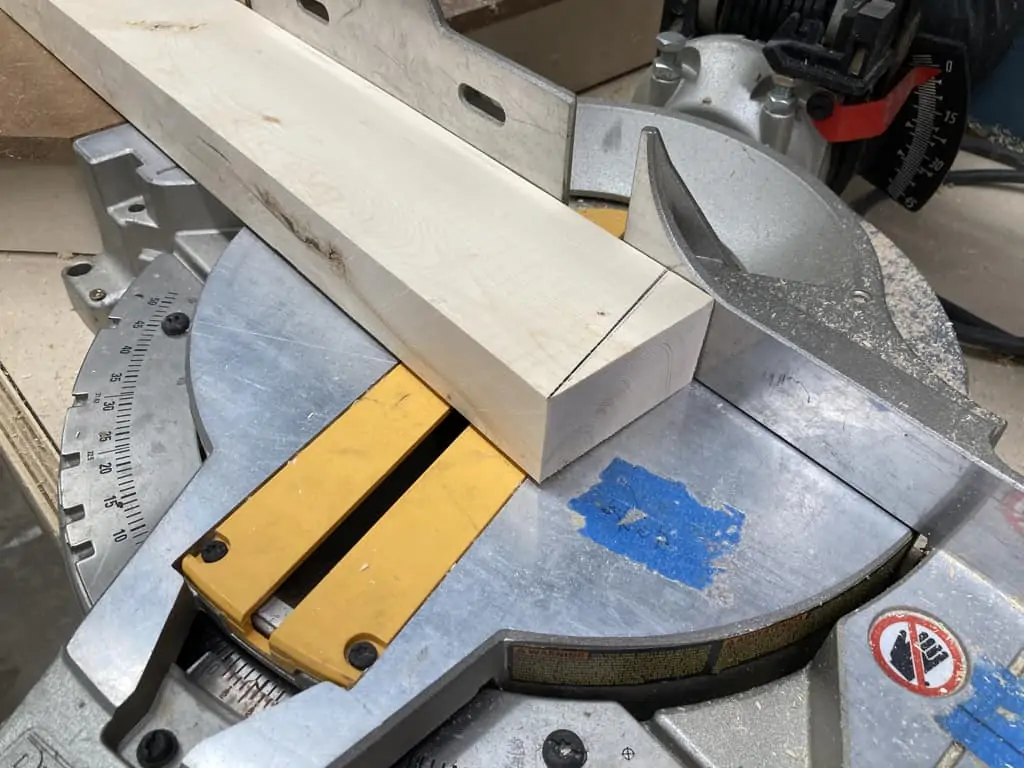
I didn’t like the sharp edges of the rails after making the angled cut, so I snipped off each of the corners. You can see this in the later images and in the video.
Milling the Boards
This step involves running the boards through the table saw and planer. If you do not have a planer you can skip this part.
If you don’t have a planer and want one, go here for my planer buying guide. I love my planer and think it is a great tool to add to your workshop.
You can thickness all of the boards for this project to 1.5″ or 1-3/8″ depending on your needs.
This step helps cut down on the amount of sanding needed and eliminates any marks or stamps on the side of the 2x4s.
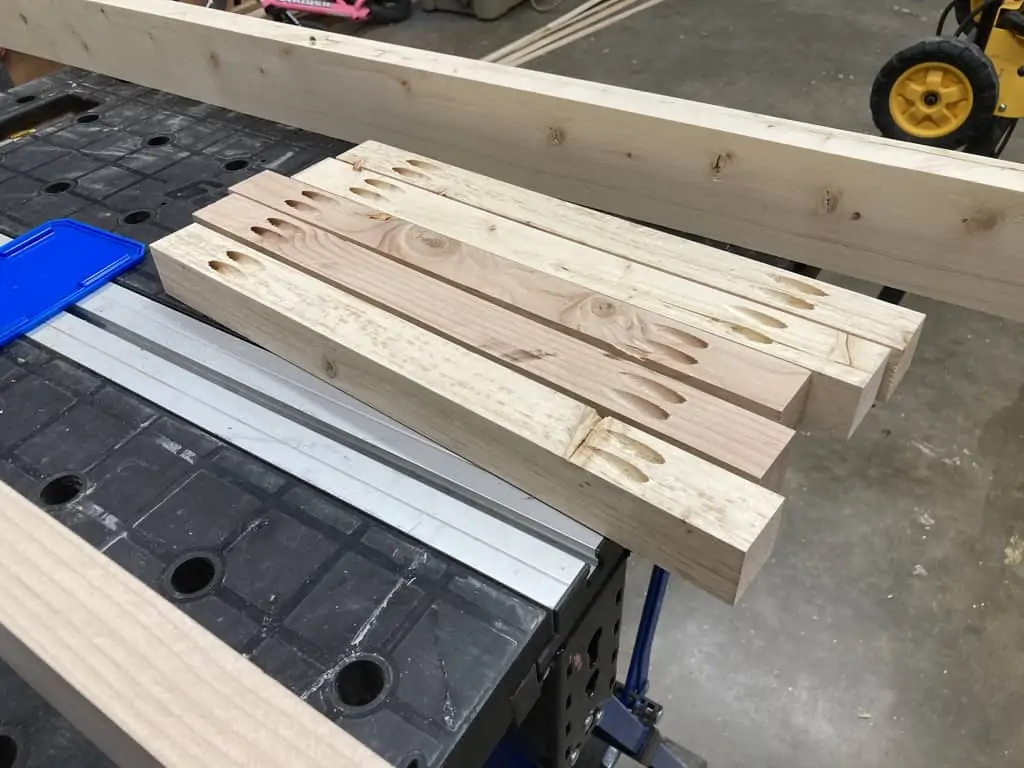
Drilling the Pocket Holes
I drilled the pocket holes for 1.5″ thick boards, which is what these are. You can really use 2.5″ screws in this situation if you want to, but I opted for 2″ to be a little more careful about going through the rails.
You can use my pocket hole jig setting chart for help on this project as well as others if you own a pocket hole jig (Mainly Kreg based jigs).
Drill two holes into each end of the rung for good strength.
Assemble Ladder
This ladder uses 5 rungs, but using 4 could give you more space for your blankets and towels. It is up to you to decide how to space it out.
I liked to lay it out on the table and see what it looks like before I started marking the spacing for the rungs.
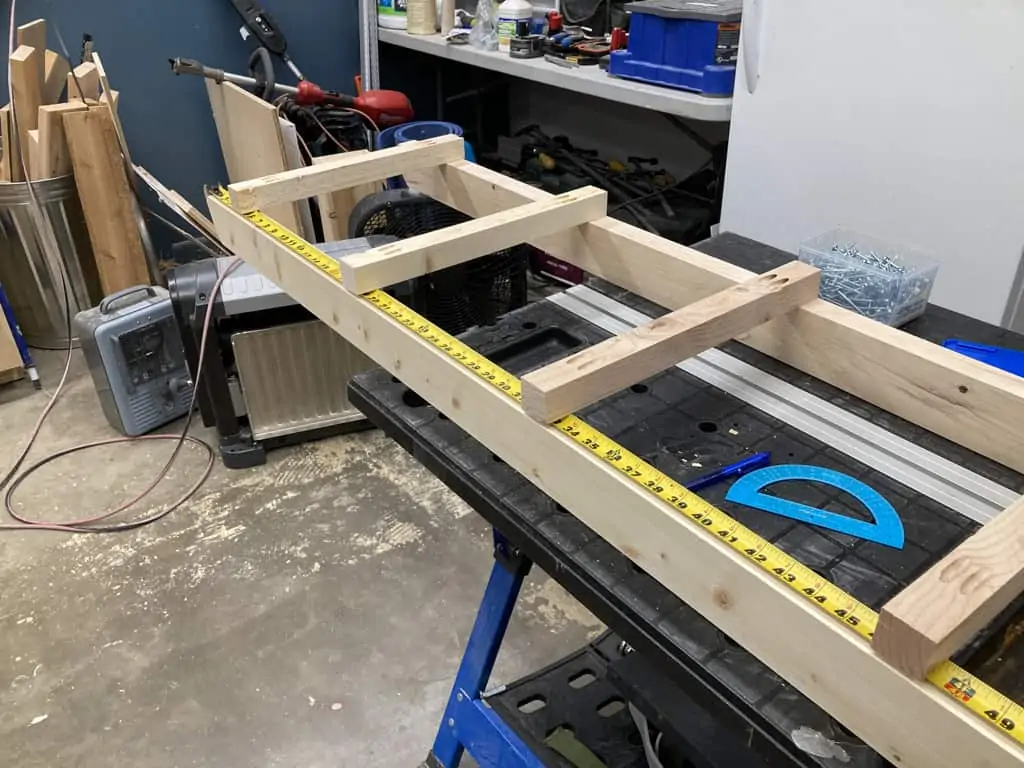
I measured 4 inches from the top of the rail, and then each rung after that is spaced at 14 inches.
This renders the top rung pretty much unusable, but it is there for strength and to look normal like a ladder.
Use a protractor to mark the lines level with the ground for each rung.
Then use a pocket hole clamp to hold the rungs in place as you drive a screw. I didn’t measure to place the rung in the center of the rail, I just estimated this part.
The pocket holes can be placed facing the back of the ladder or down towards the floor. I opted for the back of the ladder so that it was easier to clamp.
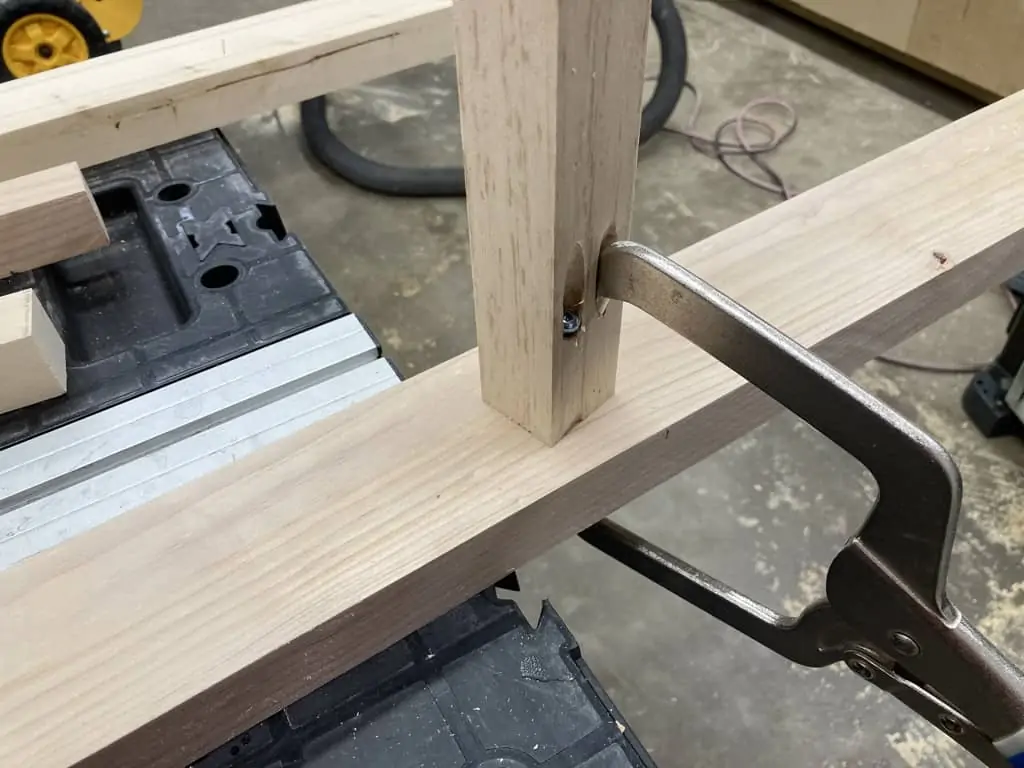
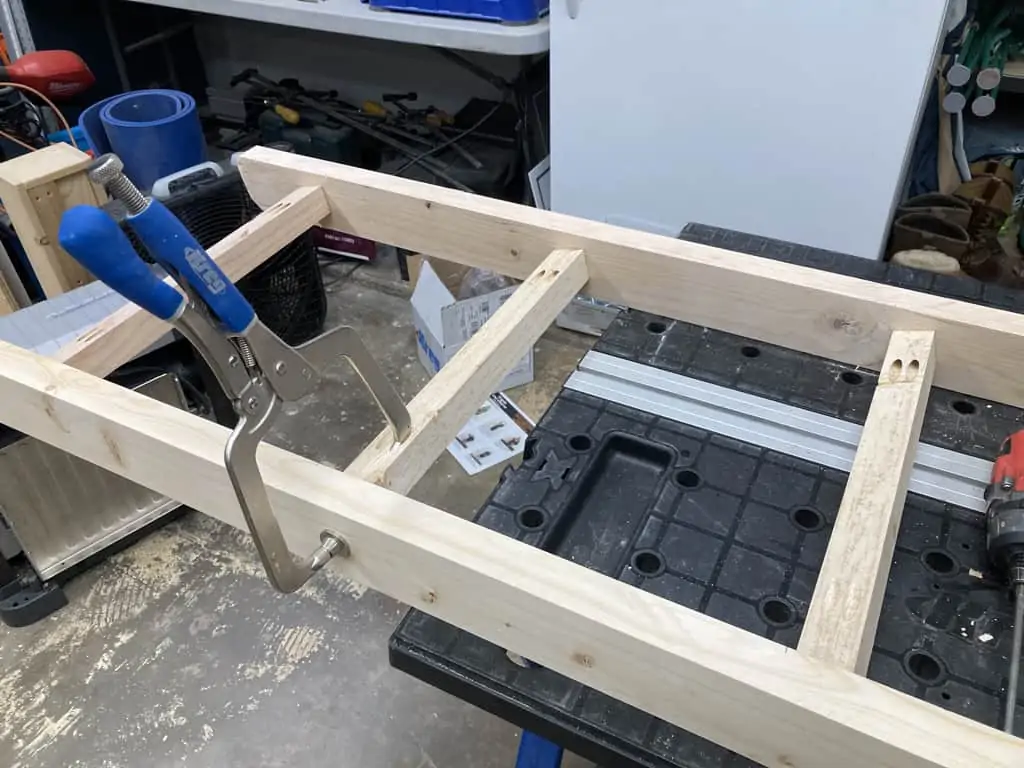
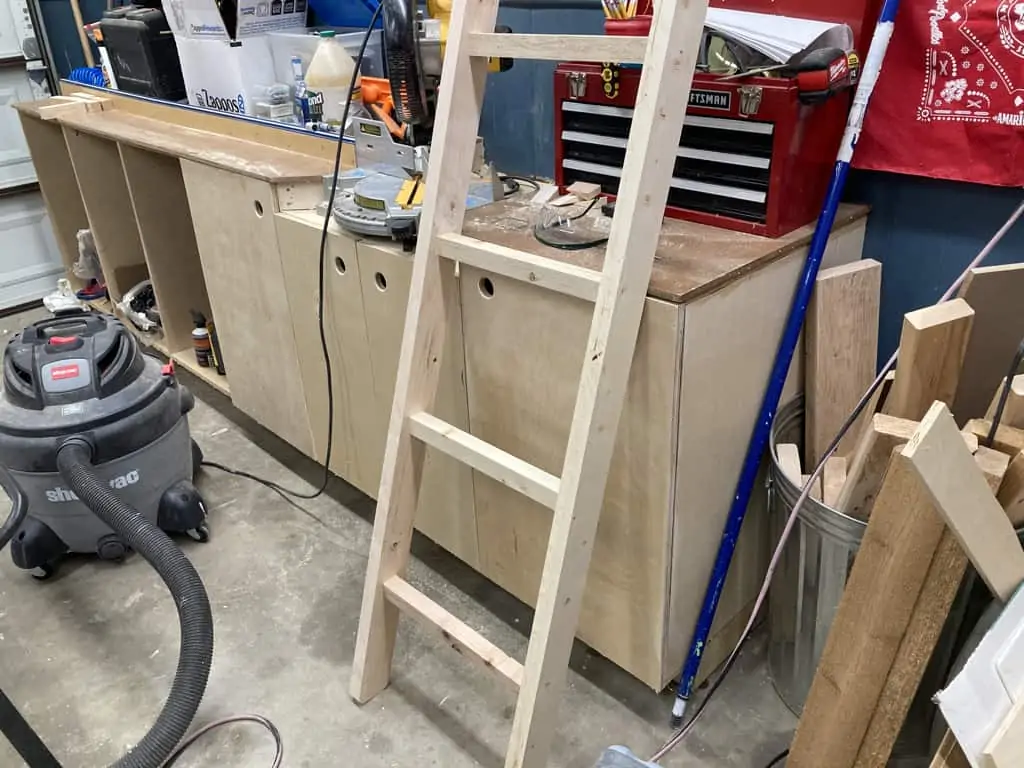
Work your way along each rail until you have attached all of the rungs. This will complete the assembly, and from this point on you will simply be putting the finishing touches on it.
Sanding, Staining, and Finishing
This part will be up to you on how you want it to look.
There are many options, but my go to is usually a wood conditioner (go here to see how to use a wood conditioner), gel stain, and a polyurethane finish.
It is important to do a good job sanding on this ladder. All of the edges and corners need to be rounded good enough so that a blanket will not snag on the wood.
This will just take some time (as all sanding does) and care.
Use a random orbital sander or sand it by hand.
For the wood conditioner be sure to use the correct type. Use an oil based one if you are staining with an oil based stain, and likewise for water based.
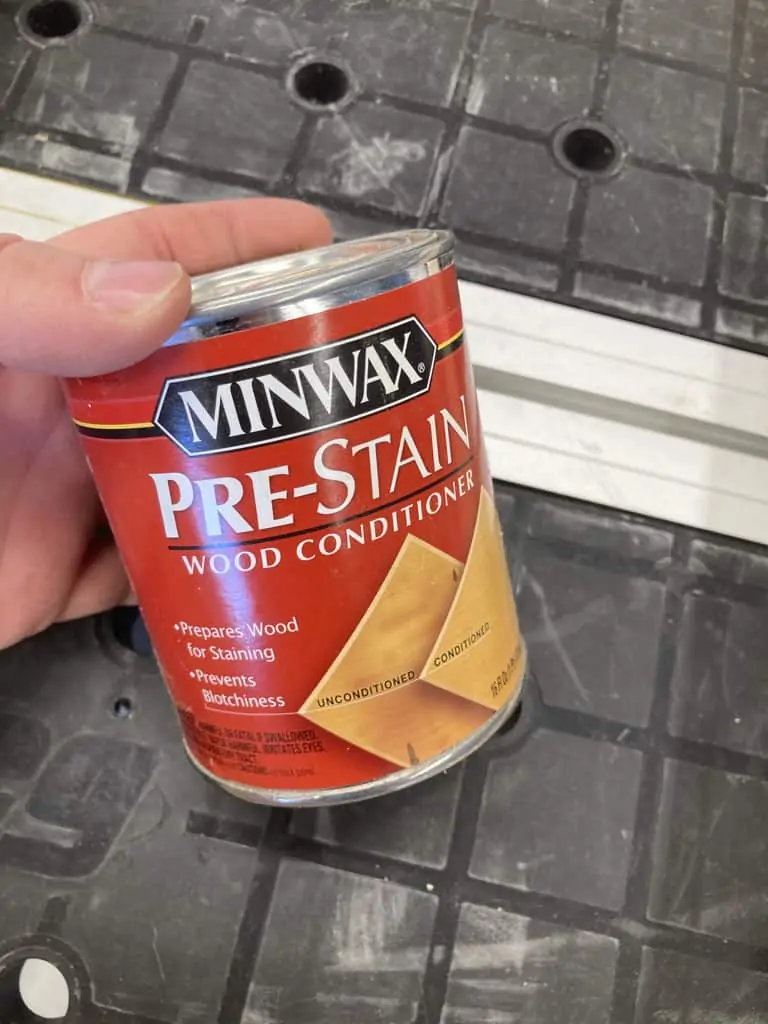
Do not wait too long to apply the stain after the conditioner. Usually the directions say within an hour or sometimes even sooner.
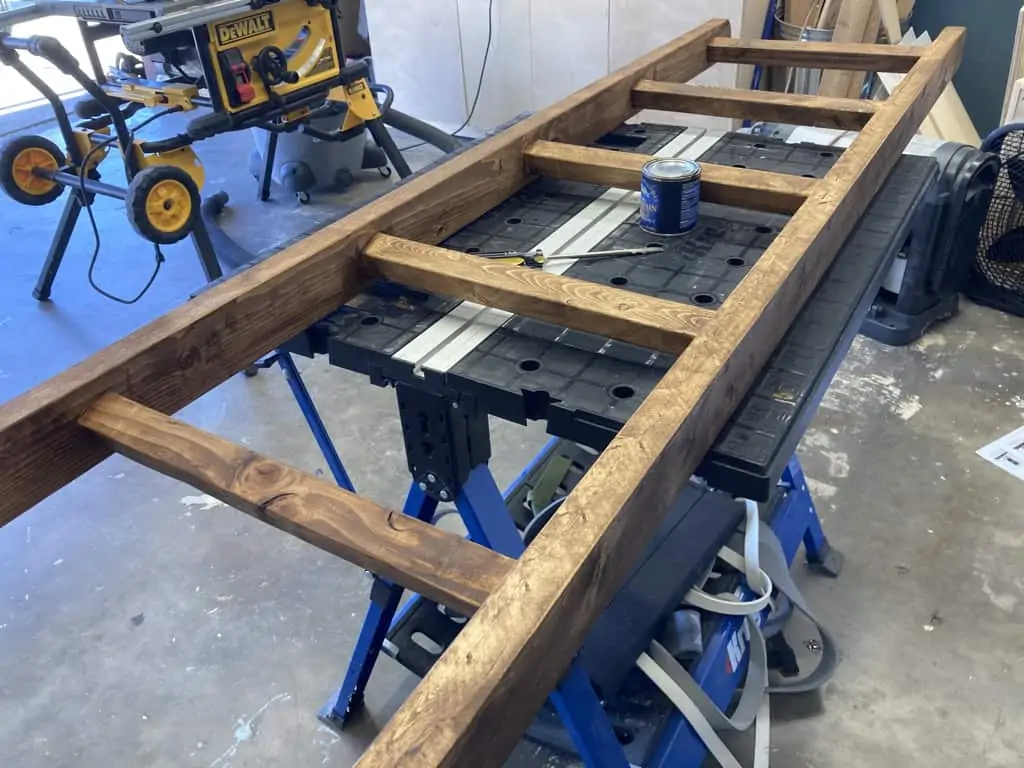
Apply 2-3 coats of your favorite finish after the stain has dried.
One finishing touch I did was apply a rubber coating to the bottom of the ladder. This helps prevent the ladder from scratching the floor or sliding around.
Now this will not be a problem on a carpet floor or on a rug, but on a hard surface it is a nice touch.
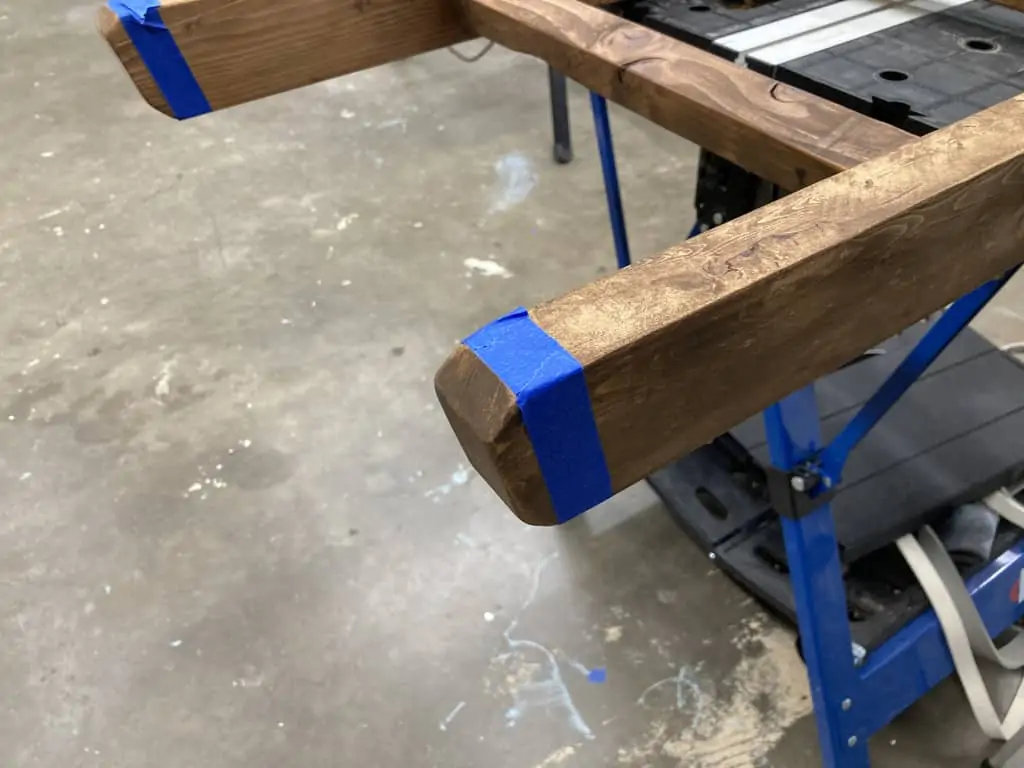
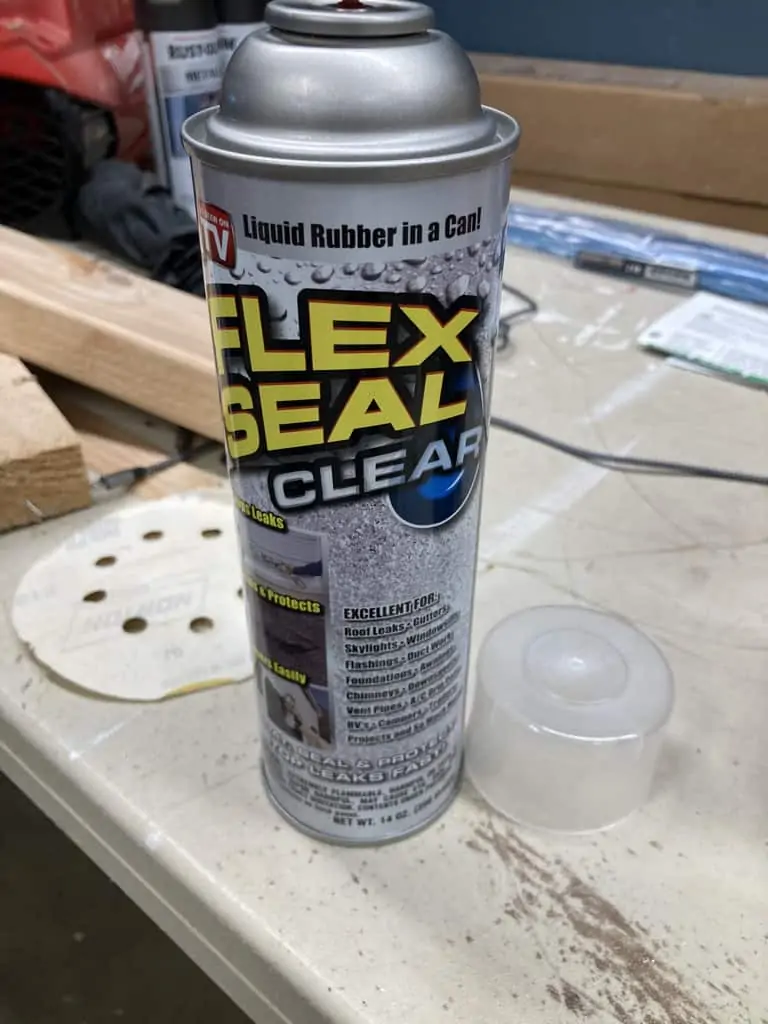
This flex seal is clear and provides a nice coating to help the feet of the rails.
Conclusion
This is a great project for those of you who either need/want a blanket ladder or want to accomplish a basic project that can be done in a day.
Be sure to download the printable PDF guide (enter your email in the form towards the top of this post) and subscribe to my YouTube channel and email list so you don’t miss any new projects or guides.