
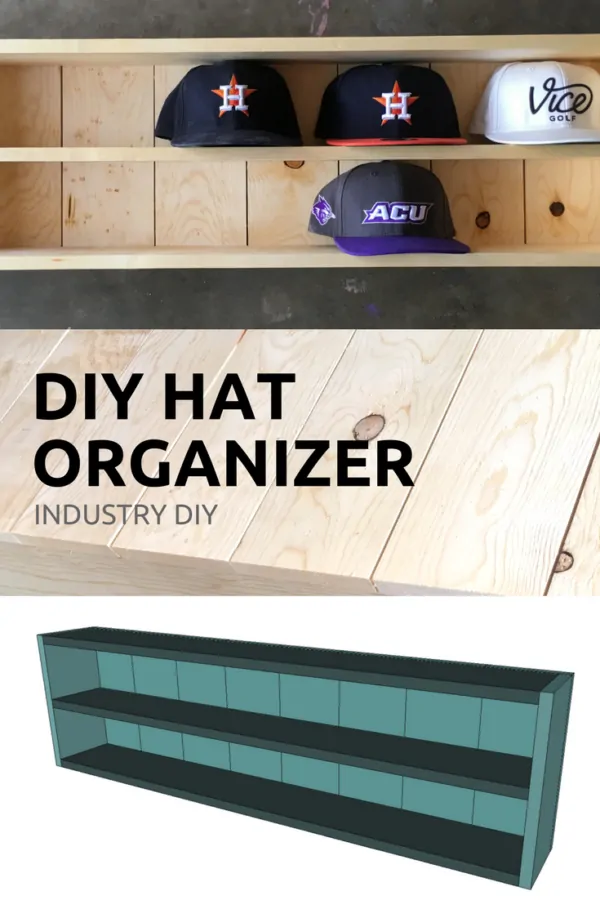
In my previous project, the entryway organizer, I created a modern style shelf that was made to hold pretty much whatever. One day I put a couple of my hats in it, and a new idea was born. I could make a shelf designed strictly for hat storage.
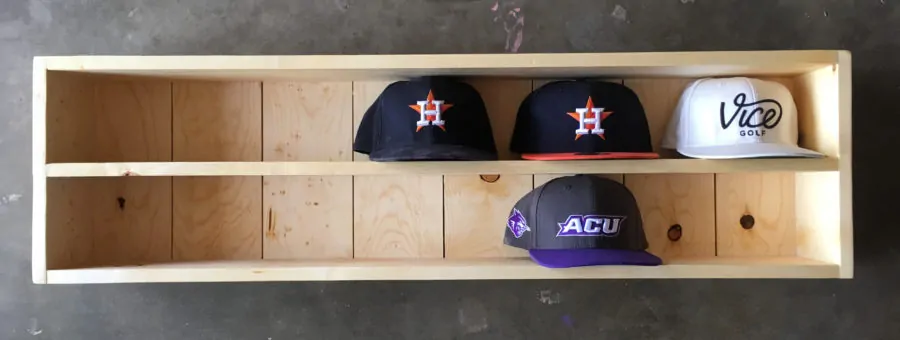
The hats fit pretty much perfect in the middle of the shelf. So I decided to make a shelf that was strictly designed for holding hats. I personally don’t even have enough hats to fill the one that I made, but that’s just a good excuse to go buy some more. These are mostly golf and baseball hats that I am using.
Download the PDF Plans Here
Difficulty
This project is pretty simple. No ripping of the boards is necessary. I would rate it one a 1 on a scale from 1-10. With one being the easiest of course. T
he best part about this project, though, is that the difficulty is irrelevant to its usefulness. If you are like me and love collecting hats, then this is a great project for you. The way it puts them on display is fun and attractive.
What’s Included
This build can be any size you want it to be. Simply take the concept that I describe here and adjust it to fit your own space.
This one has two rows that will each hold five hats. There is nothing to stop you from having 4 rows of 3 hats to hold 12 total.
This project only has two main components:
- Shelf pieces
- Backboard pieces
If you saw my previous post about the organizer, don’t be afraid to incorporate some other features into it if you want to. That is the whole point of these tutorials. Build something that will improve your life and your home.
The following tutorial shows the step by step plans for building this project. I have a cut list, tools and materials list, and sketchup images of the pieces going together. You can also download a printable PDF of the plans here.
This organizer can be painted, stained, or finished in anyway that you would like. You can even just take the pine, sand it down, and apply a nice wax to it. It’s just going to hold some hats on the wall, so I wasn’t too worried about it getting dirty or wet.
Baseball Hat Organizer – Step by Step Plans
Main Tools
Other Hardware and Tools
- Tape Measure
- Kreg Drill Bit
- Sanding Disks – 80,150, 220
- Kreg Screws – coarse 1-1/4″
- Torx head screws – 1-1/2″
- Paint Brush
- Paint thinner
- Cotton rags
- 2 Sawtooth Hangers or 2 2-1/2″ screws
- Stud Finder
Materials
- (3) 1″x6″x8′ pine boards
- Stain or Paint
- Finish (if staining)
Cut List
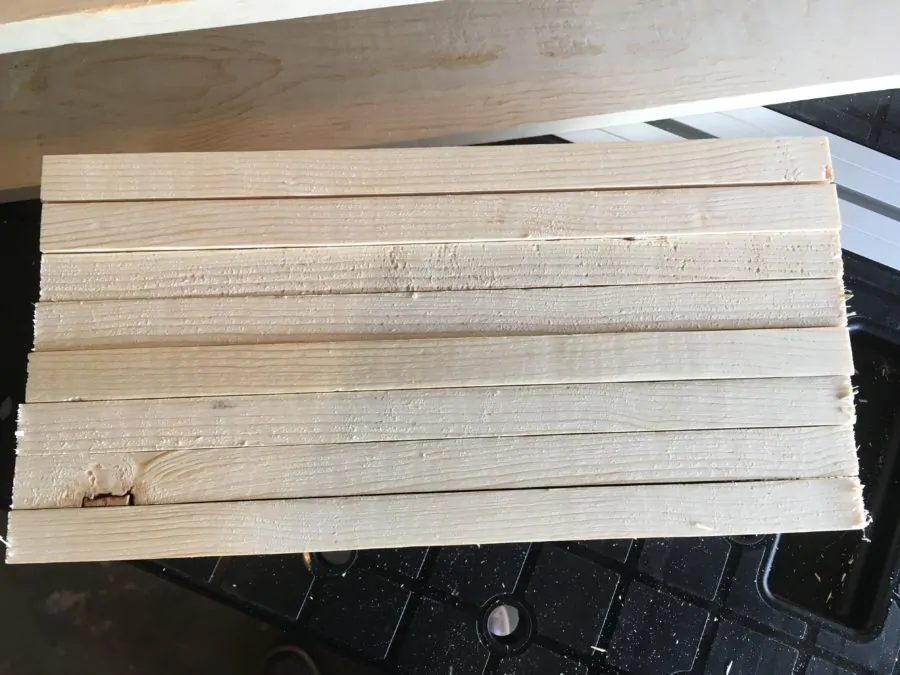
First, cut the small pieces for the back. Once you have done this you will know how wide to make the shelf (why you should do this will become clear soon). Do it this way unless you are willing to rip a couple boards for the back (using a table saw).
I will indicate the pocket hole locations on the shelf boards. There are 12 total. Use the 3/4″ setting for the pocket holes.
Find Kreg Jig settings info here.
We will not use the brown pieces on the end. If you have plans to make some stuff later, then save these boards.
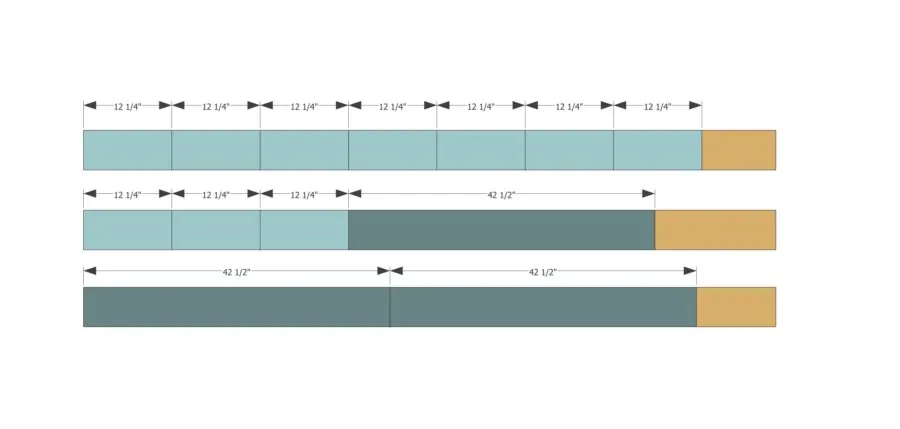
Before you cut the 42.5″ pieces, you need to follow these steps:
- Put 8 small pieces side by side
- Measure this width
- Subtract 1-1/2″
Your result will be the length the long boards need to be. In my case each small piece was 5 1/2″ wide, so my result came out to 44″.
The reason this is necessary is the width may vary. And to prevent from having to rip any boards or have gaps in between the small boards, we have to do it this way.
Here is a diagram showing how to measure it:
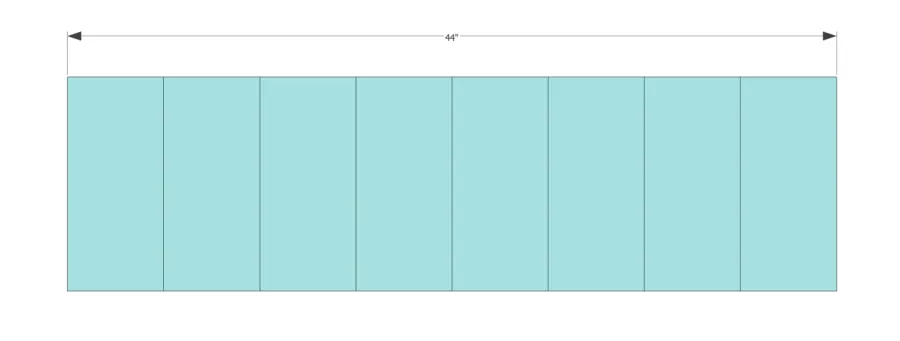
Sometimes the boards are not quite 5.5″ wide. Unless you want gaps between the back boards, you should measure this so you know how wide to cut the shelf pieces.
Assembly
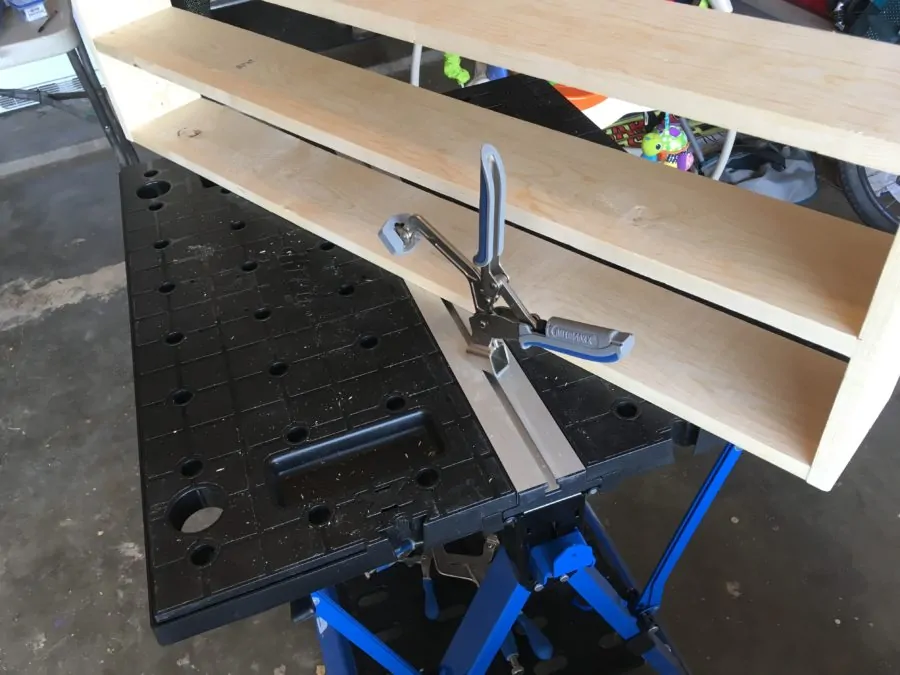
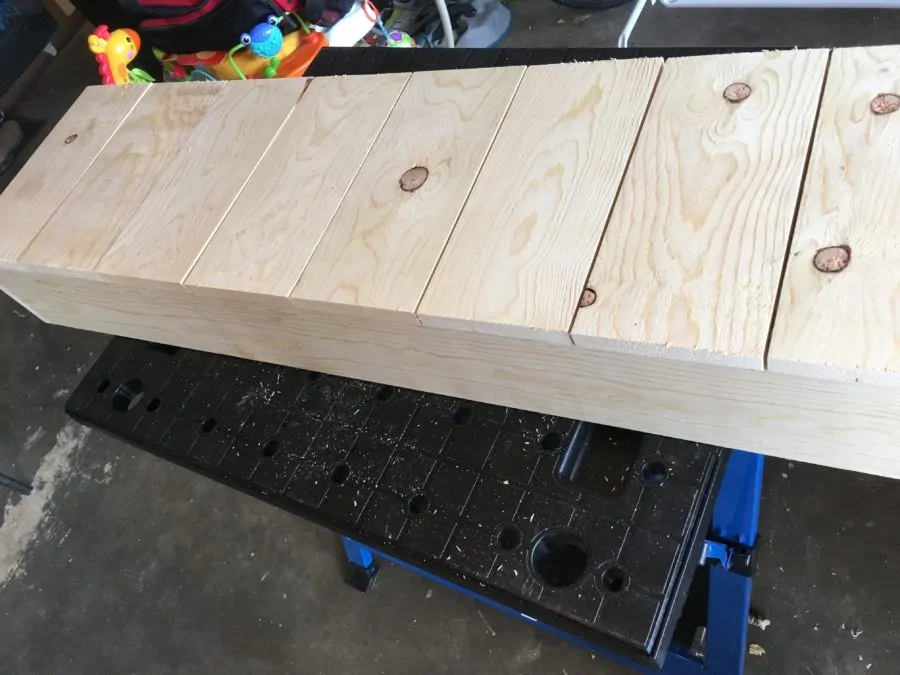
1. Attach Shelf Boards to Ends
Before you do anything else, make sure to sand out any printing or bad spots on these boards. They should look good before you assemble it.
There are 3 shelf boards and 2 end boards. The end boards will just be any 2 out of the 10 that you cut.
There should be a 5″ gap between each shelf. For more details download the pdf.
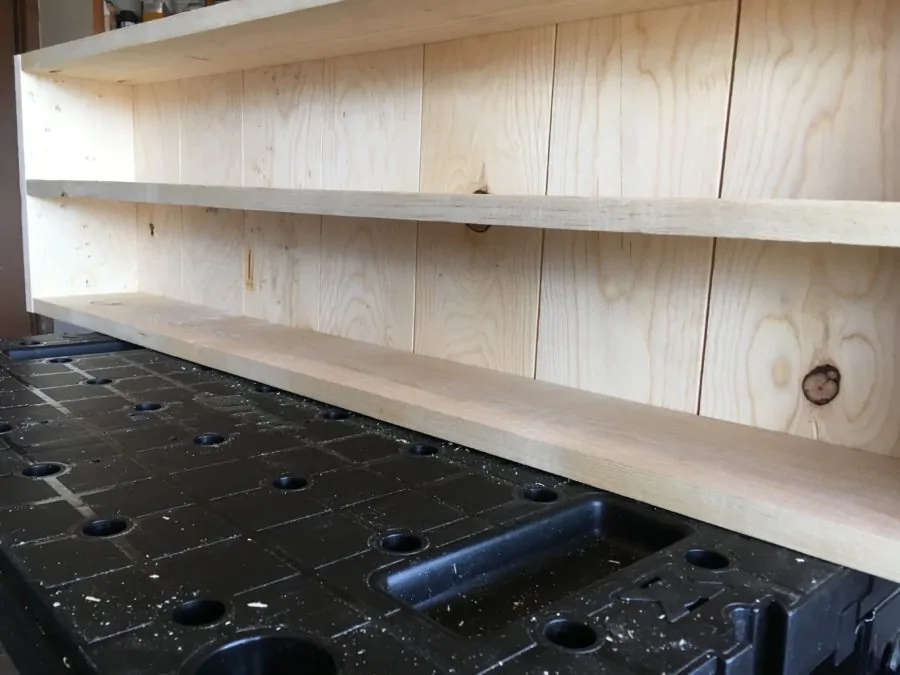
2. Attach Backboards
Take all 8 of your small boards and set them on the back of your shelf. They should all fit side by side.
This step will require 1-1/2″ torx screws. You can use other kinds I just like these because the drill bit stays in the head better. 1-1/4″ screws may work also but they might need to be countersunk into the wood just a little bit.
These boards:
Go here:
Put 4 screws into each board at the corners to hold them down securely.
Flip it over and see how it looks:
3. Sand and Finish
At this point you should sand and smooth out any rough edges.
Use a finish of your choice. This could be paint, stain, or just a raw finish. I rubbed wax into my shelf because I wanted that raw finish but it looks better with a little sheen to it.
4. Install
You can use two sawtooth hangers or a couple hooks attached to the back of this shelf.
For my install I simple drove two long screws straight through the backboards into the wall studs. This is a simple way of doing that will definitely hold it up on the wall. You may not want to do it this way if you don’t want to see the screws in the backboard.
Download the PDF Plans Here
Conclusion
This is such a simple project but in my opinion it is very useful. You certainly are not going to find something like this at a store. I like it a lot better than just trying to find some way of hanging hats on the wall, or buying a cheap walmart cap rack.
This is way that you can actually display these hats in your home.
If you don’t personally have hats yourself, I bet someone in your family or friends does. This would make the perfect gift for them.
If you would like to see my other projects, go here.
For beginner woodworking tips and tutorials, go here.