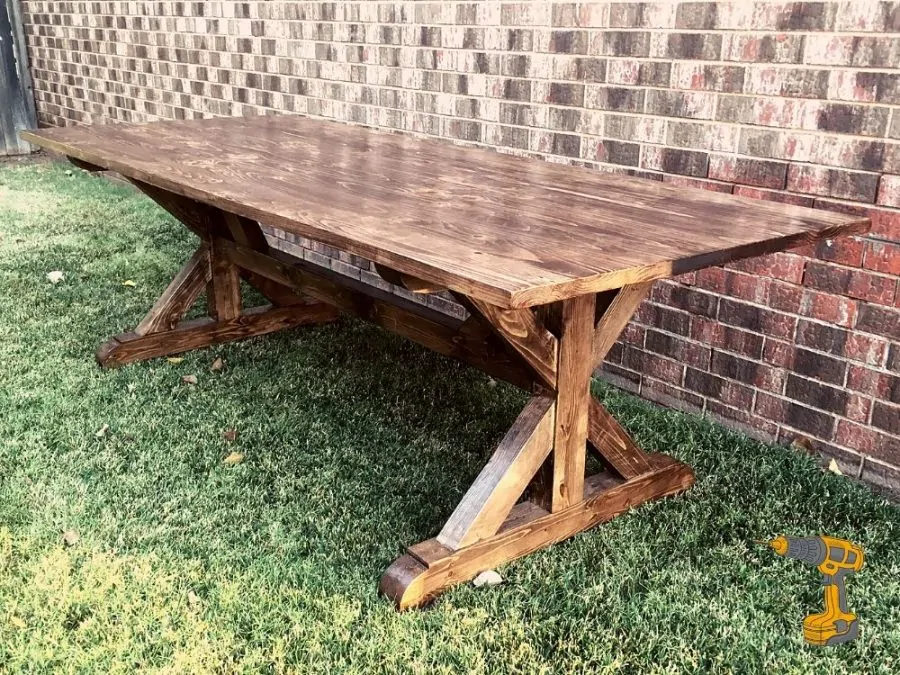
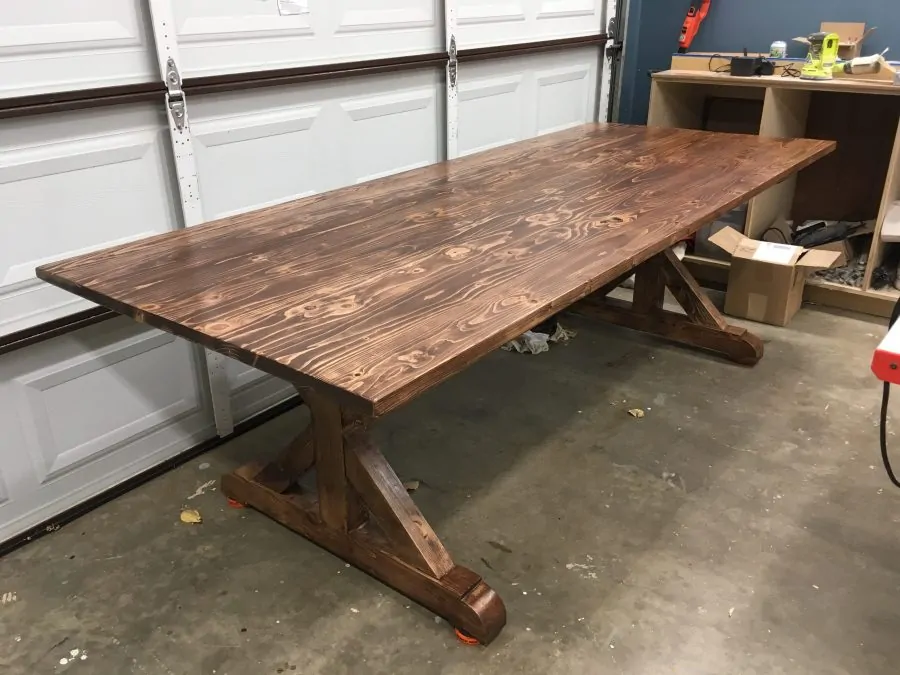
I’ve been wanting to build a farmhouse table for a while now, partly because it is almost a rite of passage for all DIY bloggers. But mainly because it is a great piece of furniture to build.
It is also a good project for anyone to undertake. There is plenty of room for artistic creativity, mistakes, and cool designs with a farmhouse table. And built correctly, they can last a very long time.
For this project I am only using pine 2x4s and pine 2x6s. These plans are good for the beginner and all the way to an expert because you can basically choose your difficulty. You will see what I mean as we go through the step by step details.
Difficulty
Overall this project is a medium difficulty. It does not require any special joinery and the margin of error can be high with a farmhouse table (it adds character!).
But due to its size, I would not call this project easy. The table top especially can be hard to handle at times. You can, however, make it smaller to suit the size you desire.
What’s Included
This post includes a materials and tools list, cut list, directions for building everything including the table top and finishing.
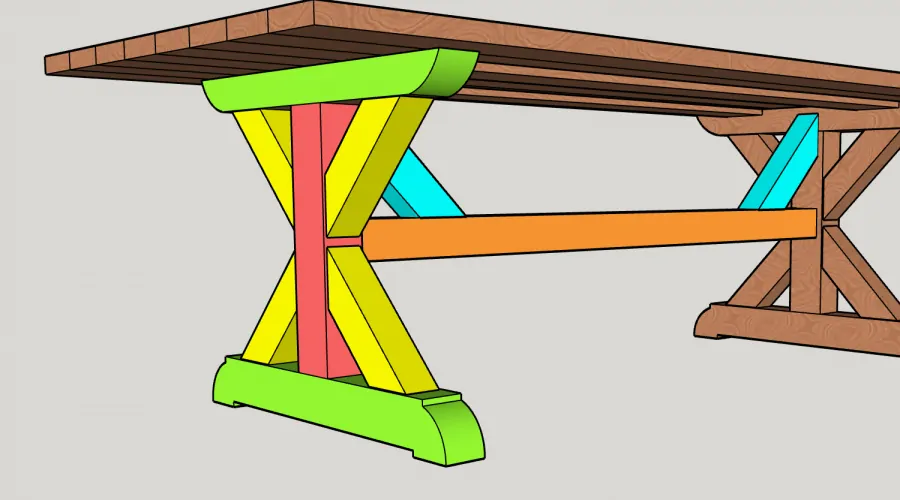
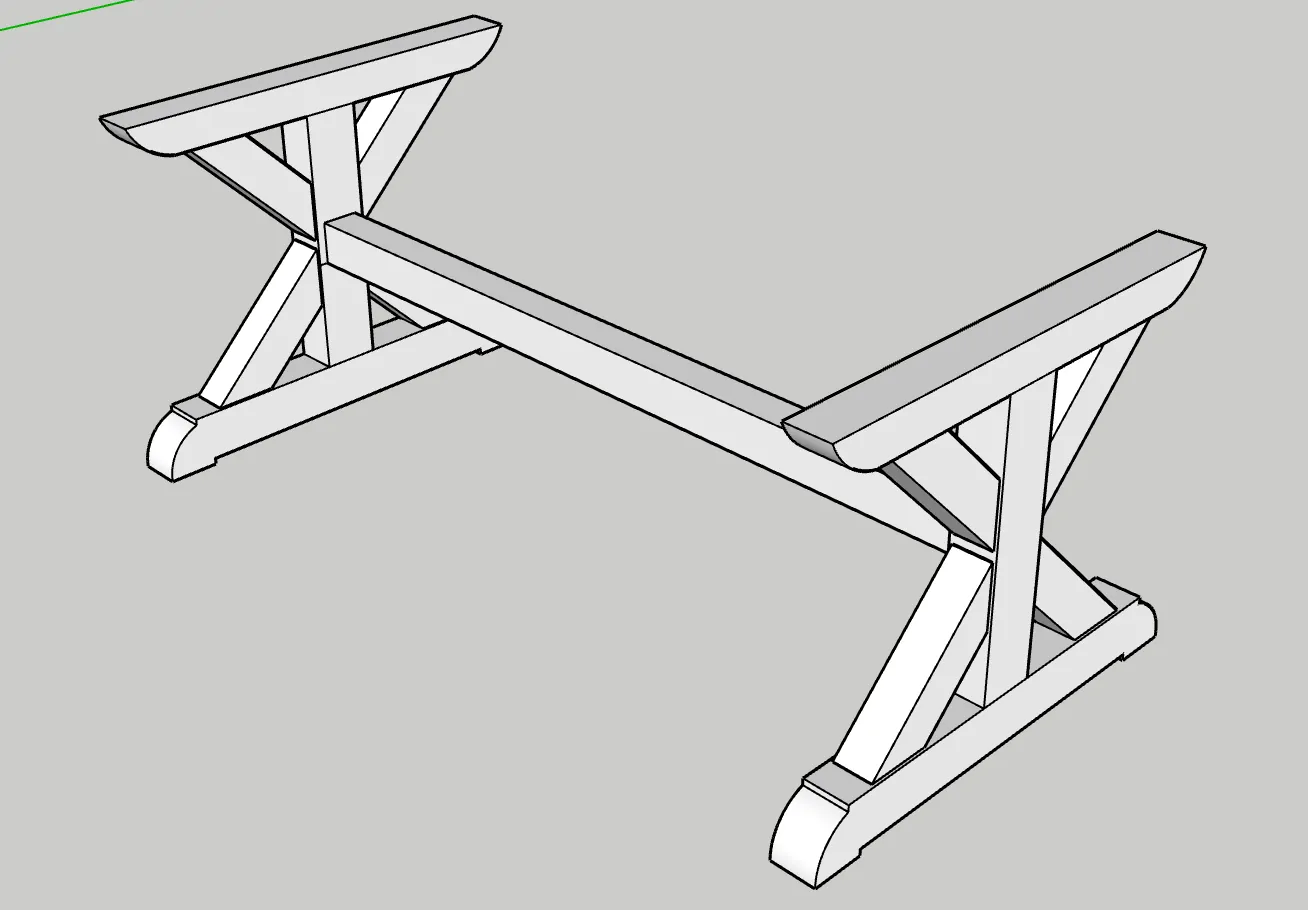
There are three main components to the table:
- Each trestle leg
- Large Table Top
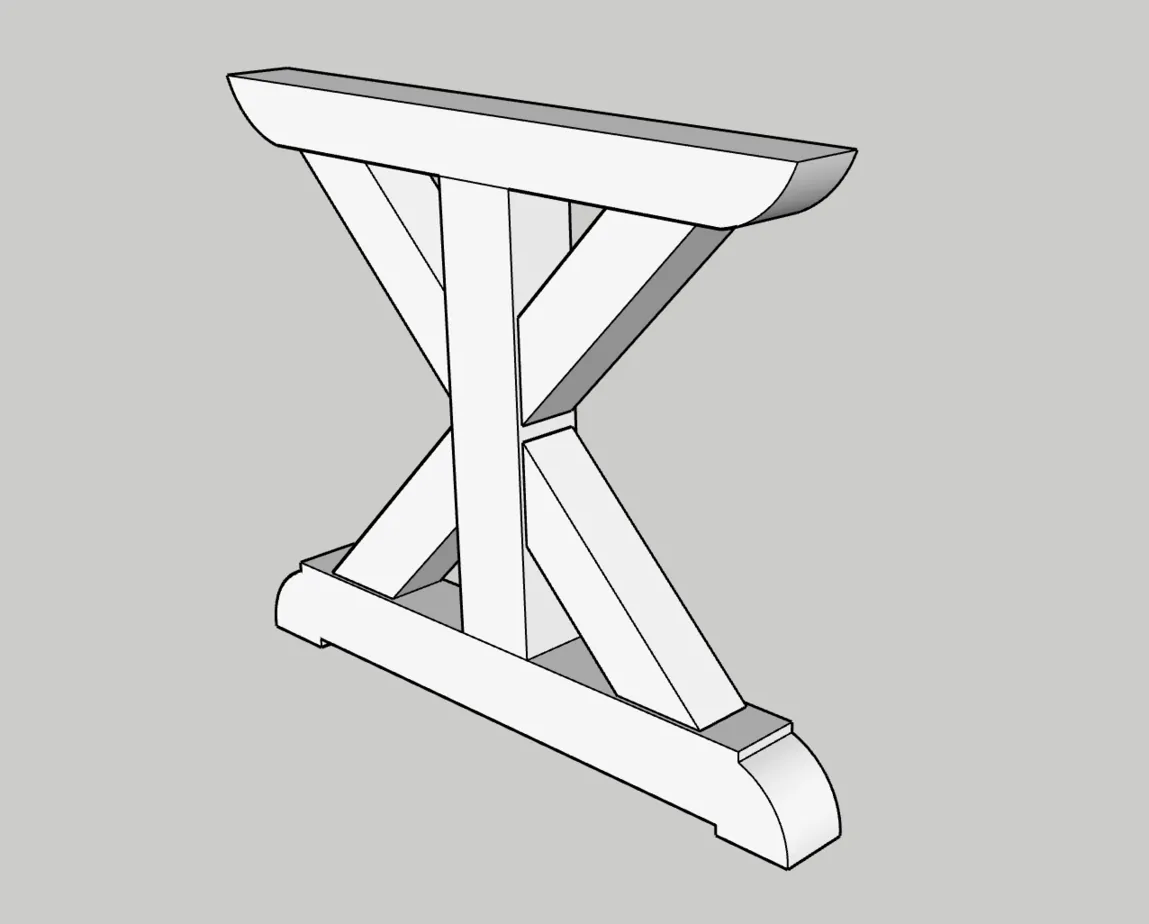
It uses a stretcher across the middle of the trestle legs for stability, and also two stretchers underneath the table top.
The X trestle design for each of the legs is very strong and stable, hence its popularity.
Without further ado, here are my step by step plans with detailed descriptions and pictures.
Step by Step – DIY Farmhouse Table Plans
Tools (Must-have)
- Cordless Drill
- Random Orbital Sander
- Miter Saw
- Jig Saw/Band Saw/Coping Saw
- Kreg Jig
- Clamps (Various Sizes needed)
- 4+ clamps >48″ for a wide table
Tools (Optional – intermediate to advanced)
- Planer
- Joiner
- Biscuit joiner/domino joiner
- Belt Sander
- Hand Planer (jack plane, no.7 or 8)
Materials
You can of course use the wood of your choice, but these plans use pine. Pine is economical and readily available, albeit usually lower quality.
- (10-12) 8′ 2×4 Pine
- (8) 8′ 2×6 Pine
- (2) 8′ 1×6 Pine
- Wood Glue
- 1/2″ wood dowels
- (Optional) Biscuits or dominos for joinery
- Stain of choice
- Finish of choice (Scroll down to that section to see what I used)
Hardware and Screws
- 3-1/2″ screws
- 2″ screws
- 1-1/4″ screws
- Table Top fasteners
- 4 furniture feet pads or rubbers
If you can get the 2x4s and some wood glue it is possible to start building the table without getting all of the other materials. I don’t normally buy everything ahead of time, but it is nice to know what will be required. I didn’t have that luxury when creating these plans.
Step 1: Board Prep
The first thing you will want to do is get all of your boards ready to be glued together and worked with. This is basically the milling and cutting section of these plans.
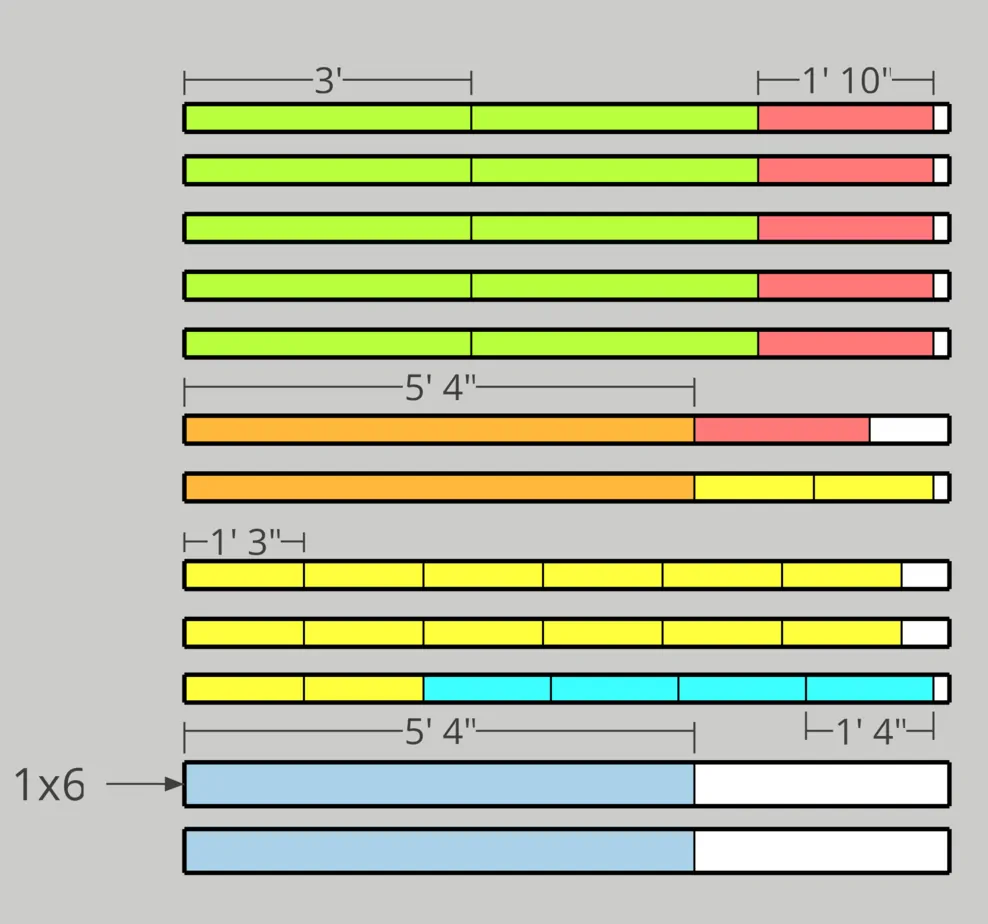
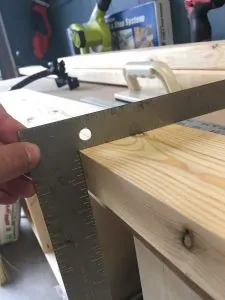
Cut Each Board to Length
The first thing to do is cut each board to length. It makes the process straightforward when you batch all of the activities together, so we are going to cut all the boards now. There may be more boards to cut later, but this will be the majority of them. I will use the Miter Saw for this step.
Here is a cut Diagram for all of the 2x4s and 1x6s:
This image shows where these boards will go:
I have not included the table top boards into the cut list. This is because they are 8′ long, so you don’t need to cut them. You will if you want a different size of course. You can also get 10′ boards and it gives you a little room to work if there are bad ends of the boards.
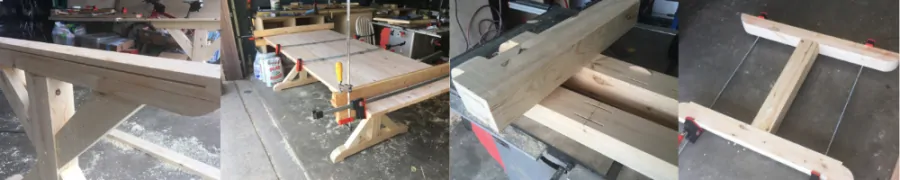
Milling the Boards
With 2x4s the edges of the board are normally rounded. This is something that I usually eliminate because I like square edges. Plus, when you leave the edges rounded it is somewhat obvious that it is a construction grade 2×4. I don’t like to do this because my whole strategy is to use cheap lumber and make it look expensive.
In the picture below I used a joiner and a planer to mill this board. It produces a nice flat surface and square corners.
You really have a few different options at this step. I’m going to list them out here, from easiest to most difficult:
Easy: Glue up 2x4s with no milling
This means you leave the rounded edge on the 2x4s and glue them together as is. This is fine, and you can even flatten the boards later on.
Medium: Cut rounded edges off with table saw or track saw
You can get a good edge on the boards with a table saw. Simply cut a thin slice off of each side of the boards and you should have four good square edges.
Difficult: Mill boards square and flat
This step requires a joiner and a planer, and a table saw can be helpful as well.
Making the boards square and flat is a great start, and I generally recommend doing it this way. It is not required, however, and until you build up a good woodshop I wouldn’t worry about it. (I plan to add a separate post that describes how I mill 2x4s).
Step 2: Glue Boards Together
This step is where we create thicker boards for the legs and stretcher. I do this by gluing the 2x4s together. You can possibly bypass this point by buying 4×4 boards and cutting them to the correct thickness. How you get there is not super important, but I use 2x4s because they are easily found and you can really create any size legs you want by gluing and milling.
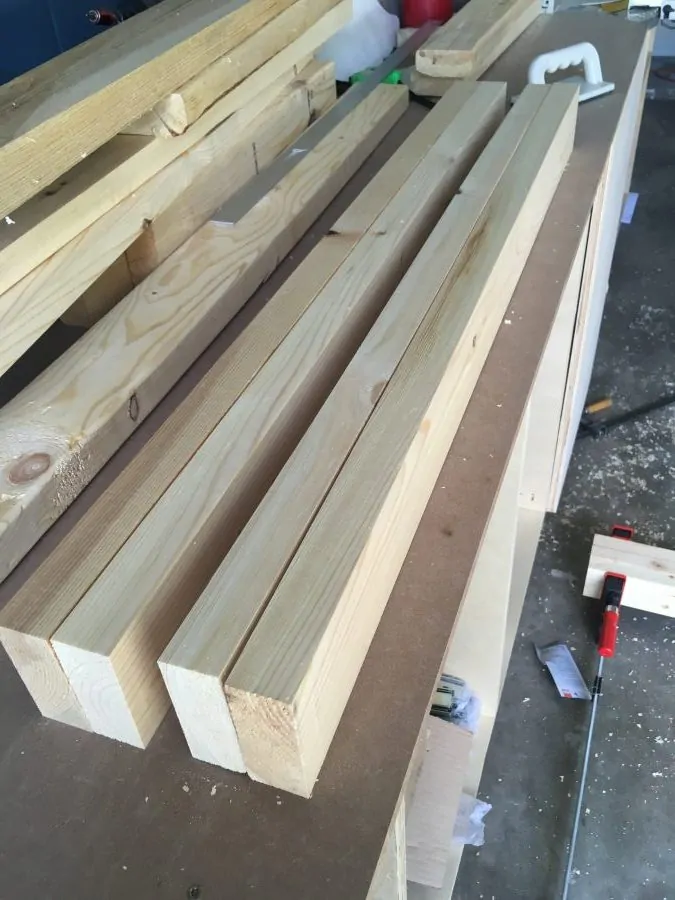
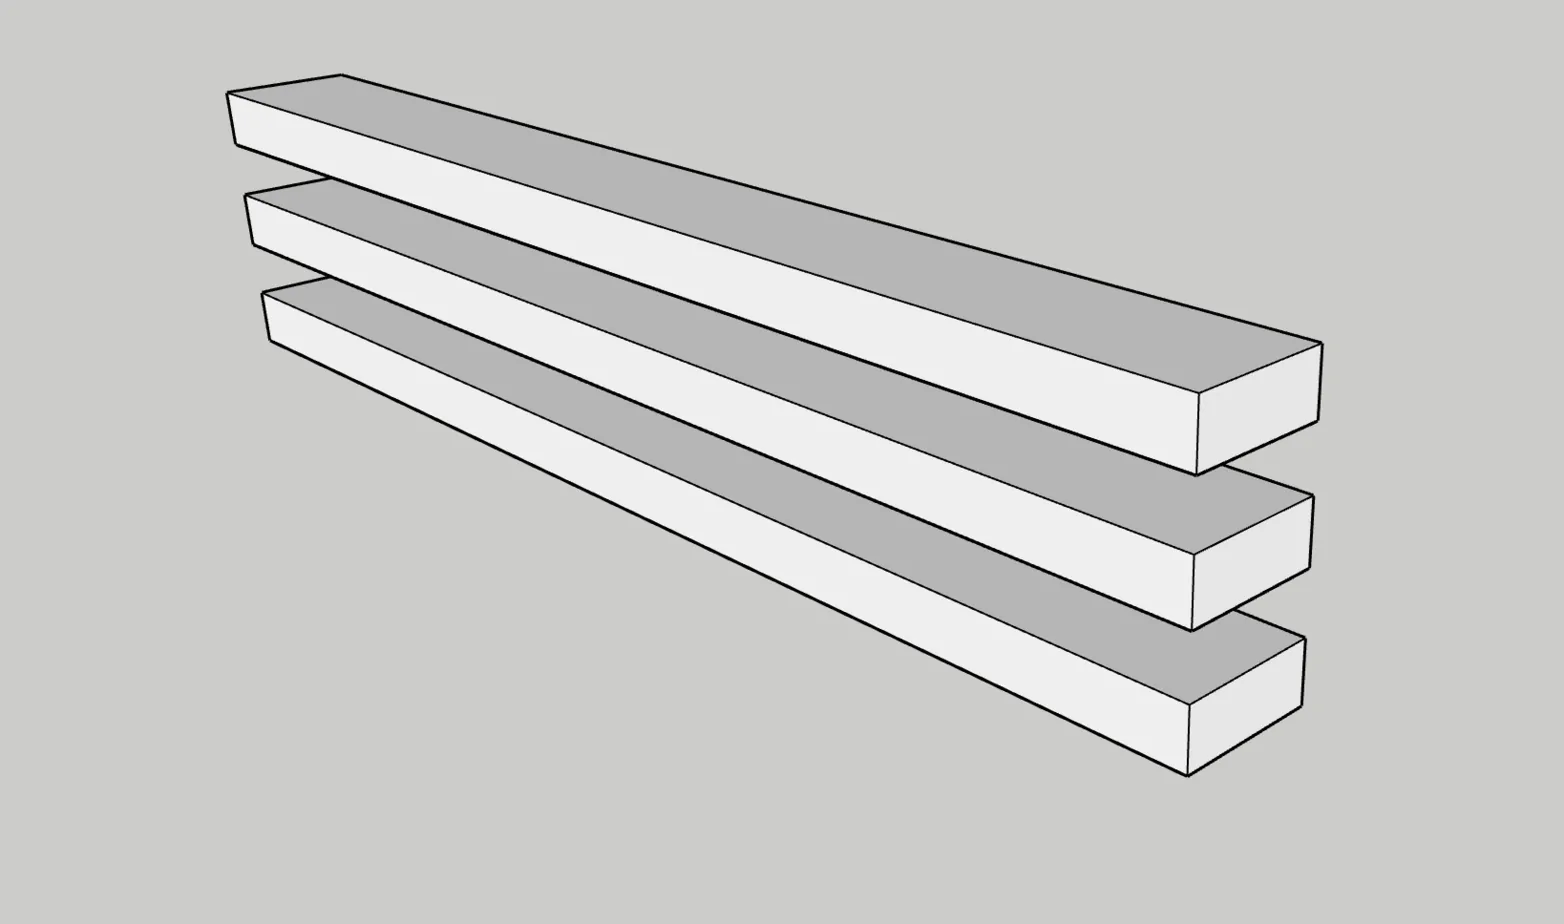
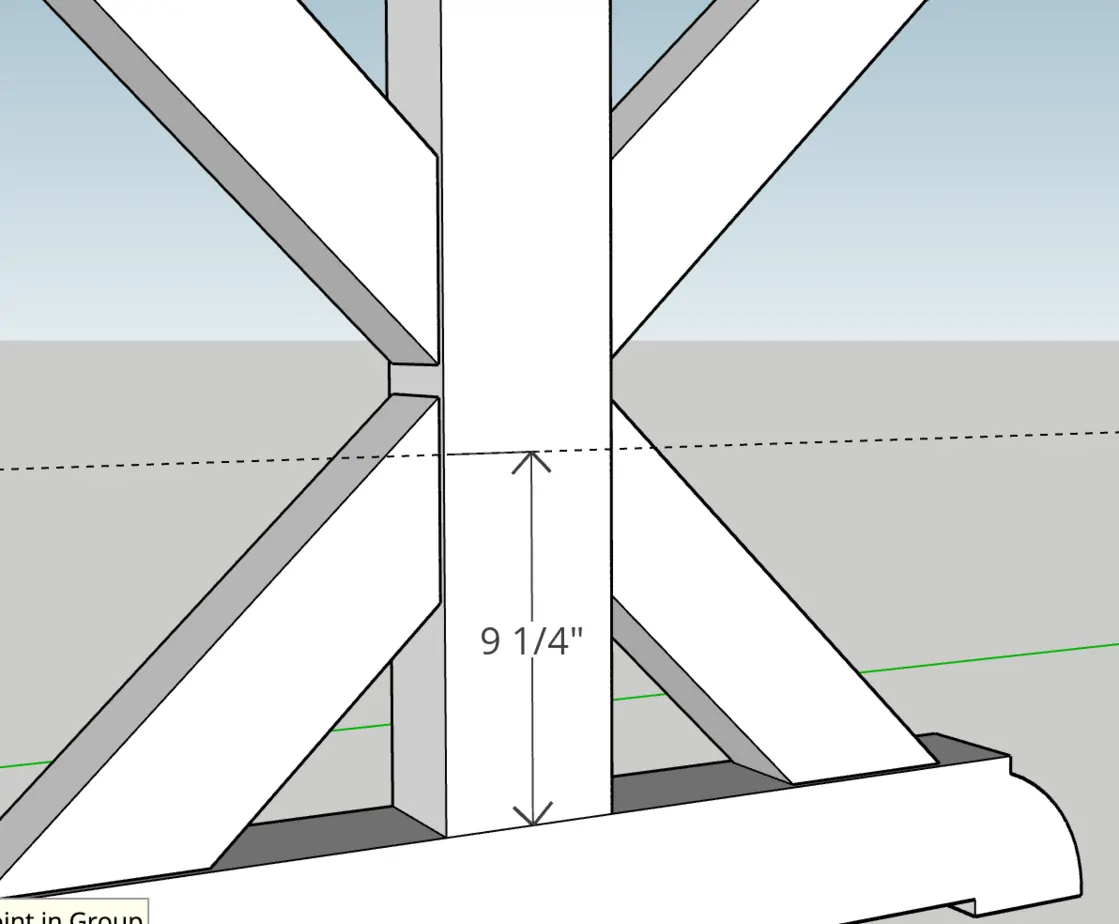
Top and Bottom of Legs
There are 5 of these boards total for each leg (10 altogether). They should be 36″ long.
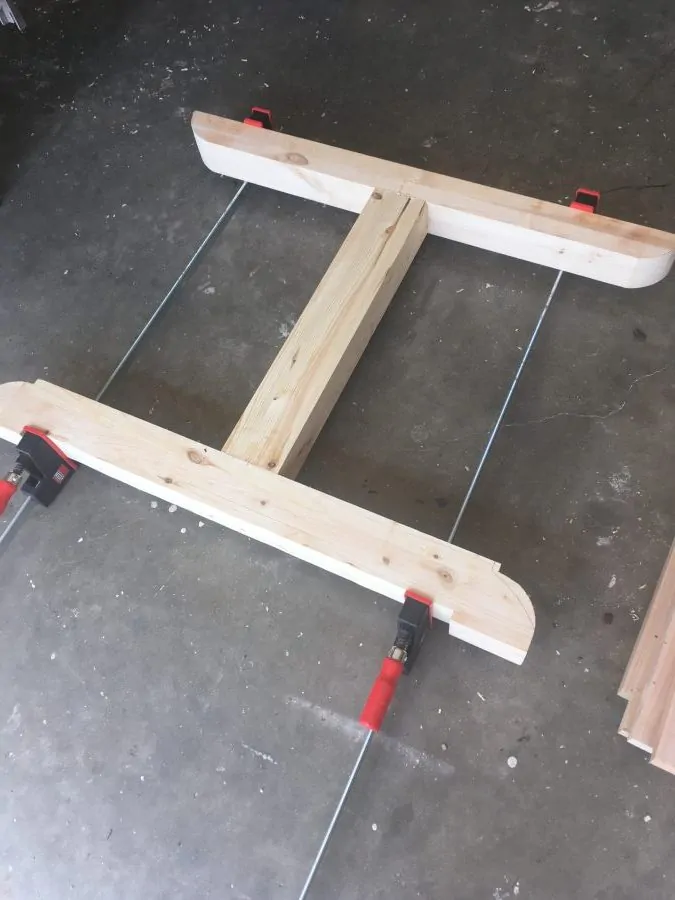
The bottom of each leg uses 3 boards as shown in the two images below:
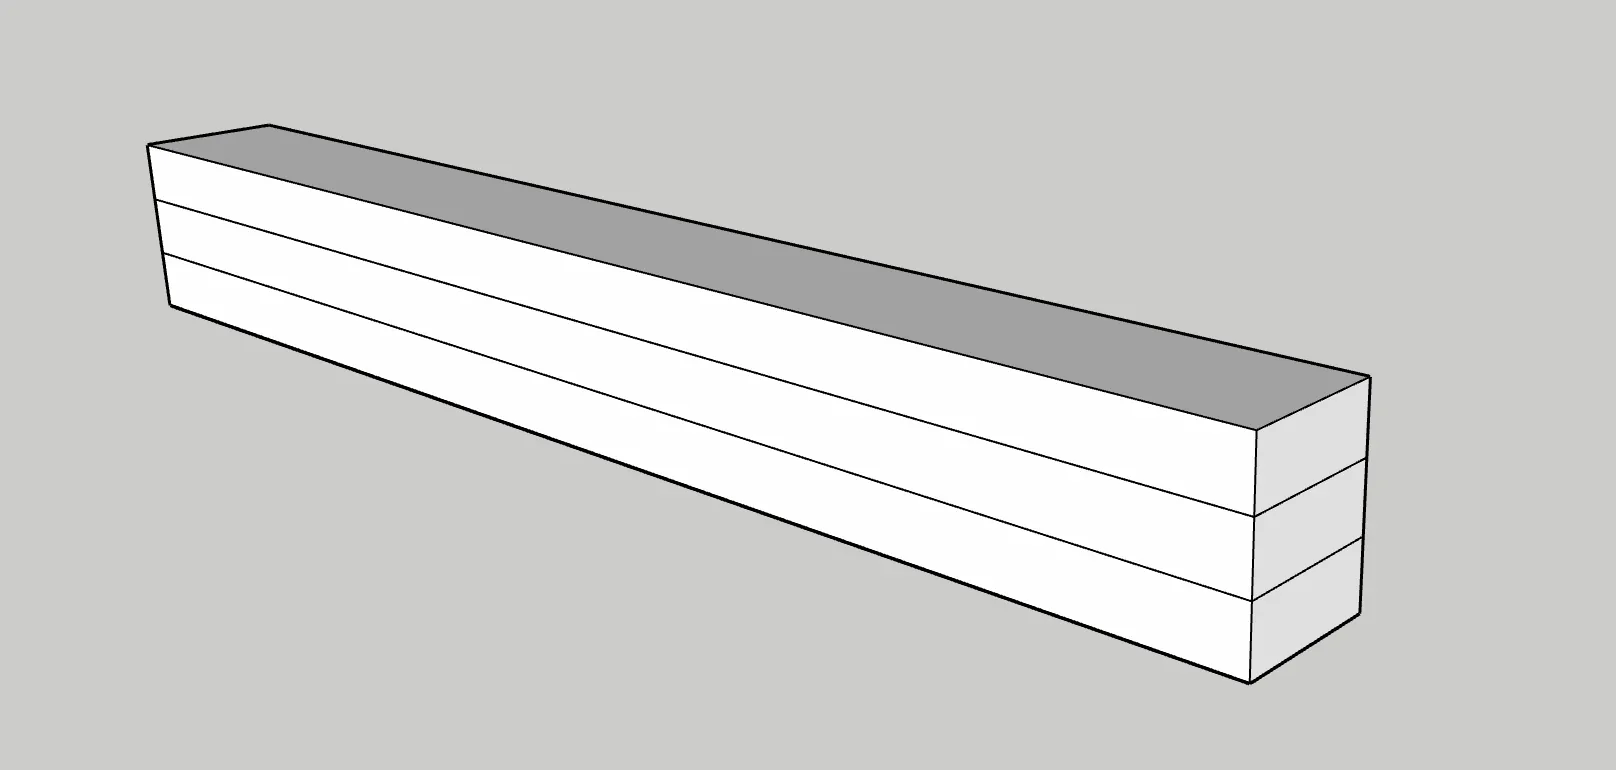
Glue the 3 boards together with wood glue. You will need to use some clamps to hold these together, as you can see in the image below:
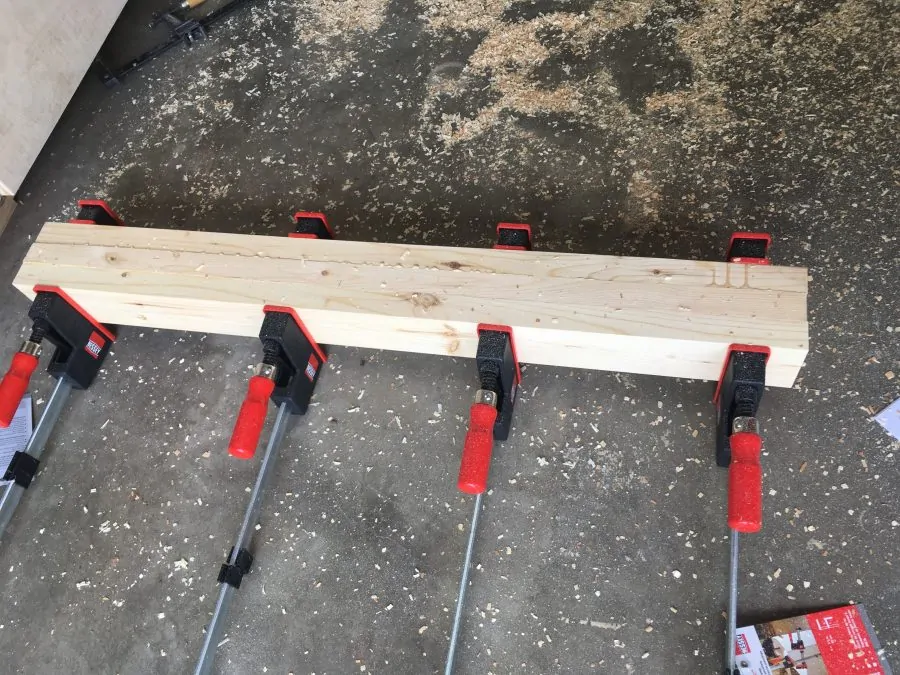
Repeat this step for the other leg.
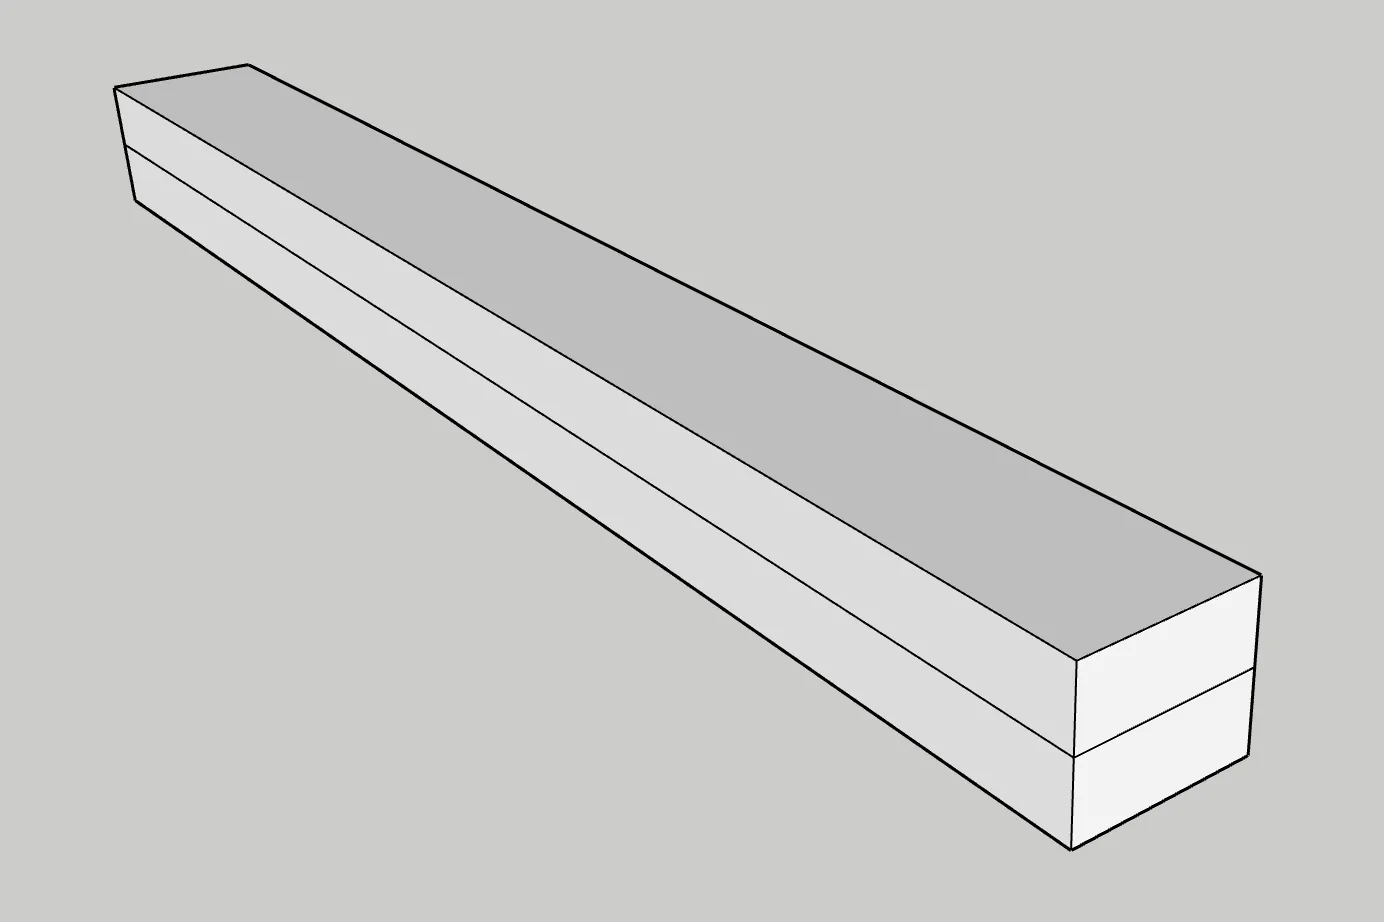
For the top of the legs, you will need to glue together 2 boards for each leg:
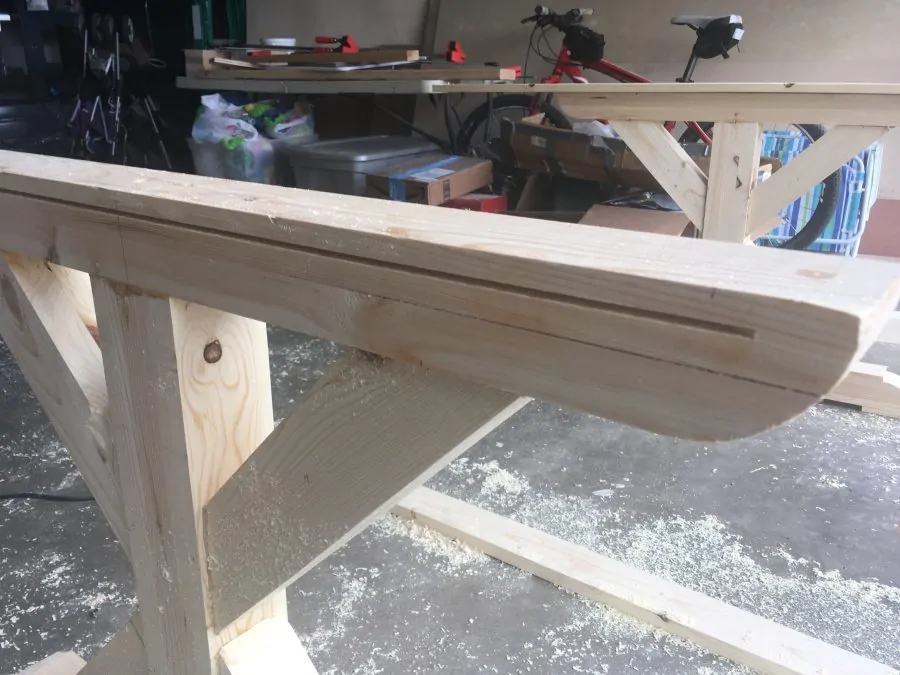
Cut Decorative Edges on Top and Bottom
This step requires a bandsaw or some type of hand saw (like a coping saw). It is a decorative step meant to make the top and bottom of the legs more attractive. You can see how I did this in the images below. Here is the bottom of the leg:
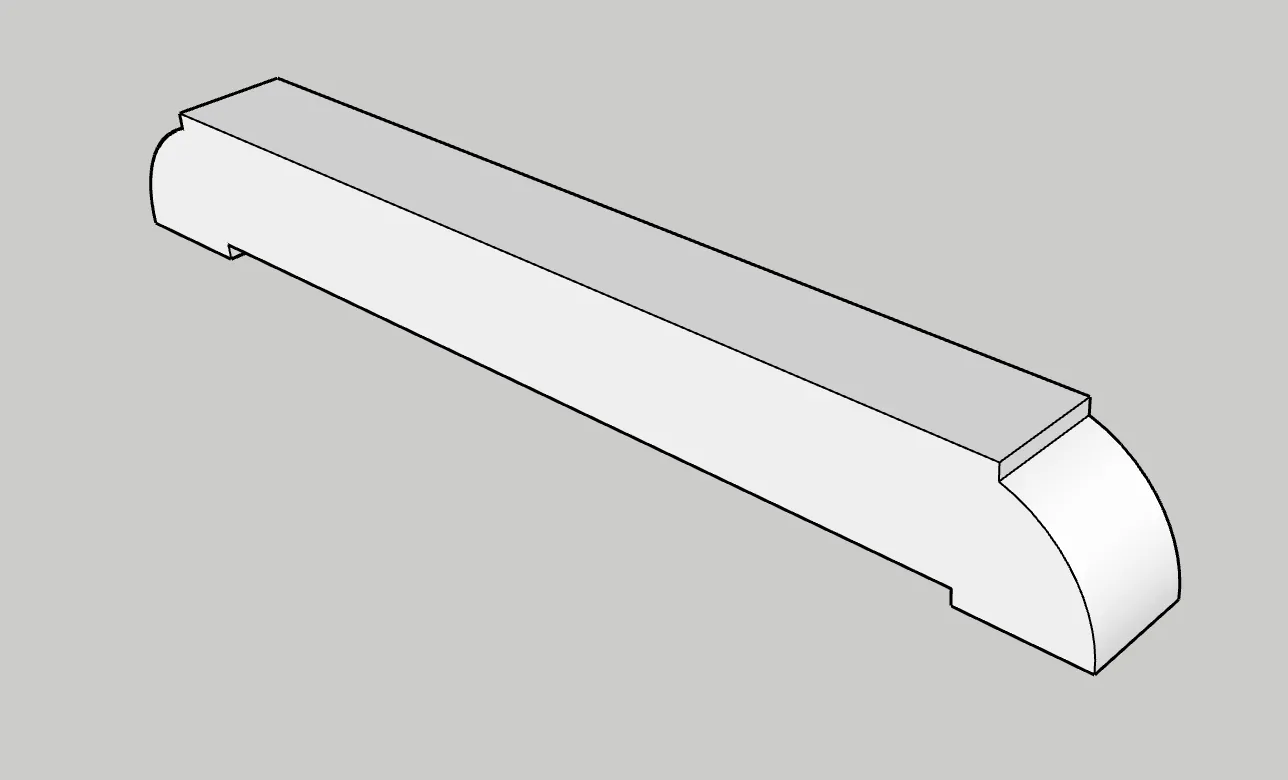
And the top:
Don’t stress too much over the measurements for these cuts. You can make them however you think will look the best.
Glue Middle Post of Leg
The middle of the leg is constructed similar to the bottom piece. Take the 3 boards precut to 22″ and glue them together.
You can run any of these glued up boards through the planer or go over them with a belt sander to remove dried glue and even up the boards.
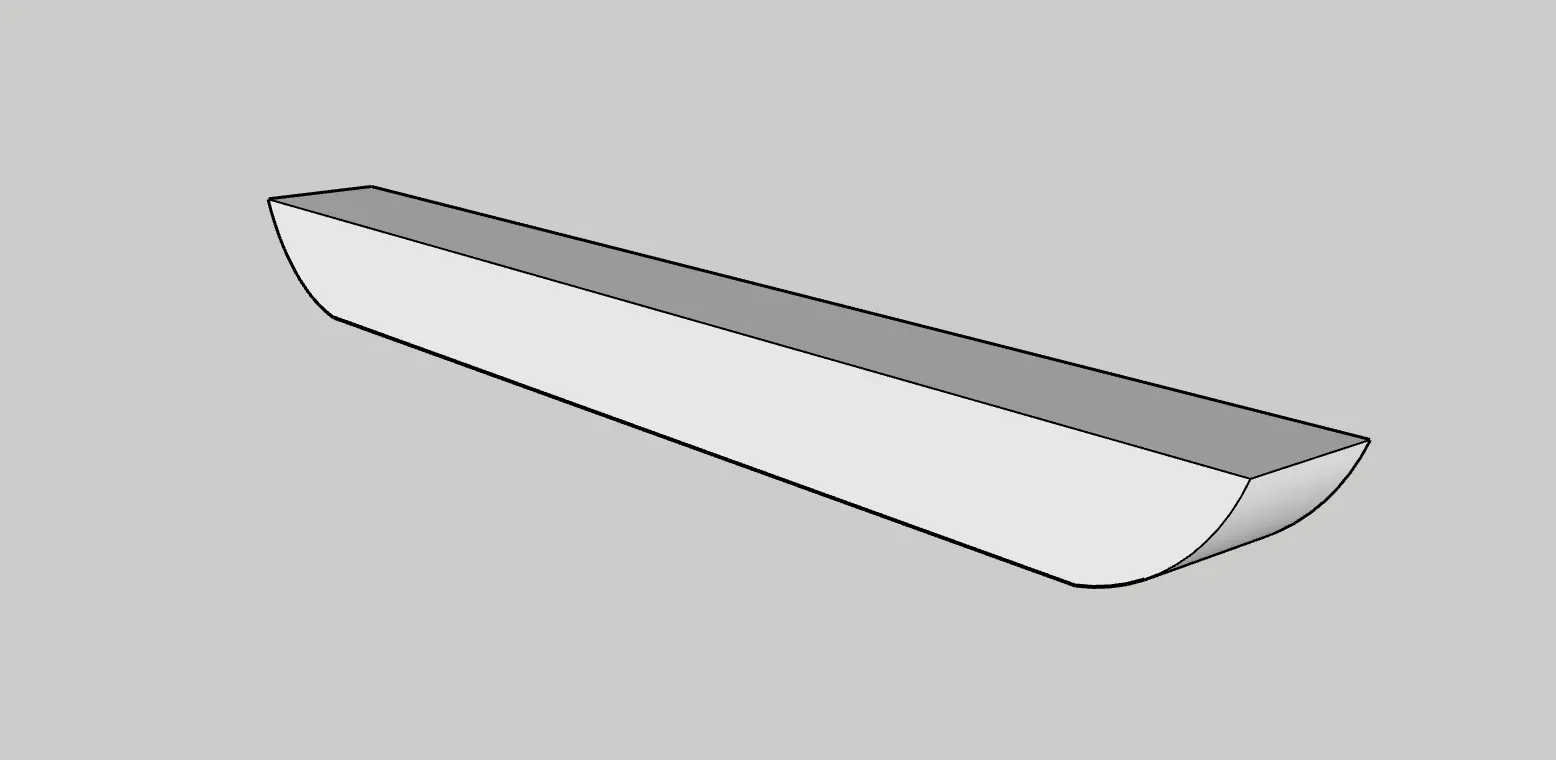
Glue Trestle Supports
There will be 8 supports total, 4 for each leg. This process goes quickly if you have the boards cut already and have plenty of clamps.
If you only have a few clamps then you will need to wait for the glue to dry before you can do more, but I have found that the glue dries quick enough that you can take the clamps off in about two hours.
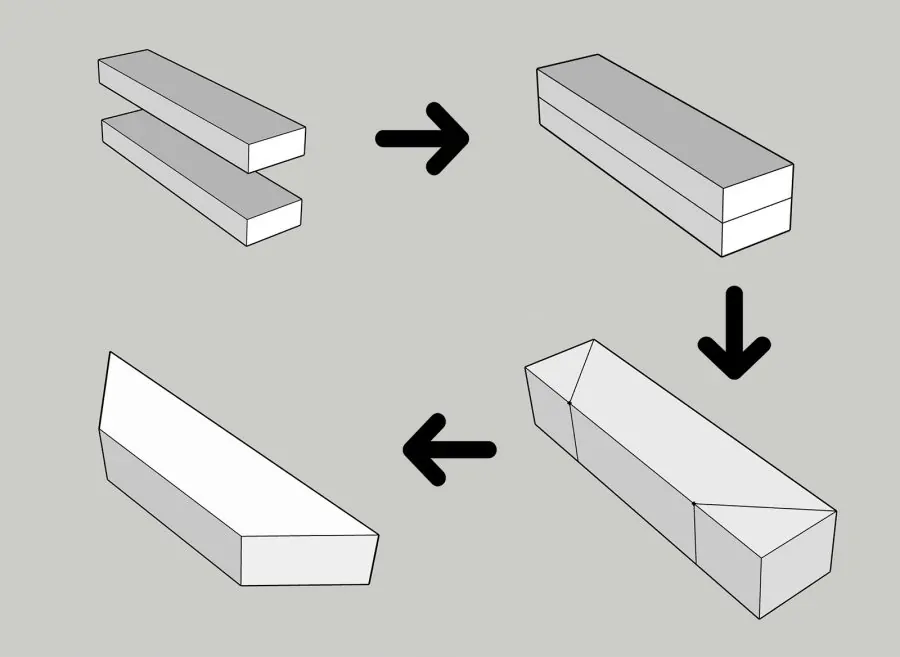
After the glue dries it is time to cut the corners off at 45 degrees. Just follow my awesome flow chart I made here:
Glue Stretcher and Stretcher Supports
These three pieces go between the legs to add strength to the table.
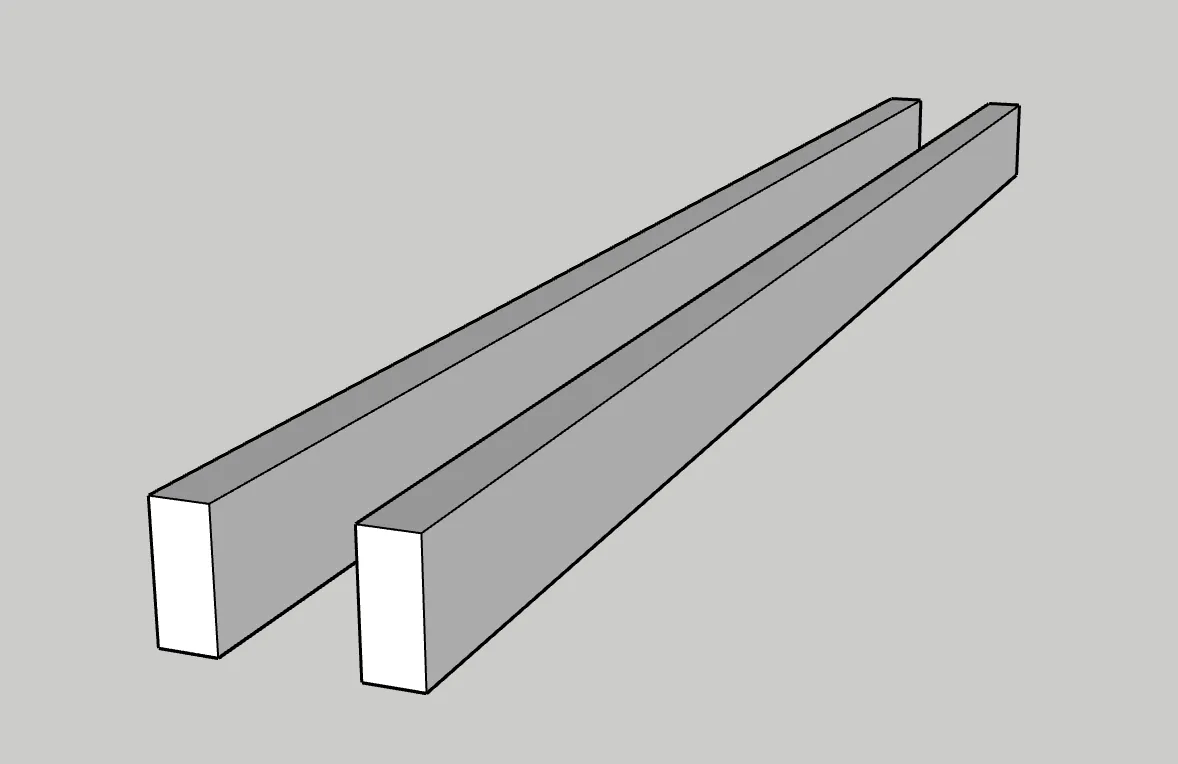
Glue the two stretcher boards (they are the two 64″ long 2x4s) together and sand/plane them down flat.
The stretcher supports are made in the same fashion as the trestle supports. Each one is 16″ long and uses two boards glued together. Once dry, cut the ends at 45 degree angles.
Step 3: Glue Up/Screw Together Trestle Legs
In this step you can choose to use your own method of building the trestle legs. You can use biscuits, dowels, dominos, or screws. In general, if it is glued well then it will be very strong. Sometimes you can use screws to help hold pieces together while the glue dries.
For my table I used a combination of biscuits and screws. The screws were put in the top and bottom of the legs where you can’t see them.
I only used biscuits and glue on the trestle supports.
In this picture I have cut the biscuits in the top, bottom, and middle of the trestle leg.
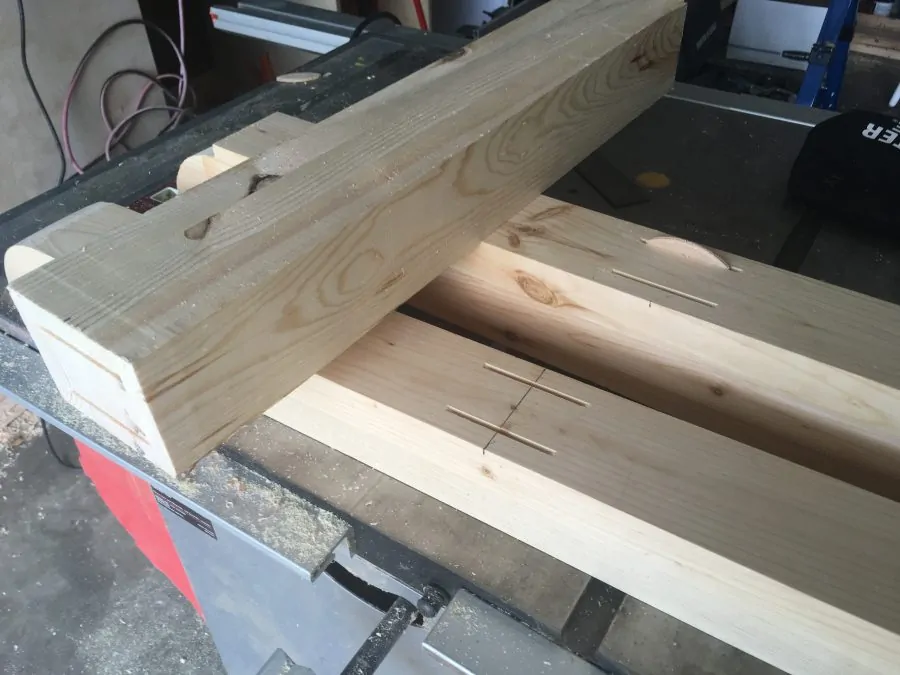
The main thing to remember here is to mark the center of the top and bottom and align it with the middle board. This way you know where to cut your biscuits and where to align it when you add glue.
Also, be sure to measure the distance from the top to the bottom of the leg on the left side and the right side when clamping. They should be equal. If they are off then you should be able to adjust the clamps until they match up. Let these dry completely before you release the clamps.
Next, I cut the biscuits for the trestle supports:
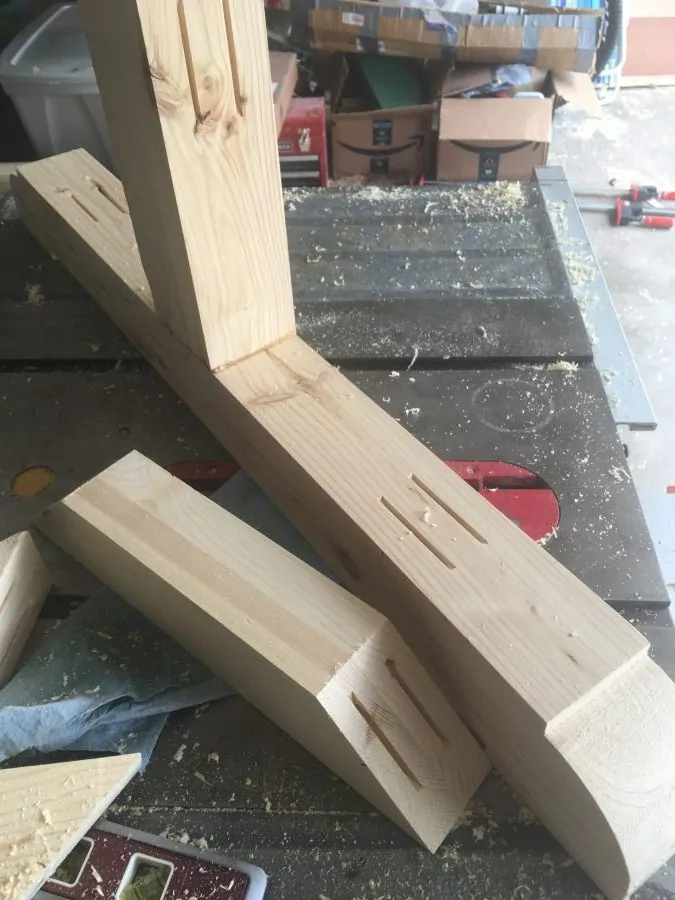
This part is a little more difficult because the supports are not as wide as the rest of the leg. So you will need to adjust your biscuit depth differently for each piece.
You can see this difference in the image below:
Add the extra space to your biscuit cutter when you cut the biscuits in the top, bottom, and middle portions of the leg.
To glue these supports pieces on, you can either use clamps, or simply drive screws through the support into the leg. These screws can be covered up later with wood putty if you don’t mind that look.
I used clamps to hold mine together.
Step 4: Add Stretchers
Adding the stretchers attaches the two trestle legs together and gets it ready for the table top.
For this step you need to mark the center of the X in the trestle leg so you know where to put the stretcher.
To attach the stretcher to the leg, I used 2-1/2″ pocket holes in the bottom of the stretcher. I liked this solution because it was quick and easy and you will only see it if you get underneath the table and look at it.
I marked where the bottom of the stretcher should sit:
And then drove the pocket screws in to hold it in place:
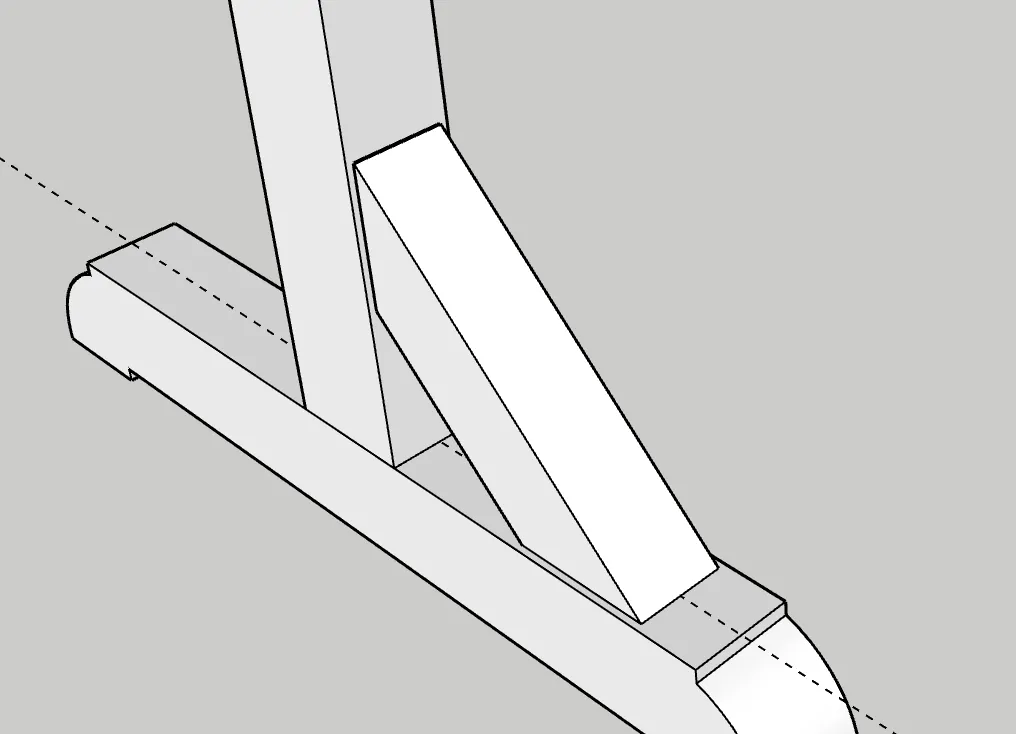
Then I put each of the supports for the stretcher in place. With these I drilled 1/2″ holes about 1″ into the supports, then drove a screw to hold the supports in place. Then I filled that hole with a 1/2″ dowel glued in place. When the glue was dry I cut the dowel flush with the support and sanded it smooth.
Next I added the two top stretchers (64″ long 1x6s) with 1-1/4″ pocket hole screws.
These pocket holes were made on the top of the boards. It will be covered up by the table top.
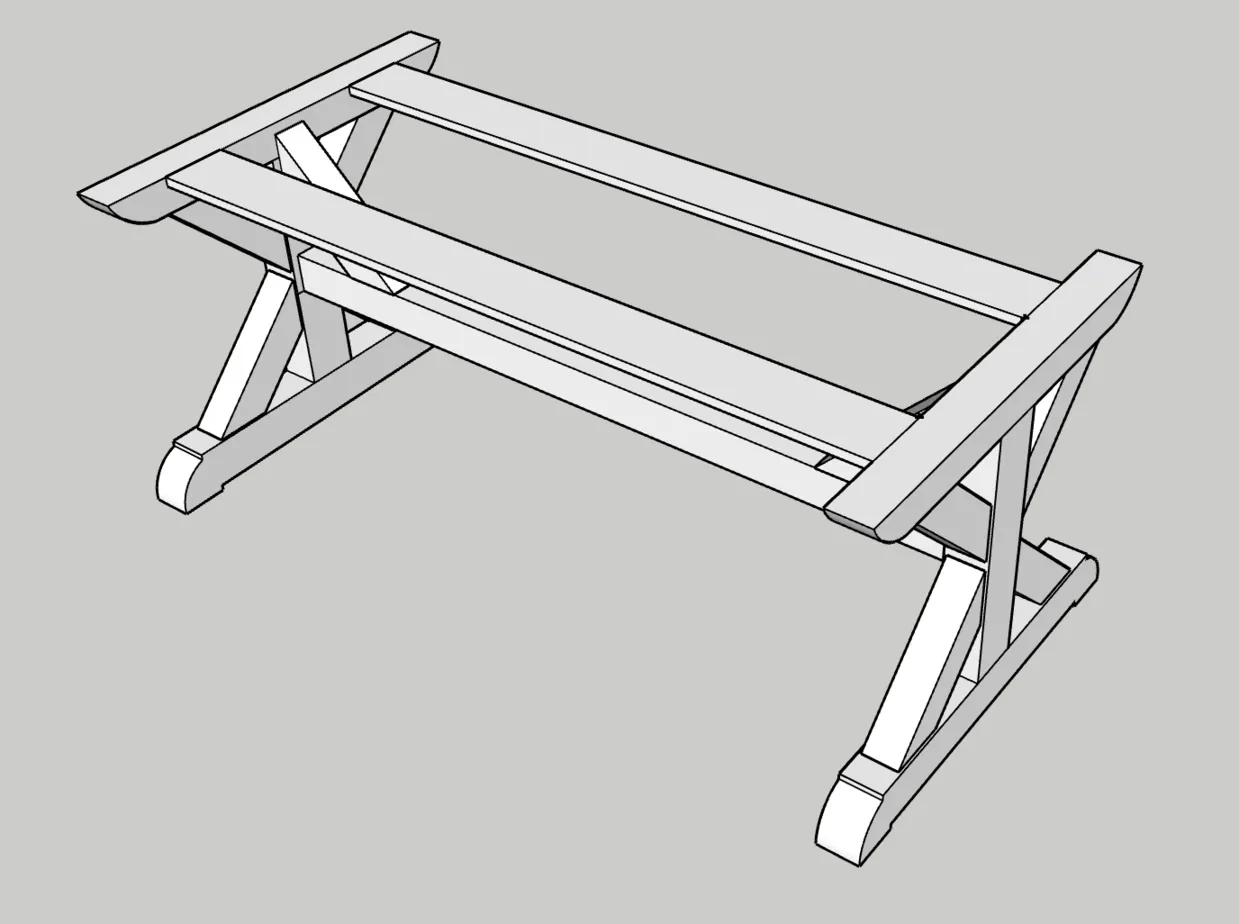
Now the actual construction of the base is complete.
Step 5: Cut Slots for Table Fasteners
This step is fairly simple, but important to mention. I used table fasteners for each leg that will allow the table to expand and contract with moisture changes. This is important for a table top like this one that could expand across its width.
I used my biscuit cutter to cut slots in the top of each leg:
You need to have the table top fasteners on hand so you can figure out the optimal depth and distance to make this cut.
You can buy them here.
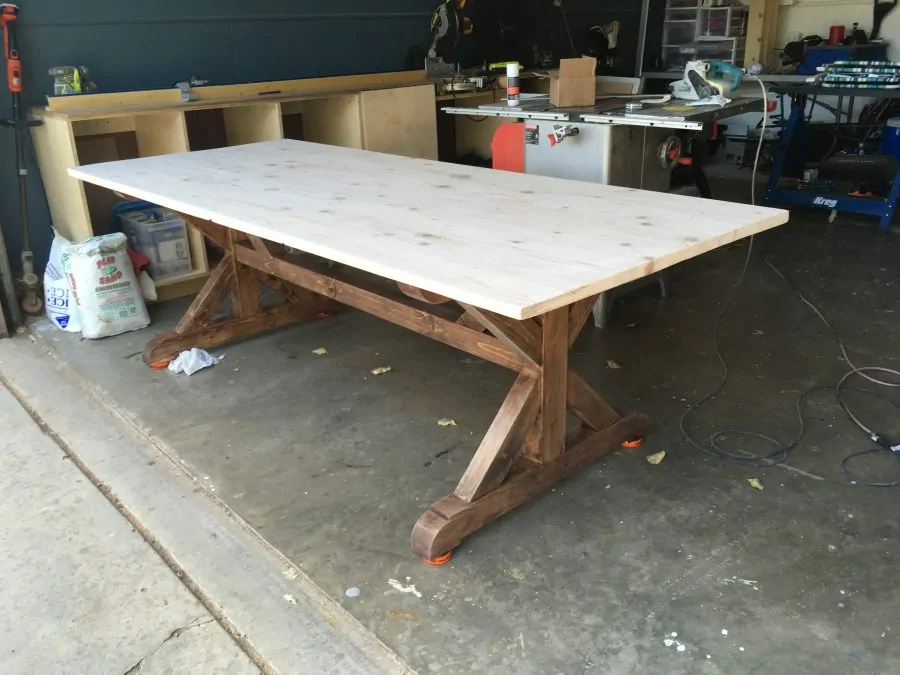
Step 6: Fill holes, Sand, Stain, and Finish
I really like to finish the base up before I even begin the top. I like this method because not only do you have a spot to put the top once you have it made, but it gives you an idea of how the top should look. How thick, how big, etc.
I used some stainable wood putty to fill some obvious cracks and holes. Then sanded with a random orbital sander and by hand in some hard to get to areas.
I used Walnut Minwax Gel Stain for this project.
The gel stain seems to be absorbed by pine more evenly the liquid stain, so you can (almost) bypass the wood conditioner part. Test this on some wood if you are concerned about the result.
Here is the bottom stained (I had the top made at this point).
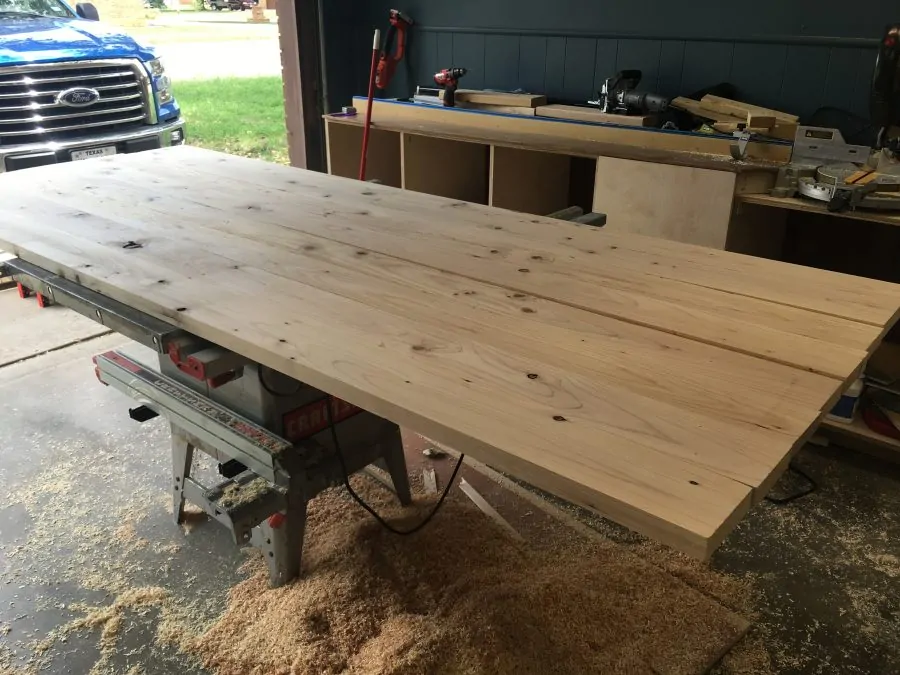
Step 7: Prep Table Top Boards and Glue Up
Now on to the 2x6s I am using for the table top.
One of the most important things here is to pick straight and true boards at the lumber yard. If you have some real twisted or cupped boards, it will be really hard to get a flat table top. There are ways to flatten these out, but over 8 feet it is going to be pretty difficult.
One thing you can do is to run the boards through the jointer or planer to get a good surface.
If you don’t have either of those machines then don’t worry, they aren’t vital to your table.
It is important to have a good straight edge to glue the boards together. One way to get a straight edge is to cut a straight edge on the table saw. I plan to make a tutorial covering this, but for the time being I recommend a solution along the lines of this.
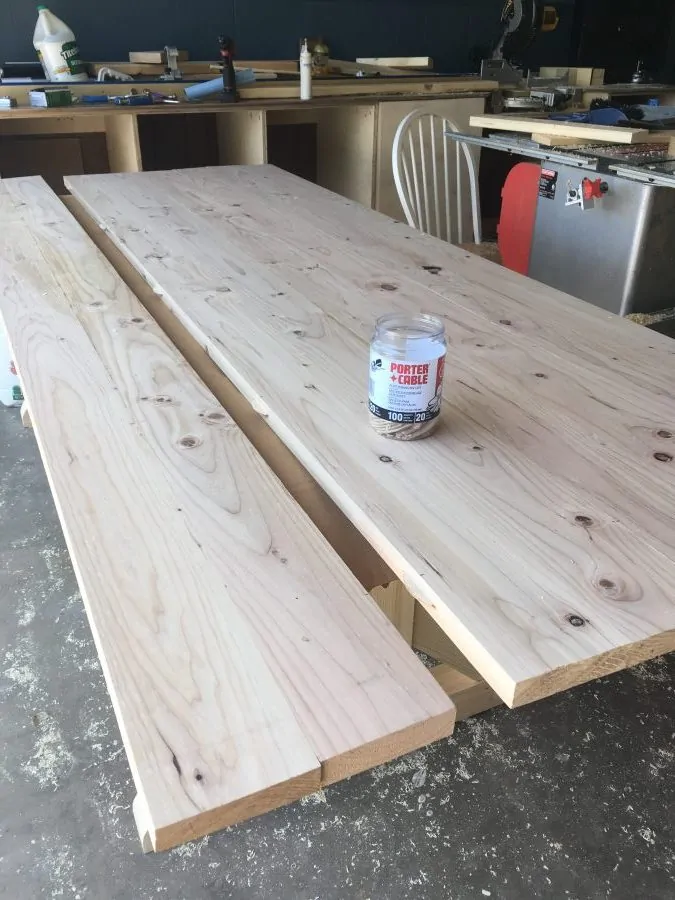
Align Boards and Cut Biscuits/Dominos
Once you get each board looking halfway decent, line them up and try to match up the edges and boards so that they look pleasing to the eye.
To prevent cupping on the table top it is best to alternate the grain direction of each board. Read this article for more info about that.
Although not completely necessary, I like to cut biscuits to help keep the top flush. Now, this isn’t a foolproof solution, but when you are gluing up such a large table it can be helpful because the glue is drying quickly.
Cut the biscuits for each board and do a dry fit to make sure it all fits and looks nice.
With a dry fit you are looking to see how well everything lines up, and to make sure that once you add glue that you will not have trouble putting it together.
We are almost ready to glue it together, but there are a couple things we can do first to make the entire table glue up easier.
Glue Boards Together in Sections
I did this when I glued up the table. It seemed to be easier to glue up pairs of boards, which made 4 pairs that I glued up together once they had dried.
If you have a planer >10″ wide you can even run these paired boards through the planer so that you get a completely flat surface.
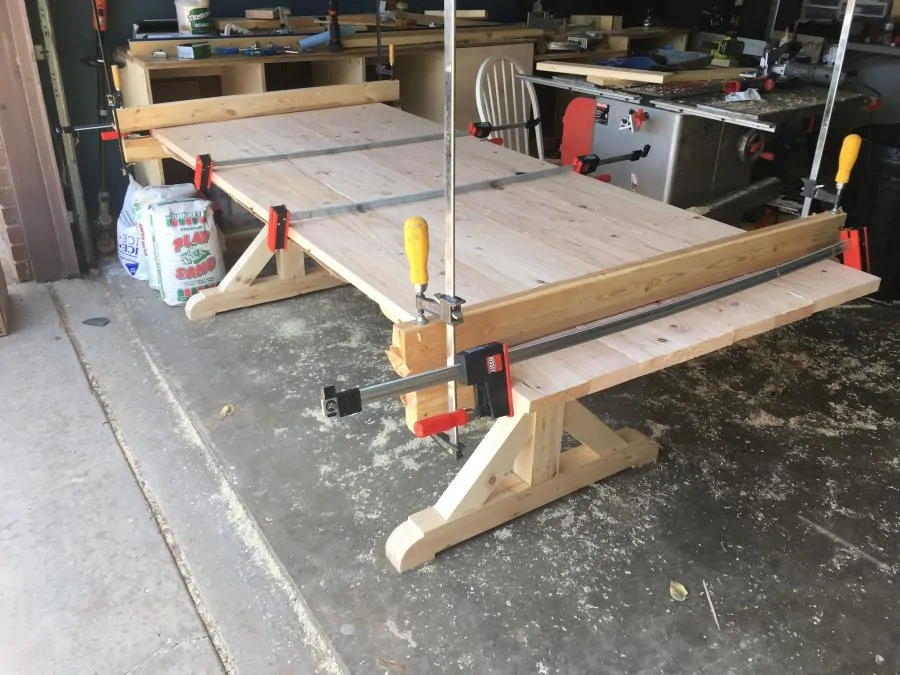
Clamping Cauls
No matter how flat you have made the surface for this big table, I would always use some clamping cauls, at least 2 for one on each end.
Clamping cauls help keep the table flat when you apply pressure with the clamps that tighten the boards together.
Sometimes when you tighten the main clamps the boards can bow across the width of the table, raise up or down, etc. even with the biscuits. The cauls prevent that and ensure everything stays flat.
The best tutorial I found at making cauls was here. I made a couple 48″ wide cauls for my glue up.
Glue Table Top Together
I made sure to set out my clamps and prepare them for glueing the top together. Once you start spreading glue the clock will start ticking. It can be a little stressful, but as long as you are prepared then the glue drying too quickly will not be a problem.
You can use whatever kind of clamps you like, just make sure they are wide enough to clamp the entire table. The more clamps the better, but I only used 4 because they are somewhat expensive at 50″.
Now spread wood glue along the edges of the boards and on the biscuits, and squeeze it all down together.
Don’t fret about any imperfections at this point, what’s done is done. It is now called ‘character’, and if you are woodworking at any capacity you will have to learn to live with that idea (As a perfectionist I don’t really do this).
With only two cauls I put them on both ends of the table. It can be helpful to have more so that you can clamp them across the table. It just depends on how perfect you want it to be and what your table calls for.
Step 8: Filling Holes, Sanding, and Flattening Table Top
At this point most of the hard work is over with, and you are left with the fine finishing tasks. You really have to change gears now, because you won’t be doing any more sawing or cutting. It is mostly sanding and staining and finishing.
Fill Holes in Pine Table Top
If you have high quality wood (hardwood or wood without knots), then you may not need to fill any holes in your table top. The 2x6s that I used had plenty of knots and small cracks.
It is not always vital to get these holes filled, but since there was a chance that this top could be used for writing, I didn’t want there to be big holes for obvious reasons.
For this process I used some CA Glue (Cyanoacrylate Glue, or super glue) from Starbond to fill in the gaps and produce a smooth surface.
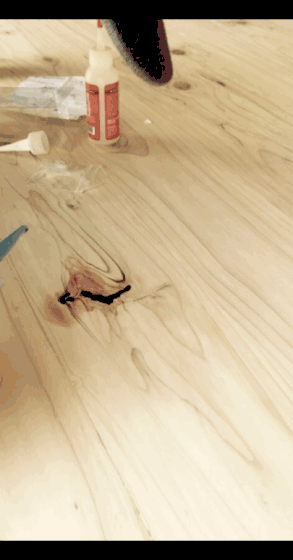
I really enjoyed using these glues because they dried so quickly I could fill in the gaps, sand it, and then fill in some more if needed.
The accelerator spray works great for speeding up the drying time and really eliminates much drying time.
This was my favorite one:
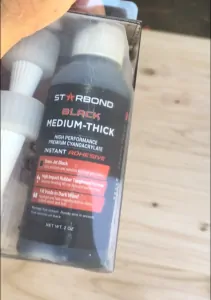
The black works well when filling in knots, and it flowed smoothly into the smaller cracks. Here is a before and after pic. I used some of the medium-thick black and some clear, and then hit it with the belt sander soon afterwards.
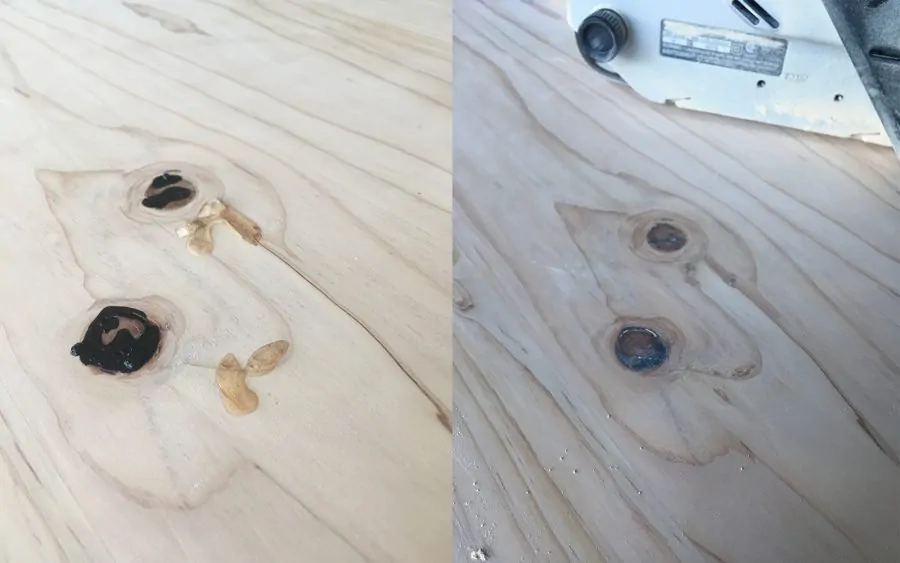
It is a life saver for a knotty pine table top. If you would like to get some you can go here (affiliate link) to check out some of their very useful products.
Flatten Table Top
If you have done a really fine job milling your boards and glueing the table top up, then this part should be short and sweet or maybe not even necessary.
Also, you of course have the choice of how flat to make your top. If this is not particularly important, then you can just take a random orbital sander and smooth down the seams and any glue residue and call it good.
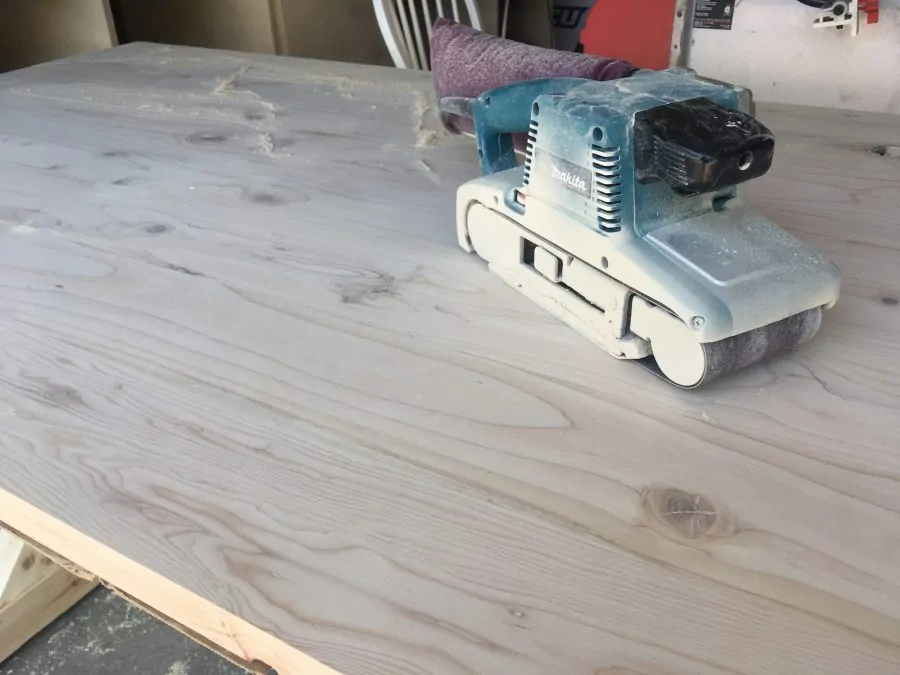
For a flatter table, you either need to use a belt sander or a hand plane to lower high spots.
I wanted to use a hand plane for this table, but it was going to be more work than necessary. A belt sander is less physical work and it works fast.
The best way to run the belt sander is to use a straight edge across the top of the table and find the high spots. Mark these areas with a pencil so you can tell where to sand.
With a 80-150 grit you can take off a lot of material with a belt sander, so be sure to keep the machine moving so you don’t sand down one spot.
Work your way up to 220 grit, sanding the entire table. Make sure to sand out any deep grooves that may have been made with a coarser grit, because these will show up later when you stain and finish the top.
After you get the top flat enough for your liking, it is time to run a random orbital sander over the top. This generally takes out any grooves or scratches that the belt sander may have made.
Work from 150-220 grit sandpaper with the random orbital sander. I don’t recommend going any finer that because the finish and stain will not take as well.
The top should now be ready to stain and seal.

Step 9: Stain and Finish Top
You can use any stain of your choice, but with pine I chose to go with a gel stain. I have read where gel stains tend to work better with pine because they don’t blotch as easily.
You can use a wood conditioner (as detailed in this post), but this is supposed to not be necessary with a gel stain.
I found that for the most part this is true, although some blotching still occurs no matter what with pine.
For the gel stain I simply rubbed it on with a cotton cloth and made sure I got full coverage.
Finish
For the finish I used 5 coats of General Finishes Satin wipe on urethane. Sand lightly with 220 grit in between coats (I did one coat per day – finishing can be a slow and tedious process).
Before the last coat I sanded with 300 grit, and then wet sanded (meaning I sanded while I was putting the last coat of finish on) with an even finer grit.
Lastly, be sure to lightly sand down any rough spots or dust particles, then buff the top out with some type of wax. It should be very smooth at this point.
Step 10: Attach Table Top and Finishing Touches
To attach the table top, you need to center it on the legs. There are various ways of doing this; the key is to get it centered and then start attaching the table top fasteners.
Use the slots that we cut in step 5 to slide the fasteners into.
I used 4 on each leg, and it seems to be attached well.
One other thing I did was put some rubber pads on the bottom of each foot on the legs. This is simply to protect not only the floor, but also the feet on the legs. It should keep it from sliding around as well, but I don’t expect that to be a problem anyway.
At this point I simply made sure to clean everything off and shine it up a little with some wax. It is pretty much finished now, just waiting to be moved into its place of use.
Conclusion
This table is a simple design that allows for tons of customization and accommodates for all kinds of different skill levels.
One thing I enjoyed the most about building it was how I didn’t have to worry if it would be strong enough. The thick boards are part of the farmhouse style, so I knew it would sturdy.
If you choose to build a table like this, don’t hesitate to ask me any questions about my process, and send pictures of the finished product if you do build it.
I plan to release a comprehensive pdf of this build which will include a more detailed step by step process with better illustrations.
Till next project, have fun building!
looks really nice good work.