
Do you like the industrial look for your home decor? Most likely you have seen industrial styles shelves on Etsy and stores like Target. It is quite a popular style now. But you don’t have to buy this stuff – you can make it yourself.
This article will show you how to make an industrial shelf bracket using pipe bought from a hardware store. There are a couple different ways of making it. I will show one here and talk about the other.
[toc]
Materials
Everything required for this can be bought at a hardware store. I have found that these products are pretty universal in the style, but sometimes stores can be out of stock for certain sizes. If this happens to you then hopefully you have more than one hardware store near you.
1. Black Pipe Flange
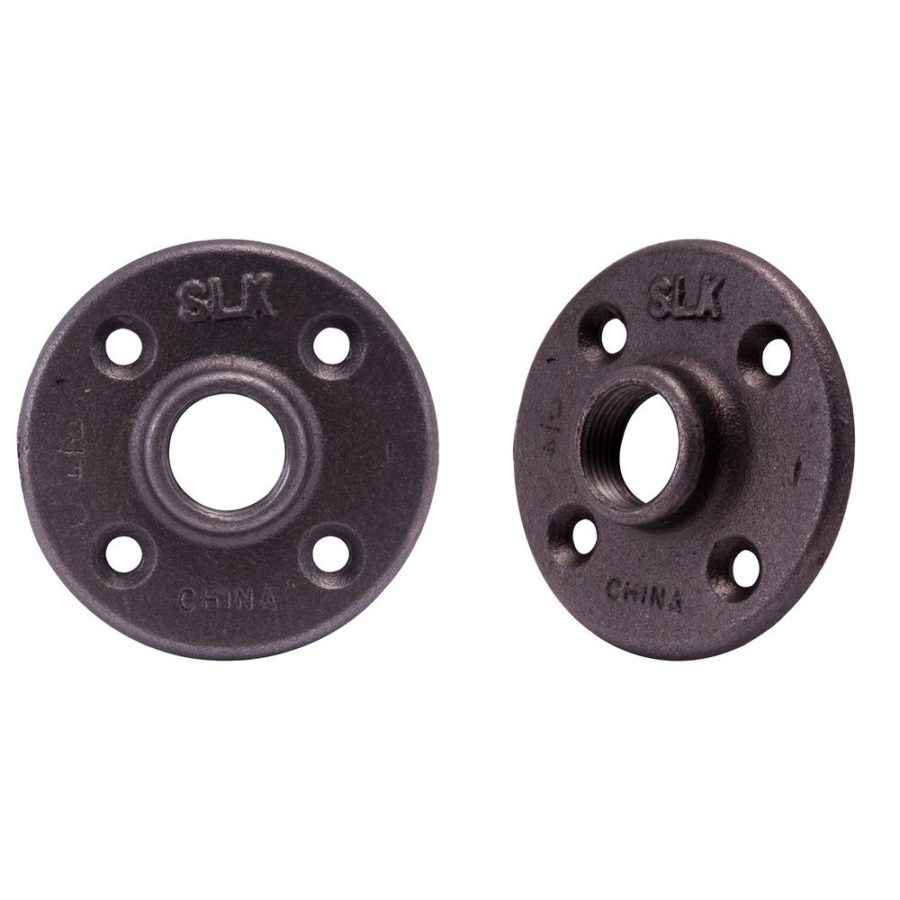
You need one of these for each shelf bracket that you make. I generally stick to 3/4″ because I think it looks the best with wood like a 2×4, but 1/2″ will work too in certain situations.
If you can’t find one I suggest buying online it from Home Depot or Amazon.
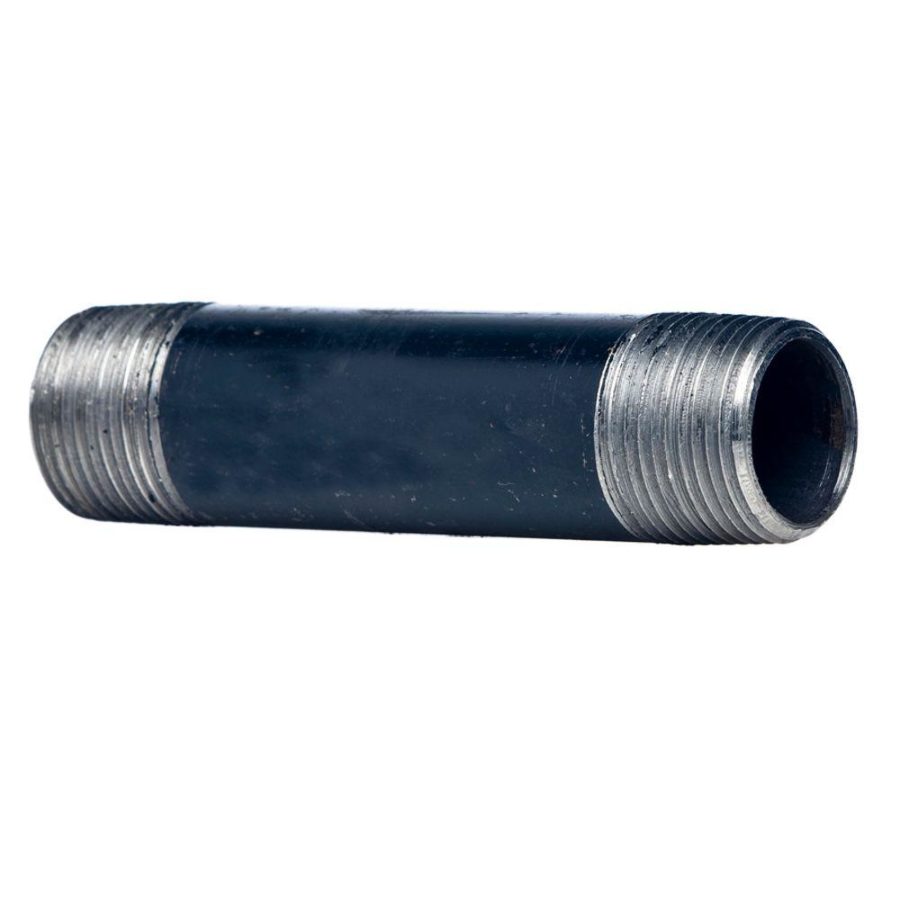
2. Pipe – Cut to Length or Stock Length
If you plan on cutting pipe to length, you will not be able to put a cap onto the end of it unless you get threads machined onto the end. This means you can either leave the end open, or weld a small piece of flat steel onto the end to cover the hole up. In this case you will need an arc or wire welder and a bench grinder.
If you don’t know how big your shelf will be now is that time to find that out. You will need to buy black pipe cut to the correct length.
If you have a metal chop saw, then you can cut it at home obviously.
This is what you should be looking for:
There are two options from this point on:
- Cut pipe to length
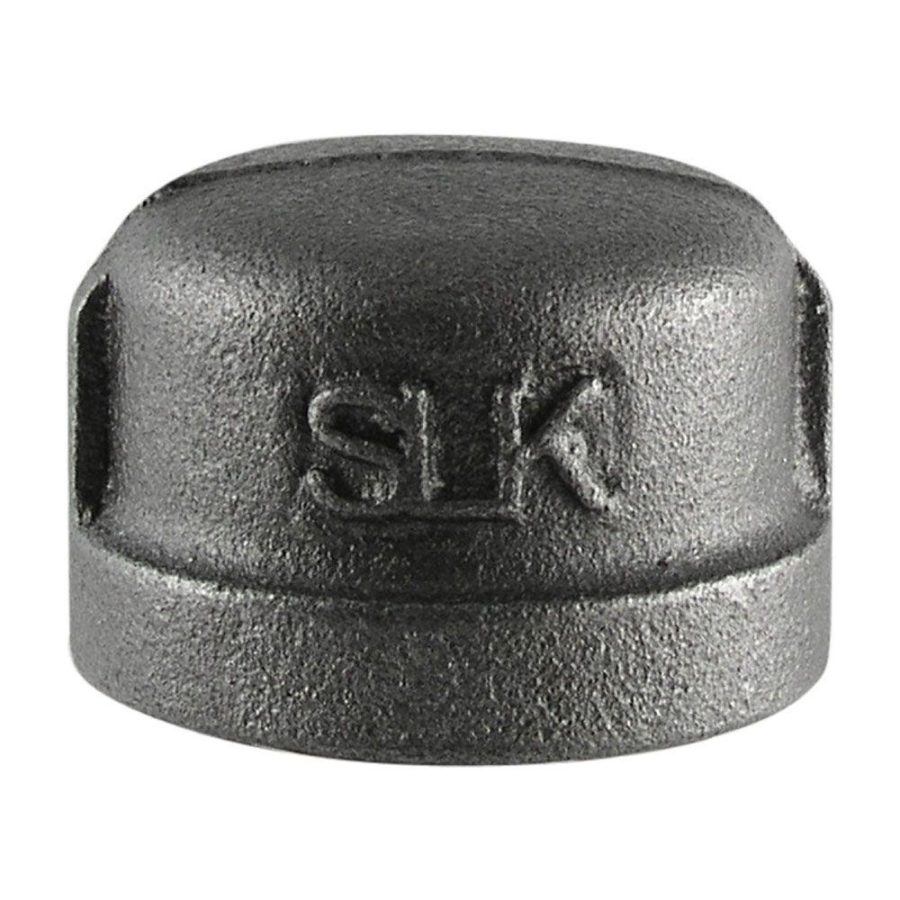
- Leave threads on the end and screw a cap on like this:
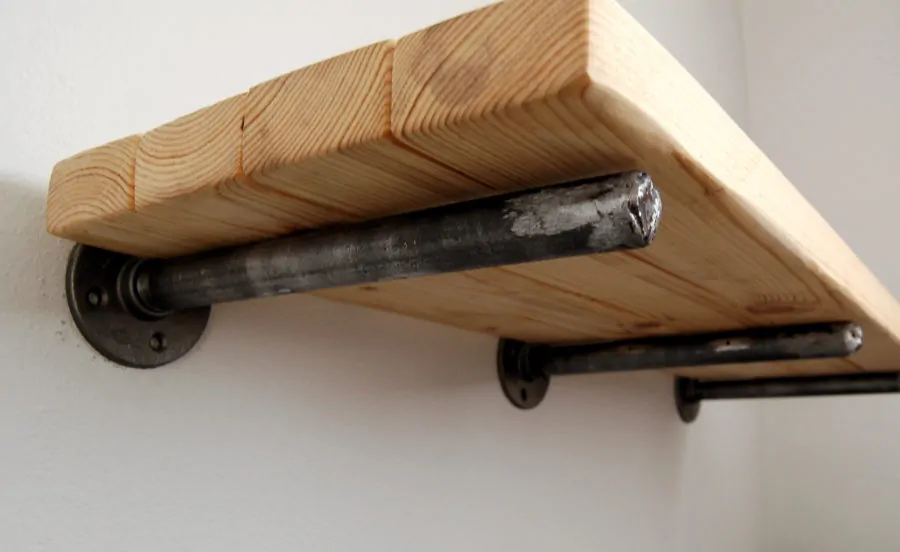
For a finished look along the lines of this:

How Long Should it Be?
This is mostly a personal preference, but there is a general rule that I use.
For cutting pipe:
I cut the pipe the same length as the width of the shelf. This is measured from the end of the pipe including threads to where I cut it. You can see this in the image below:
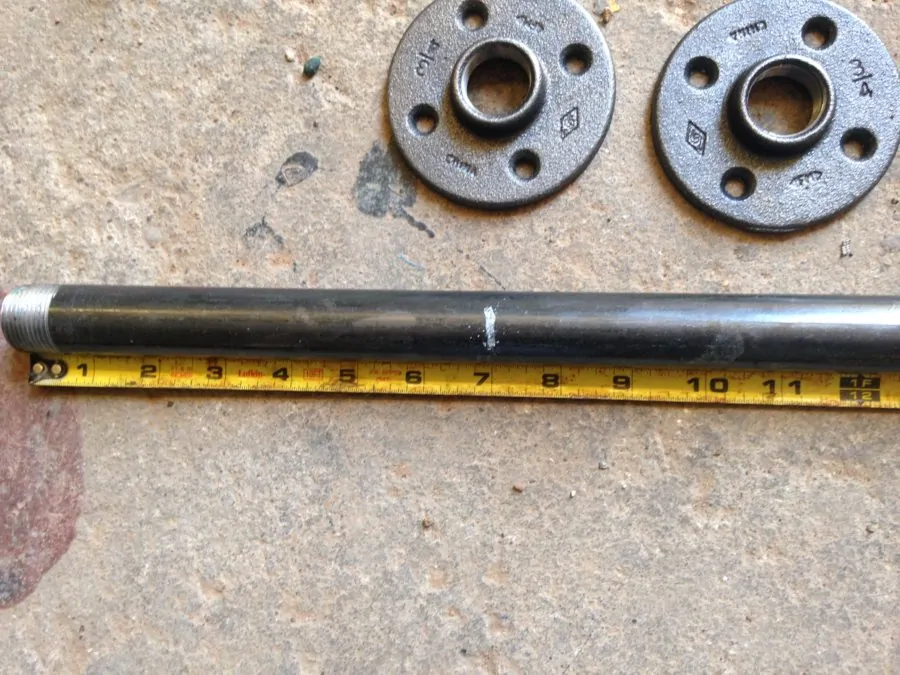
In this case I will be using two 2×4’s side by side. Since each 2×4 is 3.5″ wide, the total width is 7″.
I bought a piece that was 18″ long and I was able to cut 7″ from each end to utilize the threads.
You need the threads on at least one end. It will screw into the flange later on when you go to mount it on the wall.
For Capped Pipe
If you plan on putting a cap on the end of the pipe then you should plan for the shelf to sit in between the cap and the flange. You can see in the photograph above how the shelf does not sit on top of the caps. This would make the shelf sit unevenly.
These pipes come in pre-made lengths. So unless you plan on getting a pipe cut and then threads machined into the cut end, choose your shelf width according to the lengths you find at the store.
I recommend grabbing a tape measure while your at the store and putting some pipe into the flanges with caps on and seeing exactly what the width is.
3. 1″ Wide, 1/8″ Thick Flat Steel (For Pipe that is Cut)
If you are cutting your pipe to length and welding a cap on, then you will need a piece of flat steel. It needs to be in the neighborhood of 1″x1/8″ for 3/4″ pipe.
The 1/8″ thickness makes it easier to weld. For 1/2″ pipe you will likely want 3/4″ wide steel.
Tools Needed
The tools that you need for this project will depend on how you plan on making it. If you are not cutting the pipe to length then you will not need any tools really. Just buy the pipe at the store and put it together for your shelf.
You may need some tools for building the shelf, but that is a whole different subject.
For cutting the pipe you will need:
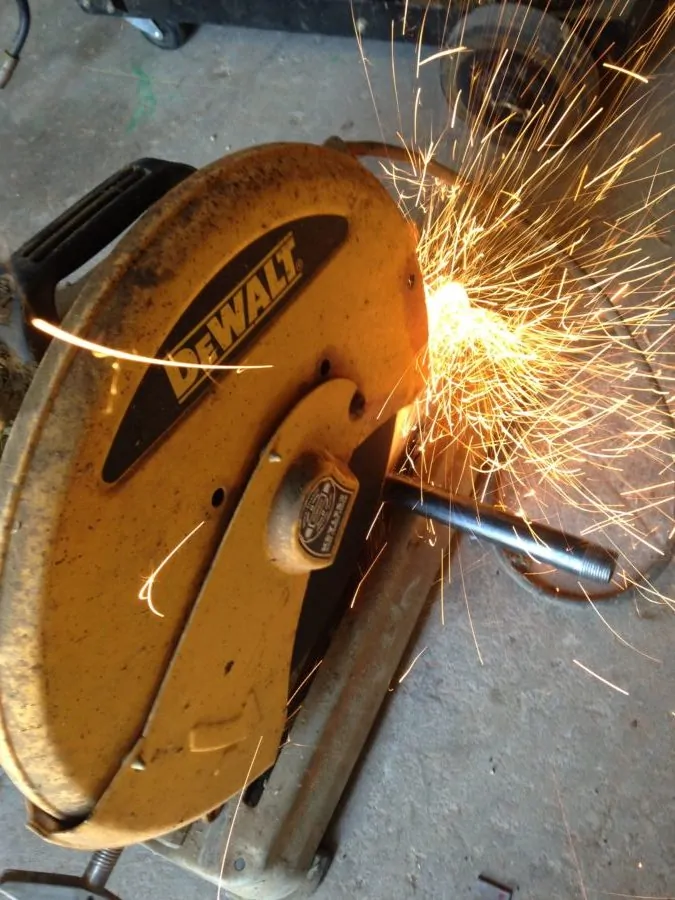
1. Metal Chop Saw
Like this one:

2. Arc or Wire Welder
If you don’t have one of these yet then I recommend finding a suitable beginners guide to welding. Otherwise I assume you know how to use one. You will need a welder for welding the flat piece of steel onto the end of the pipe.
3. Bench Grinder
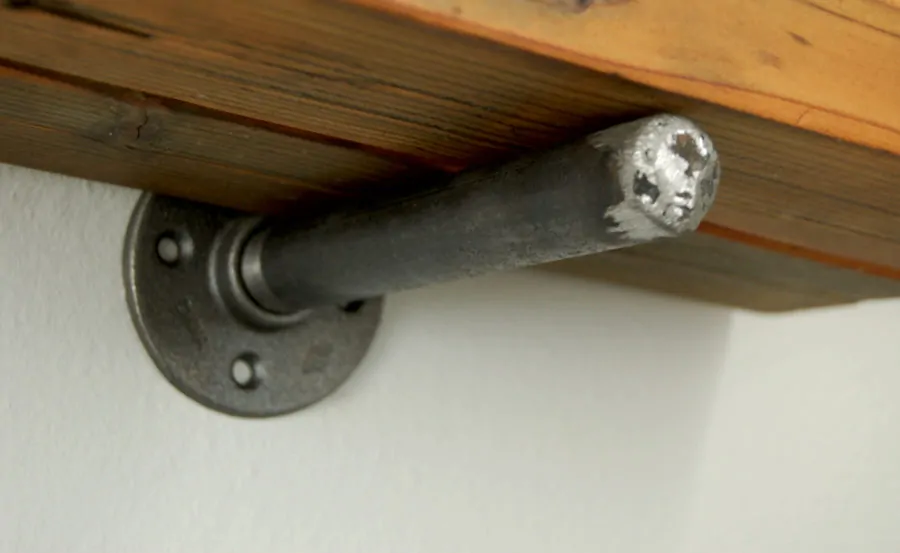
After welding the end onto the pipe you will want to grind the weld down so it looks better. I also like to get it flat so that the shelf can sit flat over the end like in this picture:
Step by Step – For Cut Pipe
1. Measure Pipe and Cut
Use the width of your shelf to determine how long the pipe needs to be. It should be cut measuring all the way from one end like in the photo:
Mark and cut it:
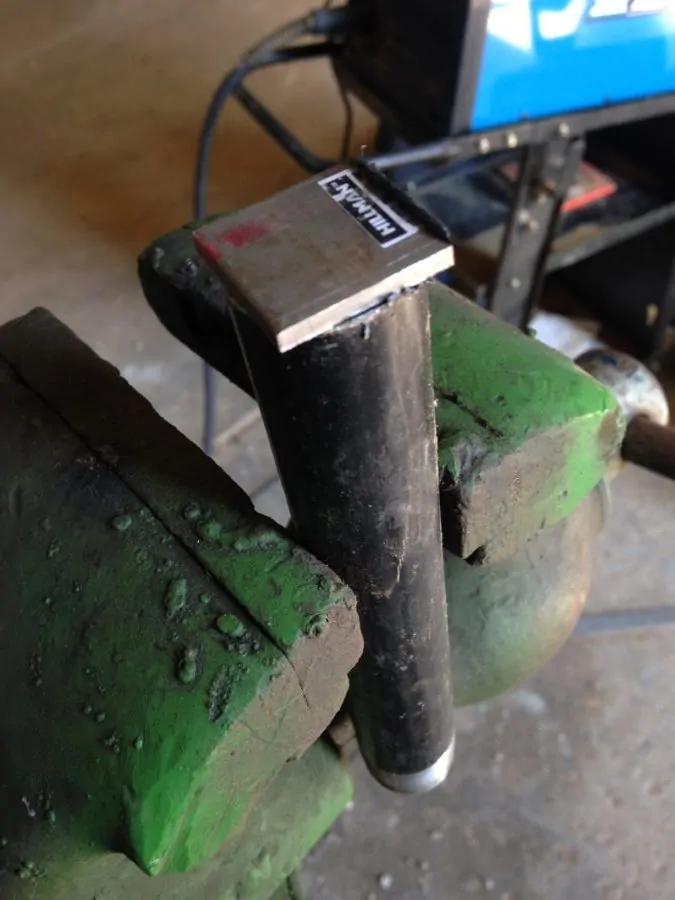
2. Cut Flat Steel Piece
For a 3/4″ pipe I usually use a piece of flat steel that is 1″ wide and 1/8″ thick.
Take this piece and measure 1″ from the end so you’ll end up with a 1×1″ square. This will be big enough to cover the end and weld to at the same time.
3. Weld Cap On
Take your pipe and put it in a vice with the cut end on top. Place the flat steel square on the end and weld around the edge.
4. Grind Weld Down
Take it over to the bench grinder and grind down the rough edges so that a shelf can sit flat against it.
At this point you’ll want to look it over and clean any imperfections up.
You could also paint it or put some kind of finish on it at this time too. Personally, I prefer the raw steel look with the wood. It fits in very well with the whole industrial look.
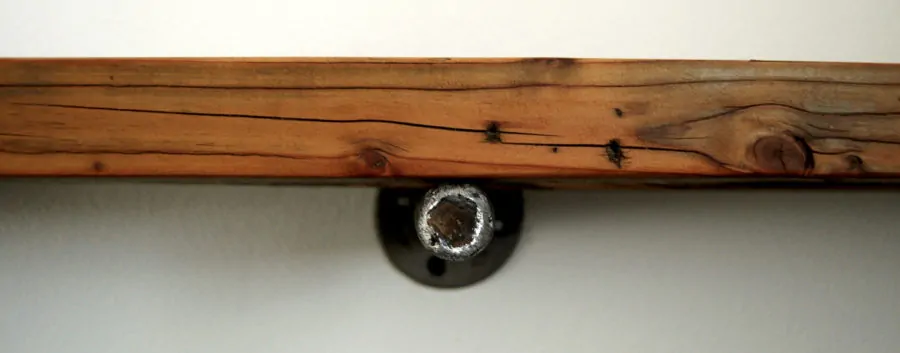
5. Drill Hole Through Pipe (Optional)
This step is optional because it is not necessary. I drill a hole through the pipe so that I can use a screw and secure the shelf from below. I put the screw through the hole in the pipe and then drive it into the shelf.
The reason I do it is because I like to have a secure shelf that I know is not going to come off the wall.
You need a drill press for this step.
Drill a hole through the middle of the pipe. Use a 1/8″ drill bit or bigger, depending on what screw size you will use.
How to Install
To actually use these brackets you need to first screw the flange onto the wall. Definitely find a stud first so that it will be a secure mount.
Then take the pipe and screw it into the flange. If you drilled a hole through the pipe, make sure that the holes are on top and bottom.
That’s all there is to it.
About the Shelf Part
The easiest shelf that you can make for these brackets is a couple of 2x4s put side by side. I would probably take a couple pocket holes and secure them together.
But it can get much more advanced if you want it to. For example, I made one for a customer once that used 4 2x4s and three brackets total. It required fairly long pipe to make it work, but it was definitely a high quality shelf.
Conclusion
I hope this tutorial has given you a good understanding of how to make a good industrial shelf bracket.
If you don’t have all the tools for it you can always put the cap on the end. I prefer the flat look of the cut and welded piece. I will leave it up to you to decide which is best.
As an alternative to welding a cap you could use a black pipe cap instead. To accomplish this, you could measure the length of shelf bracket that you need, add an inch or so to length of pipe, and have Home Depot cut the pipe and then cut the newly cut and thread end. Cutting and threading a pipe is \free at Home Depots in Illinois.
Definitely Matthew, I think that is a great look as well, thanks.
Thank you, Showing the shelves to us.
by 37509.