A lumber storage rack is almost a must have if you plan on doing any woodworking. There is nothing worse than having several boards of wood laying around on the floor or taking up your workspaces.
I have dealt with this problem off and on for a while. It for sure makes it harder to get things accomplished.
I finally decided to do something about it.

I went out and bought some conduit (cheap), 2x4s (cheap), and lag screws.
If you have some basic skills like drilling holes, driving screws, and cutting things, then you should be able to replicate what I have done here.
And it is fully customizable. Build it to suit your space and needs.
Follow along as I lay out step by step how I build this lumber storage rack with conduit.
[toc]
How To: Build a Lumber Storage Rack with Conduit
The materials and tools required for this project are easy to get and fairly cheap. If you plan on building a storage rack for wood, then most likely you will already own the stuff needed.
Materials
- Pine 2x4s
- The length needed depends on the size of your storage rack. Each shelf requires about a foot of space. I suggest just buying 3 8′ 2x4s because they are cheap and you will have enough for sure.
- 1/2″ Conduit (Length = (Width of shelf) x (Number of shelves) x (3))
- 6 Lag Screws (5″ x 3/8″) with washers
(Optional)
- 2 bungee straps
- 4 anchor rings
Tools
- Miter Saw
- Cordless Drill
- Impact Driver (Optional)
- Hacksaw (with metal cutting blade)
- Stud Finder
- Level
- Drill Bit Set
- Spade Bit Set
- Nut driver for drill or impact driver
Step 1: Determine Size and Cut Boards
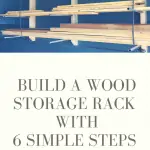
You should find a space where you plan on installing this storage rack.
My garage has an area close to the door with no wall cabinets that I found would be a good spot.
If you don’t have a stud finder, I recommend getting one.
The one you see in the picture is this:

They are cheap enough you should just go ahead and get a couple. I have multiple so I can always have one nearby.
If you want to use 4 support columns then that is even better. More columns will equal better support for smaller boards. I only did 3 because it lined up with my studs in the wall better.
Only install columns where there are studs present.
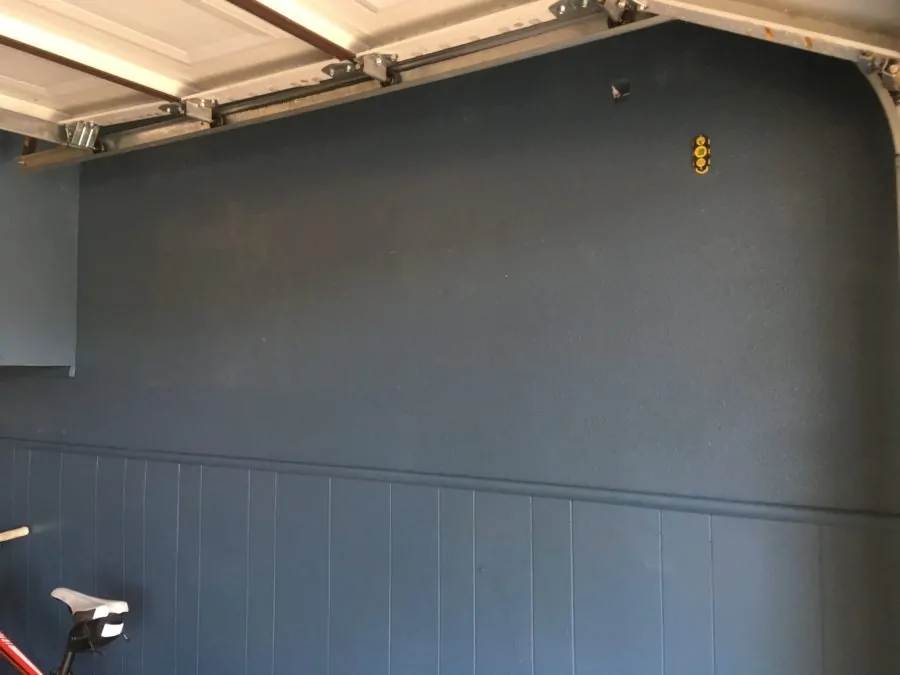
Cut Boards
Determine the height of your storage rack. There should be nothing real tricky about this part, just simply measure the height and cut each board to the correct length.
You can cut an angle off the bottom like I did to make it more aesthetically pleasing.
Step 2: Mark and Drill Conduit and Lag Screw Holes
The next step is to drill the holes into each of these shelf supports.
You will need different holes for the conduit and lag screws.
Mark Conduit and Lag Bolt Holes
The conduit holes need to be spaced apart according to the height of each shelf. I spaced mine 16″ apart, but you should do what you think is appropriate.
Start at the bottom of the support, and mark your holes from there on up.
Use a spade bit to drill all the way through the board. The bit size should be the same size as the outside diameter of your conduit for a snug fit.
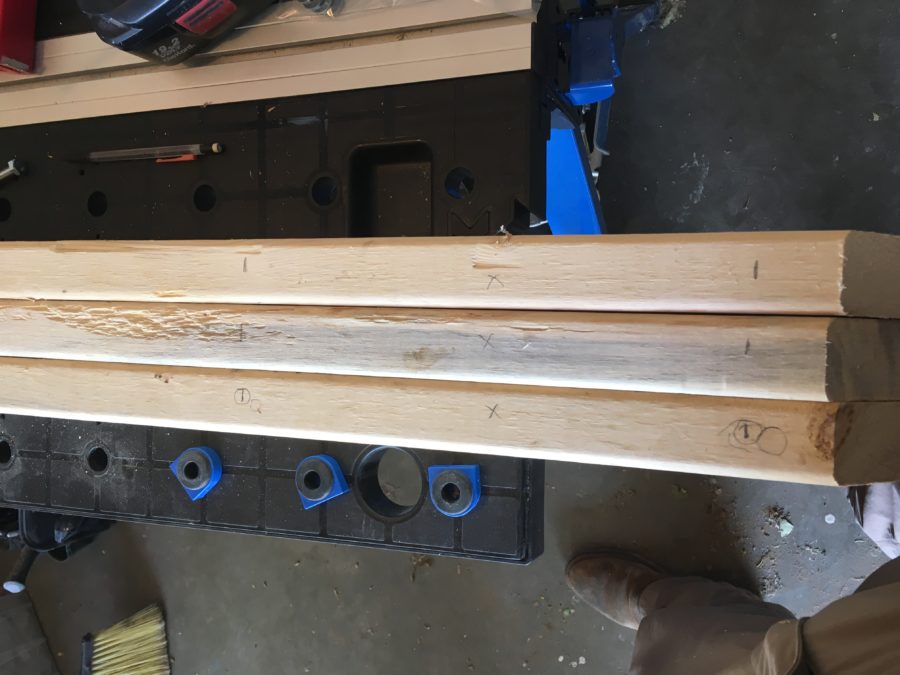
The conduit holes are marked with a dash.
The lag screw holes are marked with an X. I have marked the bottom one in between the conduit holes. There are two lag screw holes on each support column, one towards the bottom and one up top.
The lag screws will hold the shelf supports to the wall. These holes will need to be drilled with a 3/8″ drill bit.
It is important to drill straight through the board. You can accomplish this a few different ways, one being to use a drill press. I used my cordless drill because it has a level sight gauge on the back. This way I can set the board on a level surface and then keep the bubble in the middle of the target (shown in image below). This ensures I have a true hole straight through the board.
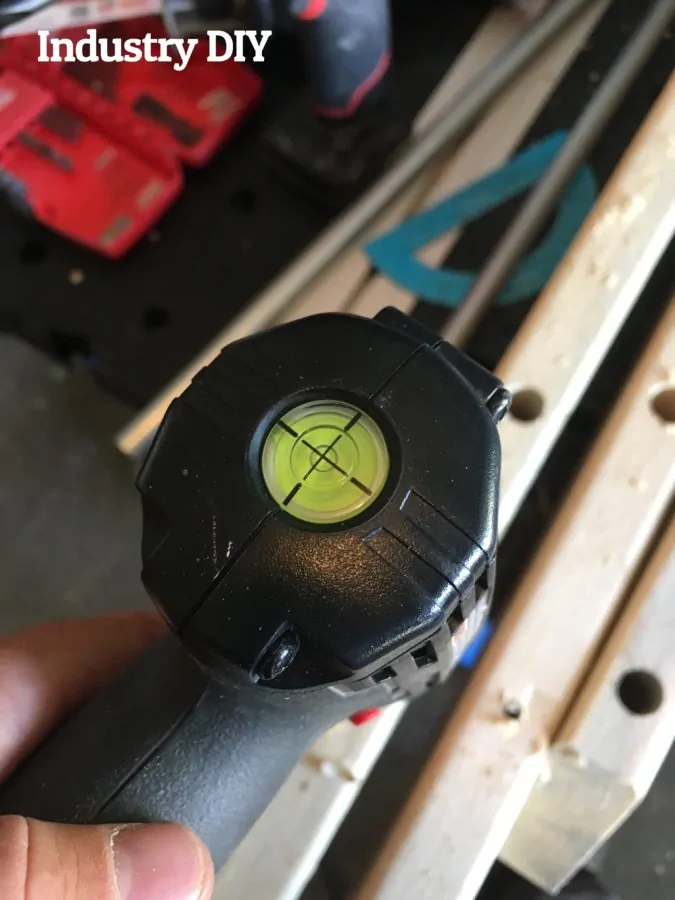
Use the spade bit to drill the conduit holes, and the 3/8″ bit to drill the lag bolt holes (all the way through the board for both).
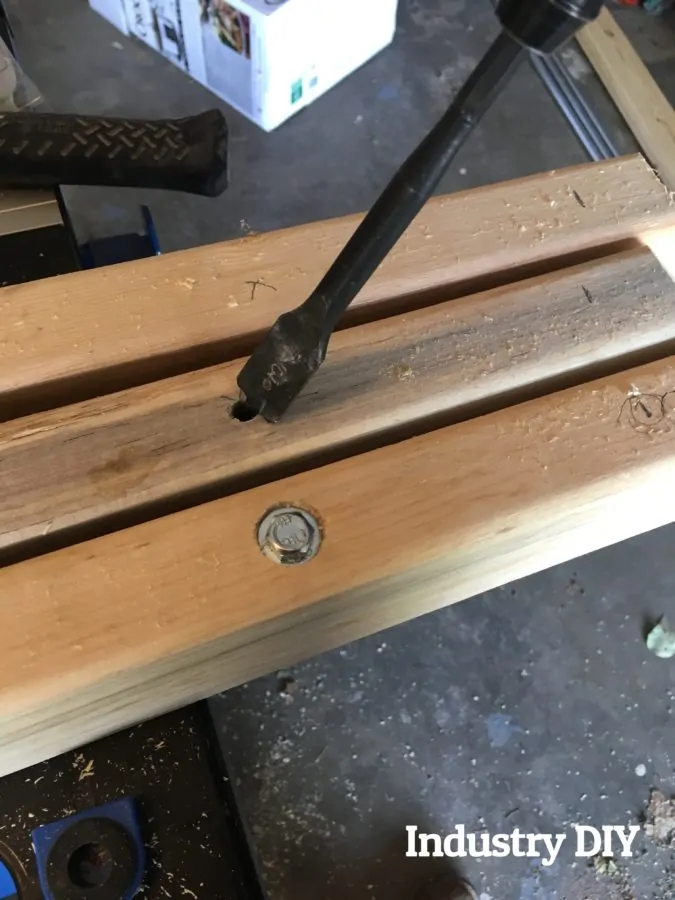
I also countersunk my lag bolt holes a little bit with a 3/4″ spade bit as you can see in the image below.
Drill all of the holes on each shelf support before you go on to the next step.
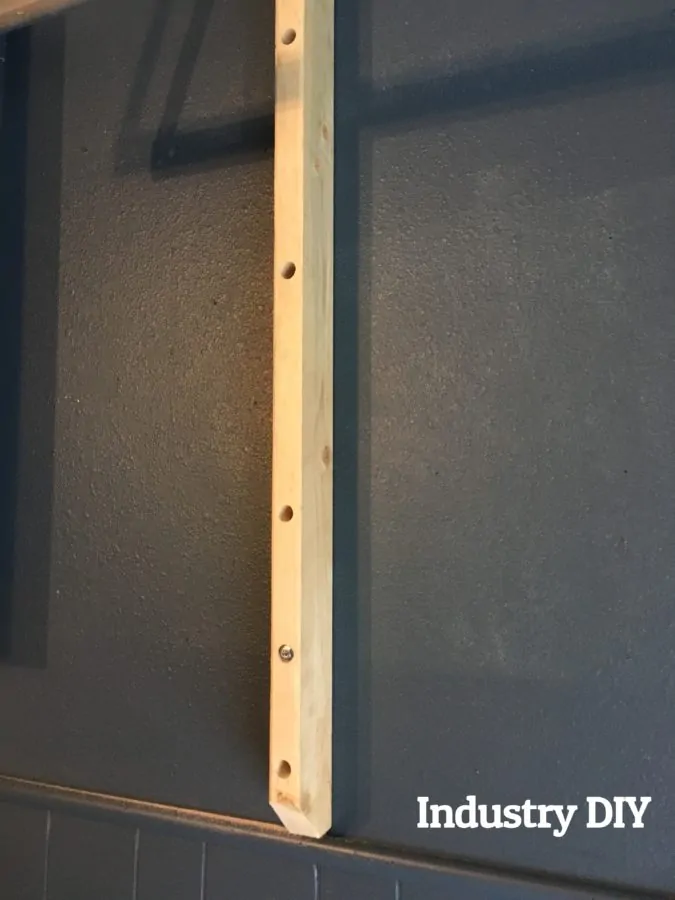
Step 3: Install Shelf Support Columns
Each of the shelf support columns needs to be installed at the same height as the others. This ensures a level shelf.
You will need an impact driver or nut driver bit that will fit your lag screw. If you don’t have one of these then a simple ratchet wrench can work as well, it will just take longer.
Use the stud finder to make sure you will be attaching the supports to the studs. Once you have the location marked, drive the lag screws in while you hold (or have a helper hold it, ideally) the shelf support in place.
Use a level to make sure the column is straight up and down.
You can see this in the image below.
Repeat this step for all three supports (or however many you decide to install).

Now it is time to make the shelf conduit pieces themselves.
Step 4: Cut Conduit for Shelves
This step is fairly straightforward. All you need to do is decide how wide you want your shelf to be.
Take that measurement and add the depth of the 2×4 (because the conduit will go inside it all the way to the wall).
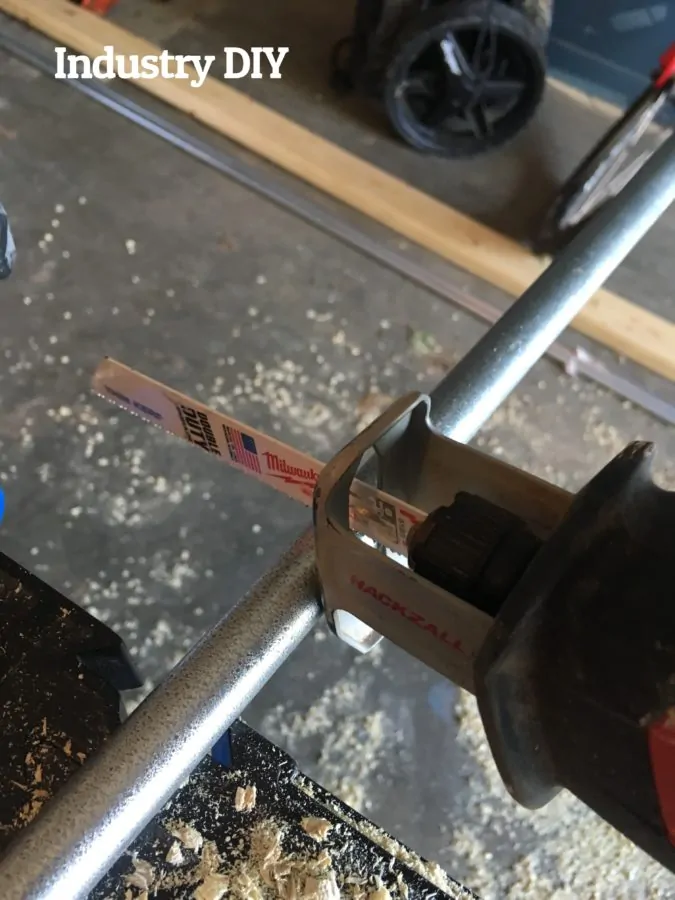
Now take a piece of conduit and cut it with your hack saw.
I used a cordless hackzall as you can see in the image below.
Step 5: Install Conduit
Put each conduit piece into the holes to make the shelves.
If you are worried about the conduit coming out of the hole then I recommend using some construction adhesive and pumping it into the hole before you install a piece.
I did not do this because I don’t see any reason for it to come out.
I did, however, install a safety feature that is optional. See next step.
Step 6: Install Bungee Straps (Optional)
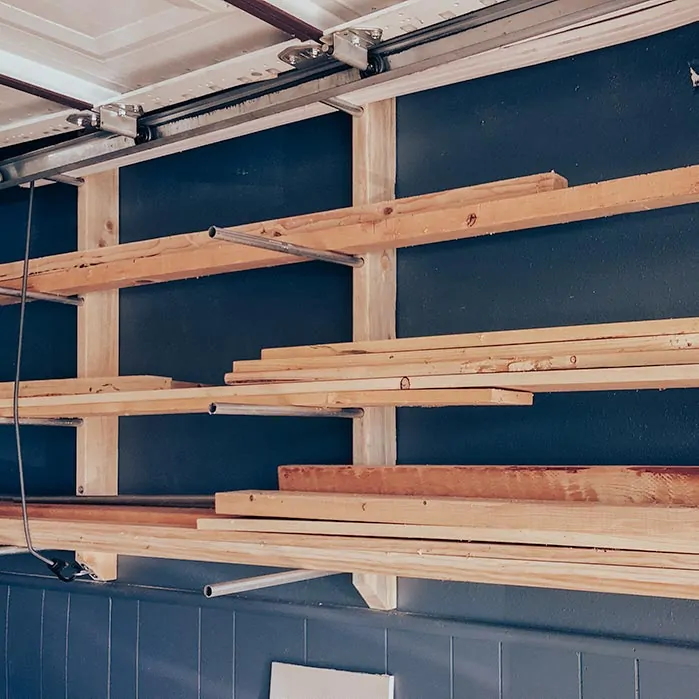
This is simply for my piece of mind. The bungee straps will keep boards from sliding off by accident. If something bumps the boards or nudges it on accident, I don’t want everything to come crashing down.
All you need for this is four anchor rings and two bungee straps. You will have to get bungee straps that are the correct length for your storage rack. The length will be the height of the rack.
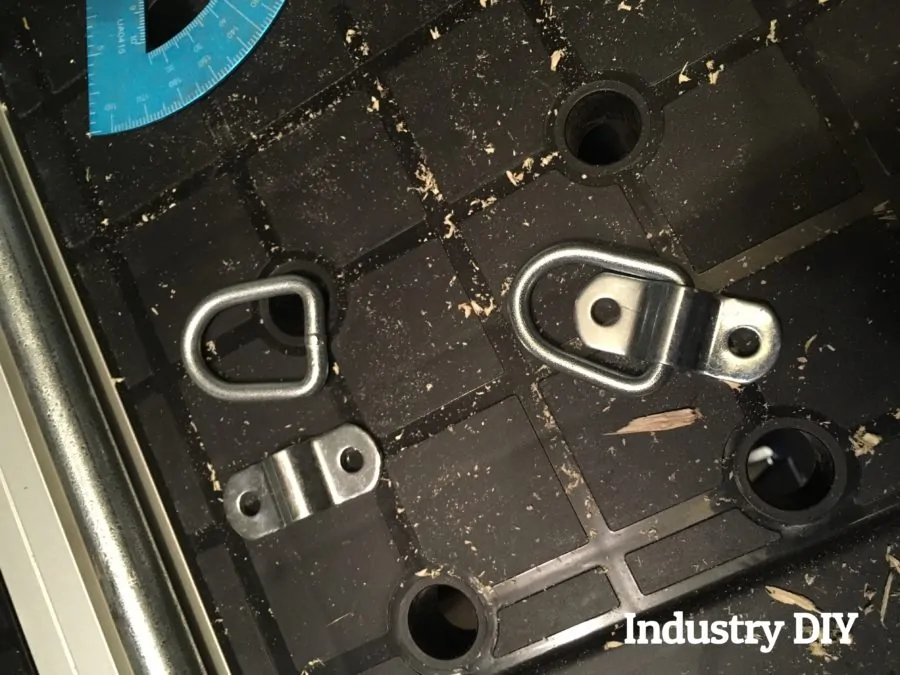
Screw these anchor rings into the very top and very bottom of the shelf supports. I did the end supports only. If you want to do every shelf support then go right ahead, that will be even safer.
Once installed, attach a bungee strap and go over the boards, holding them onto the wall.
You can see this in the final product below (the garage door hides the anchor straps up top from view).
Conclusion
This simple project will allow you to safely and easily store wood off of the ground. Productivity should increase.
If you are like me, I wanted to build a fancy storage rack for a long time but never got around to doing it.
Finally I said, I’m just going to build a simple one in a few hours and be done with it. So here it is, and it’s very useful.
The conduit should be strong enough to hold all the boards that I want to put up there, and the shelf supports are not going to come out of the wall with those lag screws installed.