This is part 2/2 of my kitchen remodel project. To go to the first part click here.
In the first part I worked on removing everything I possibly could from the kitchen. This included cabinets, appliances, flooring, and even some electrical and drywall.
This way I could start from scratch. This is not always necessary when doing a kitchen remodel, but mine was in pretty dire shape. It was on life support and I was ready to pull the plug.
Repair and Restore
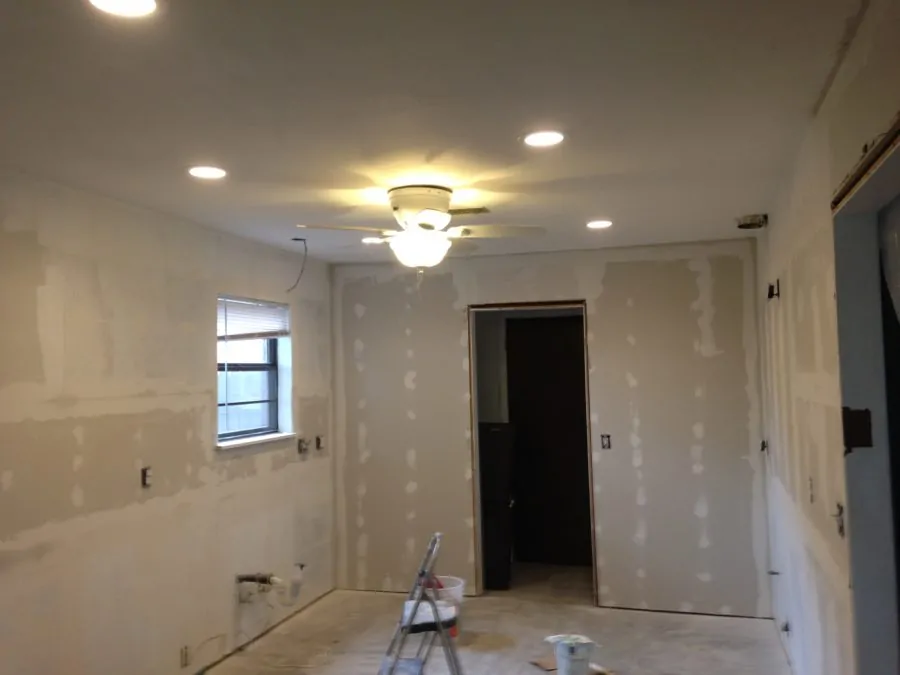
If you saw the demo in the previous post, you know that there was some work to do with the walls and getting everything cleaned up.
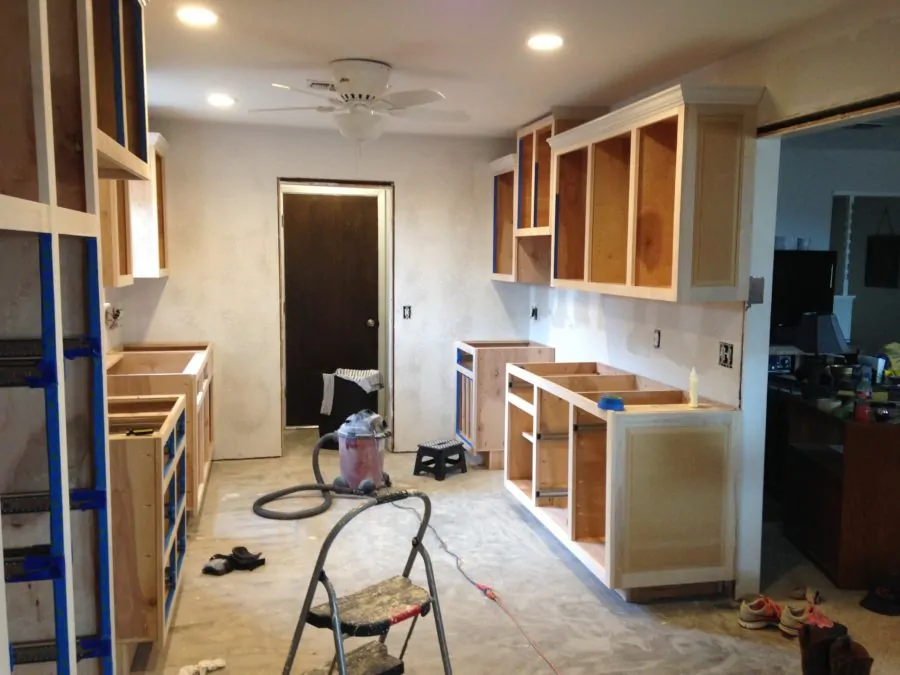
In the photo below I have installed the fan and recessed lighting. You can also see the repaired and patched drywall. Most of this will be hidden by the cabinets, but it needed to be repaired for the backsplash.
Cabinet Installation
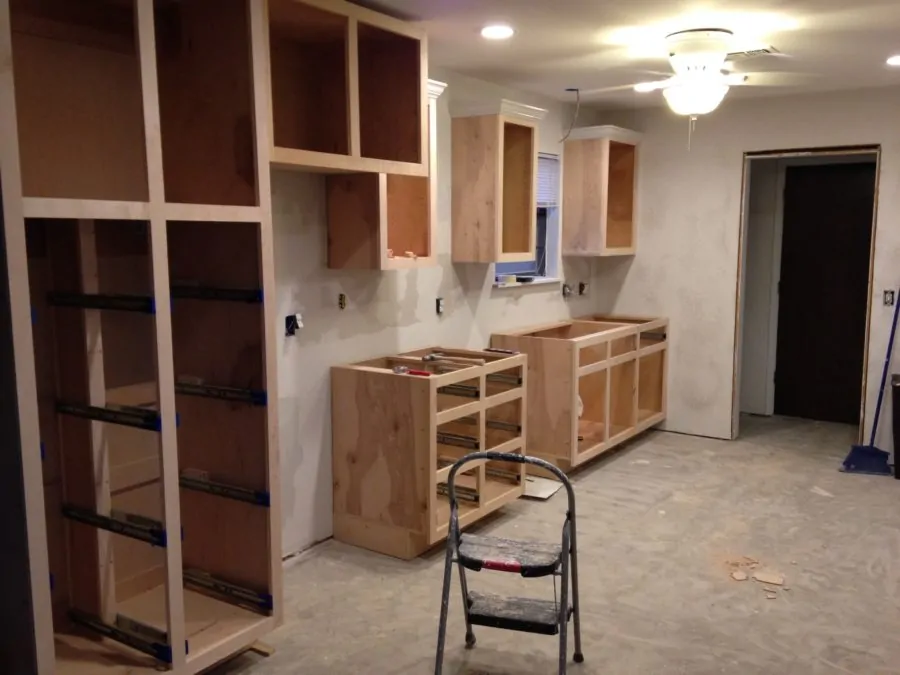
Once I got the place set up, I started with the cabinet installation.
Now I read a bunch of different stuff online about whether or not to install the flooring before or after the cabinets. Some do install the flooring first, and in that case the cabinets will sit on top of the flooring.
I didn’t like this for two reasons. One is that it would use more flooring, and thus be more expensive. The second reason is that if you happen to damage the floor or need to replace it, then you have to deal with the fact that it is sitting under the cabinets.
So because of this I went ahead with putting the cabinets up. Here are a couple photos of that process:
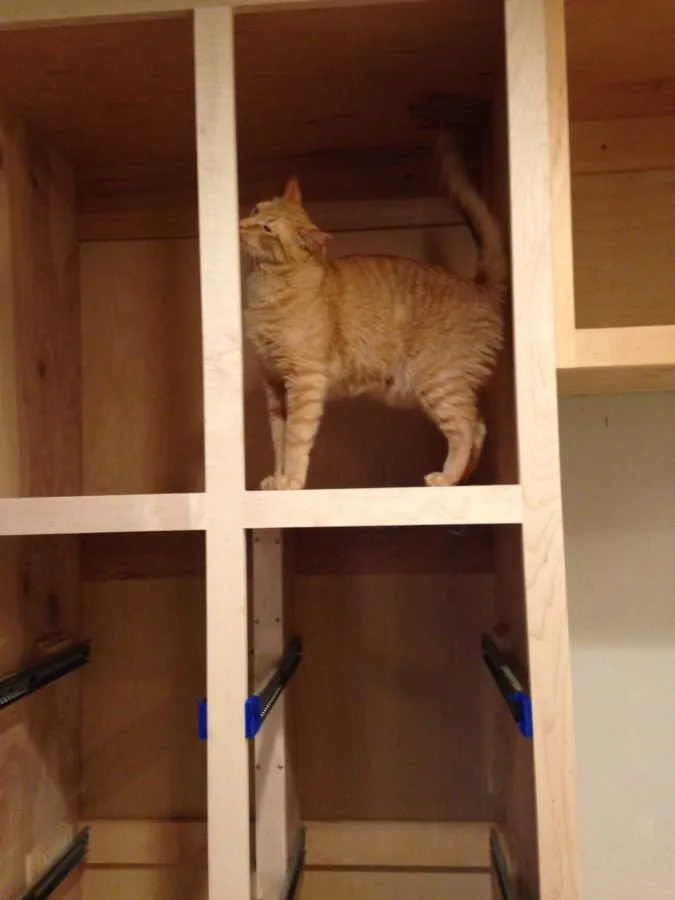
And then our orange animal playing around in the pantry.
About Building the Cabinets
I built all of these cabinets on my own. It was not an easy process, but I don’t regret doing it. They are high quality, strong, and suit our purposes great. I have no idea how much these would have cost to buy, but they cost me about $1500. And all of the sizing is custom to the space.
I followed instructions on how to build cabinets from this book.
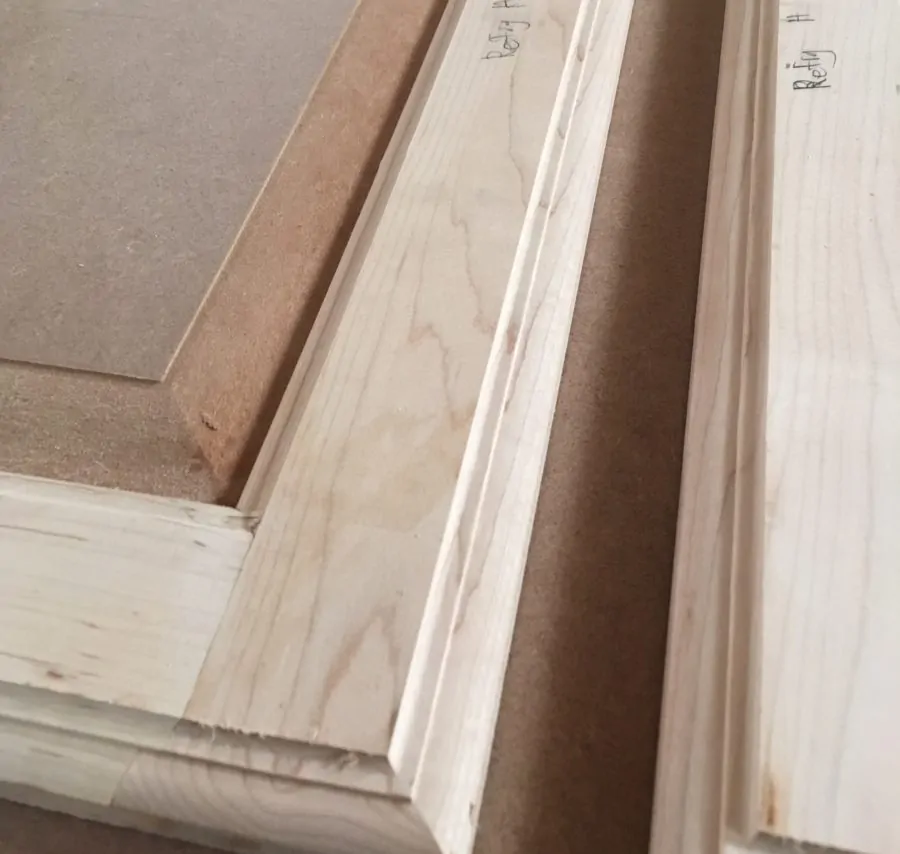
Face Frames
The face frames are made using maple. I used this because we plan on painting the cabinets, and I read where maple, along with poplar, is good for paint because it has a tight grained surface that doesn’t soak it all up.
They were assembled using pocket hole joinery (Kreg Jig).
Cabinet Box
The rest of the cabinet was built using 3/4″ birch plywood. This is a good wood to use if you plan on painting. It is relatively cheap but high quality at the same time. It is also widely available.
Doors
I do not have the doors in the photos above. You will actually see these installed later. I didn’t build the doors at the same time that I made the cabinets, strictly because of time issues. They take a long time to build.
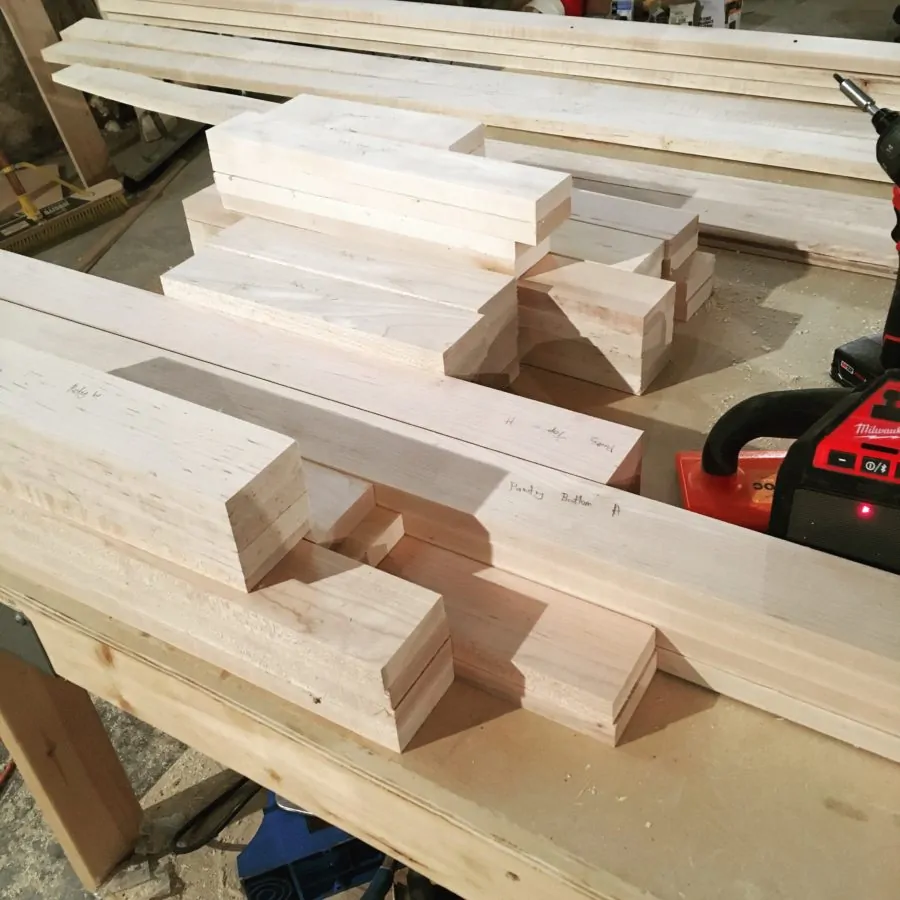
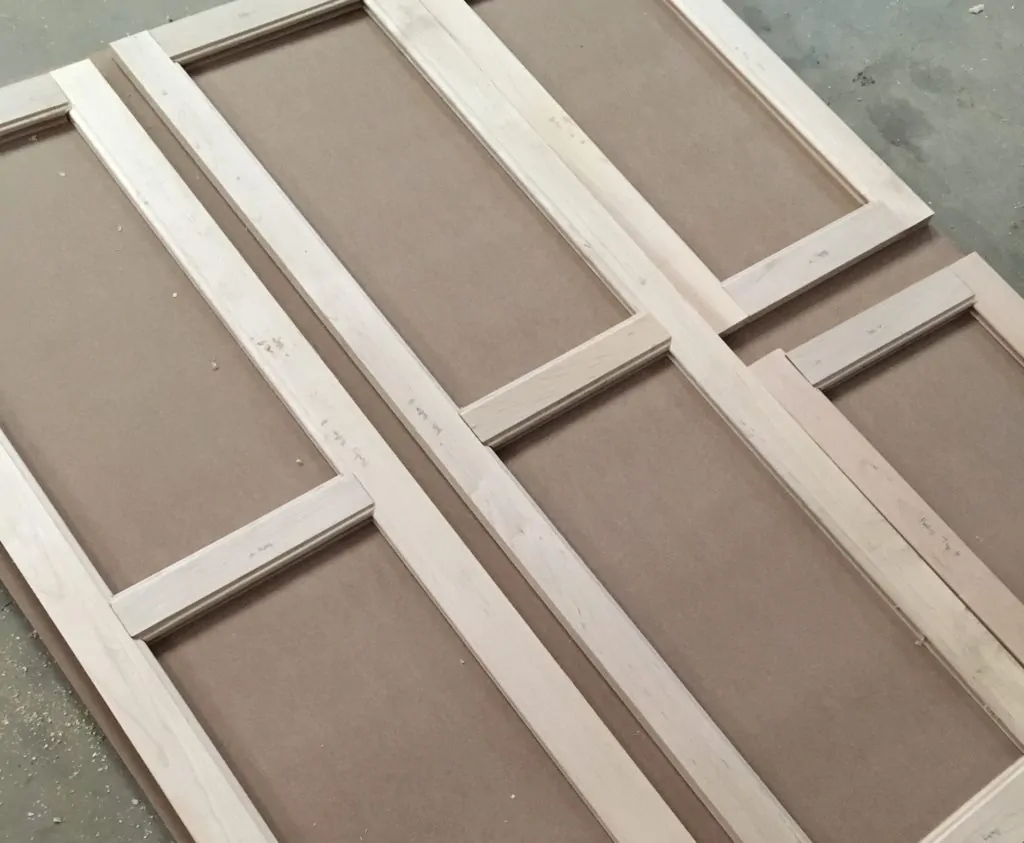
Here are some photos of the door construction.
These are all the rails and stiles for the doors cut into the correct lengths. There ended up being so much more than I expected.
Here are the some of the door frames after I ran them through the shaper and fit them together. They are not glued in this picture (because I still need to cut the panels for the middle).
This part consisted of running board after board through the shaper against a stile and rail bit. You have to rearrange the bit for the ends of the rails.
The rails are the horizontal pieces that have the ends cut with the shaper. The stiles are the vertical pieces and you don’t shape the ends of these boards.
Then it came time to cut the panels for the insides of these doors. This is a painstaking task that creates a ton of dust (if you’re using mdf). I used mdf for these panels because I am painting the doors white and there is no reason to use real wood. It machines well enough.
After I clamped and glued them together I had to wait 24 hours for it to all dry. Then it was time to sand and clean it all up.
The next step was to drill the holes for the 35mm concealed hinges. This was easily done with the Kreg Concealed Hinge Jig (I reviewed it here).
Drawers
I have 20 drawers in this kitchen. So that required a ton of drawer box making.
I made the boxes with 1/2″ baltic birch plywood. It is really good to work with because it generally has no holes or big knots in the layers. I’m not sure why, but the sheets come in 5×5 feet pieces.
And I think the end grain looks good exposed. If you don’t like it that way you can always laminate some edge banding onto the drawer sides.
I constructed them with pocket holes and the bottom is held in with a dado groove cut into the side pieces.
I don’t have any photos of this process, but I do plan on making a tutorial on how to make these drawers.
Drawer Slides
I bought all of my drawer slides off of Amazon. I could get a pair for 20″ full extension drawer slides for about $15. So yeah it adds up with 20 drawers, but it is well worth it. Go here to buy them on Amazon.
Overall
I enjoyed making these cabinets, and I learned a lot along the way. The most important thing I learned was that it takes a long time. The doors themselves took two full weeks.
They were not hard to install, in fact that was the easiest part. I loved being able to make everything custom to exactly my specifications.
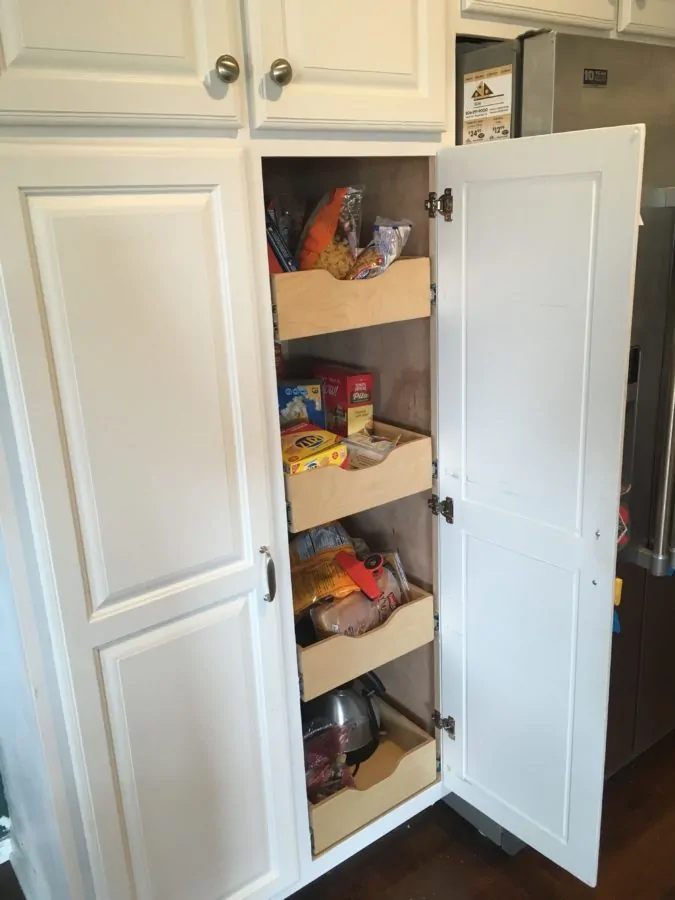
I was able to make the pantry with a whole bunch of drawers along with pull out drawers for my pots and pans and trash bin.
If I had to do it over again I would make every single bottom cabinet have drawers. It makes it so much easier to access whatever you put down there.
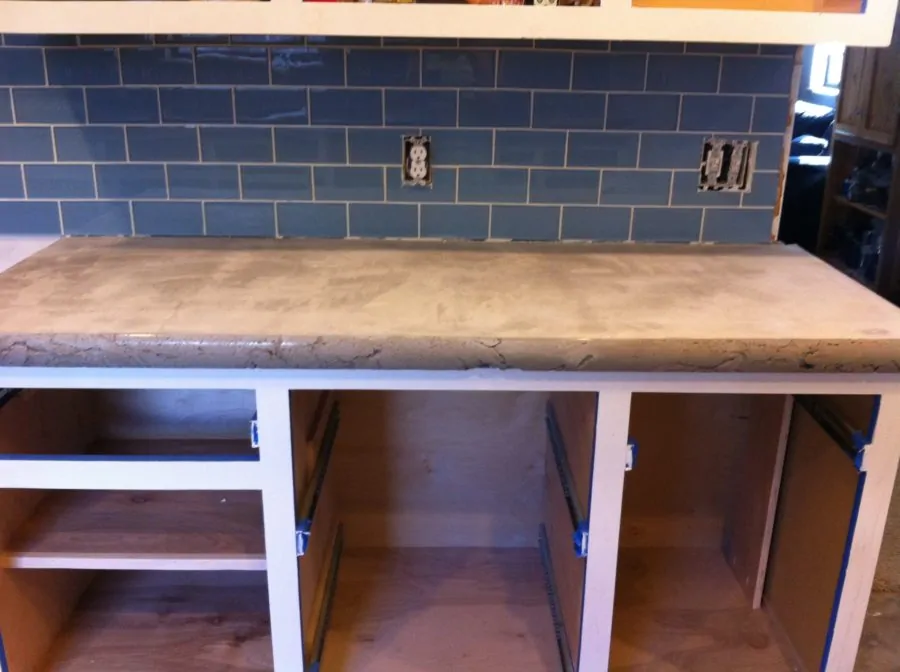
Countertop and Backsplash Install
After the cabinets were put in the next step was to install the countertops. Now I know granite is super popular, but it is also very expensive.
For that reason we decided to go with concrete countertops. I did this for two main reasons. Number one, it is cost effective. Granite is probably about 5 times more expensive. The second reason is that I have experience with concrete.
What really made it possible was using all the forms and mixes from Concrete Countertop Solutions. They sell forms that are really easy to use. The mix that you buy is an admixture that you add to a Sand Topping Mix from Quikrete.
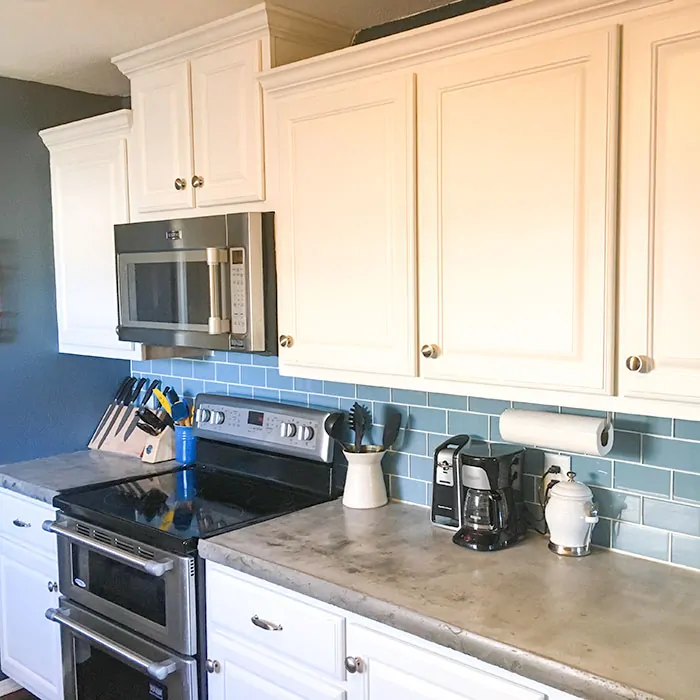
The backsplash was generally easy to install. It is just a multistep process with the tile cutting, groute, etc. We bought the glass tiles from Home Depot.
Here is a photo of the backsplash and countertop installed:
Floor Install
The floor installation was probably the most difficult part of the entire process. This is because I ignorantly tried to do it by myself. I mean, I got it done, but it was a killer.
The reason for this is that flooring is just harder than you expect it to be. Plus, it was a glue down floor. So I ended up making a huge mess in the process.
The one regret I have about this kitchen is I wish I would have just put some nice tile down. Maybe a wood look tile or stone. This is engineered wood, and sooner or later you will have some kind of water disaster in the kitchen. Its almost inevitable. So a tile would weather this storm no problem.
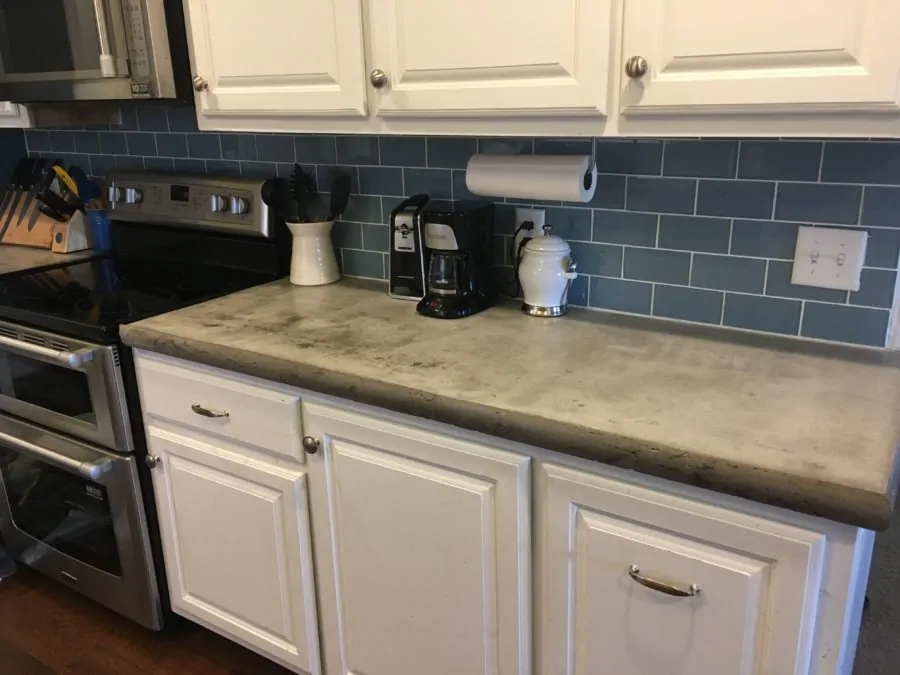
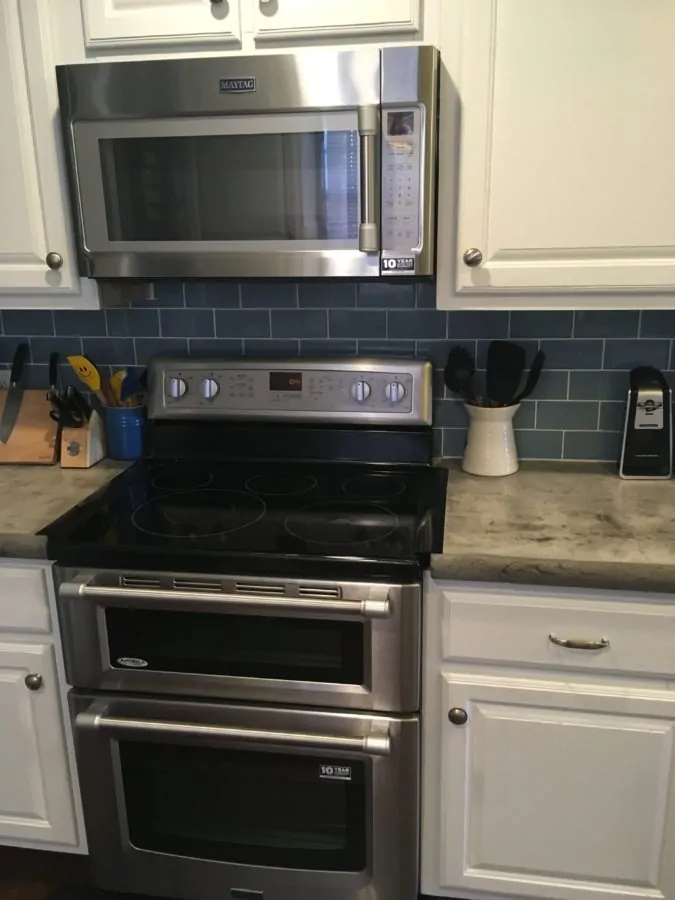
Final Pictures
I really like the character in the countertops.
The double oven has proven very useful.
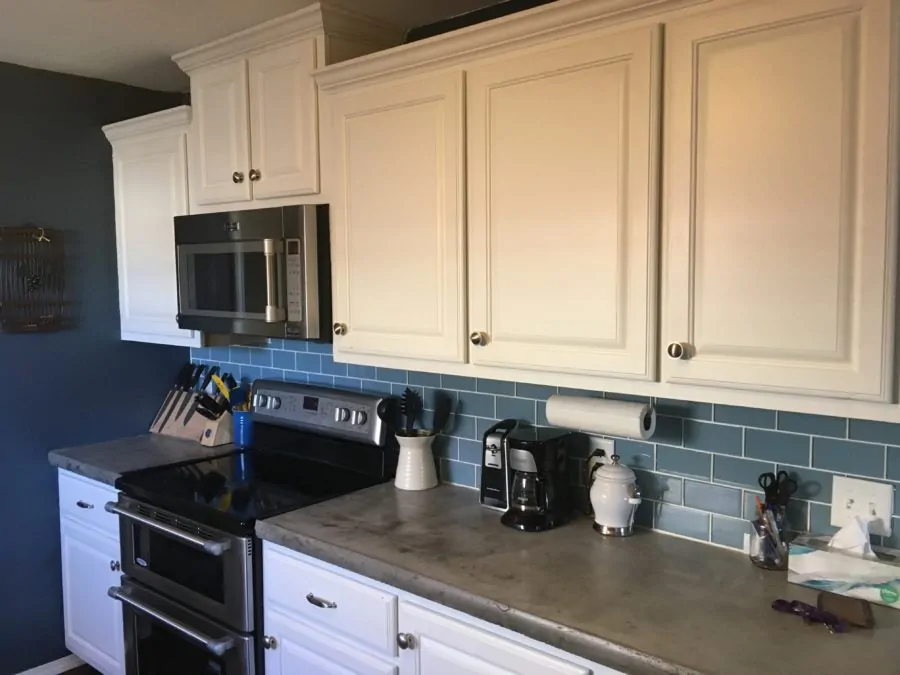
The cabinet with the six drawers is my favorite.
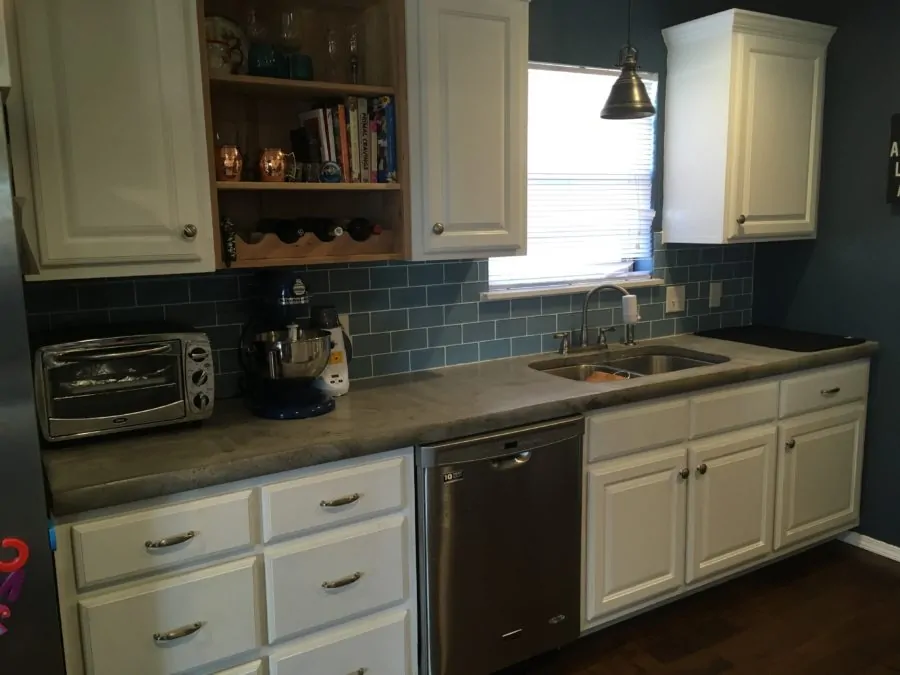
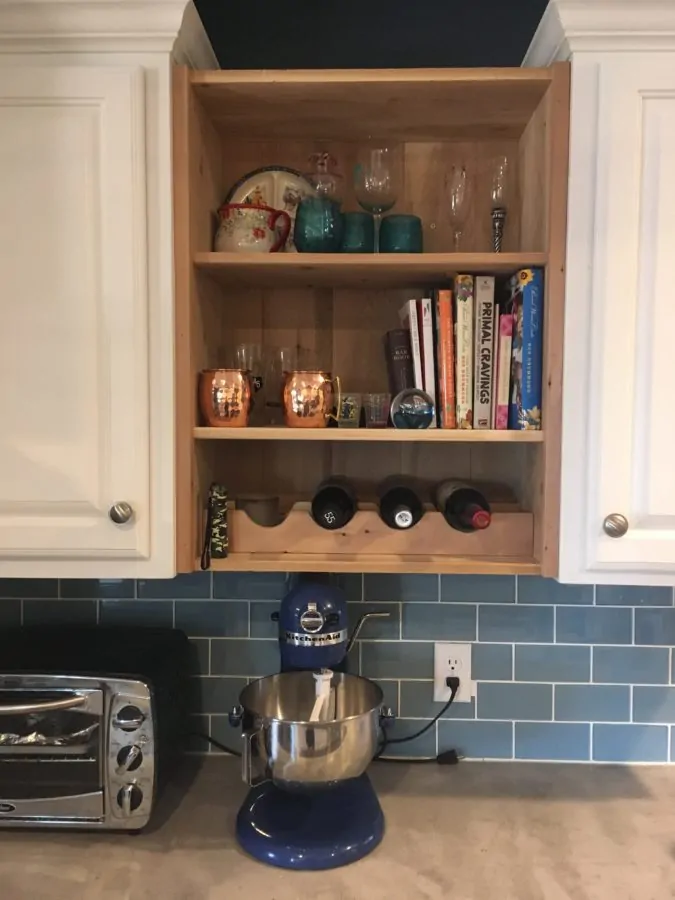
I added this open shelving later on along with a little wine rack.
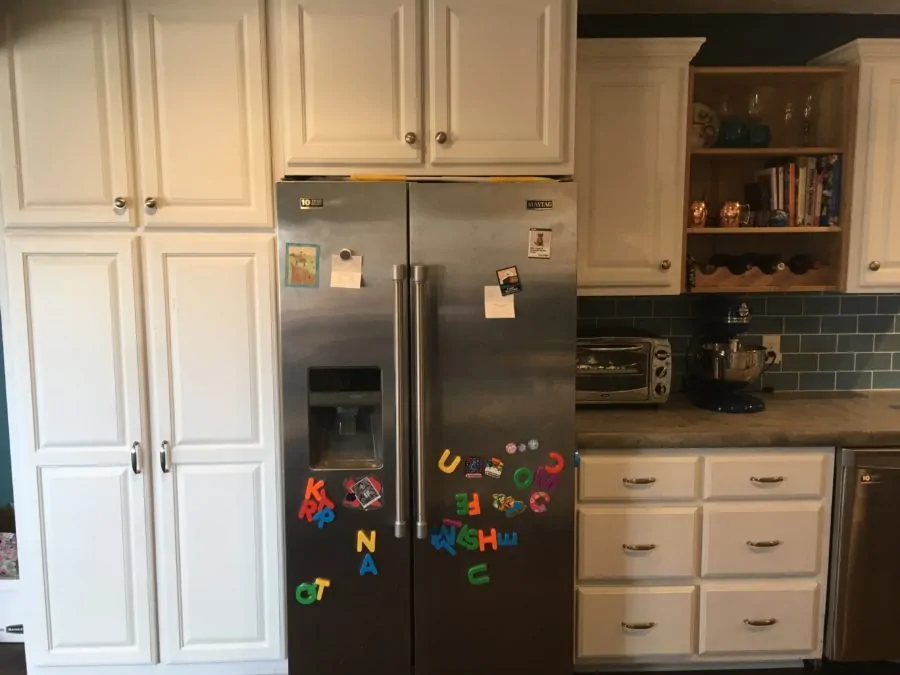
And my favorite part of the whole kitchen, the pantry. The drawers are a must.
Conclusion
Overall this project was a massive undertaking, but incredibly worth it. The kitchen was improved tenfold, and hopefully it added a little equity into my home too.
I gained some skills that I hadn’t thought about before, like cabinet making and building drawers. The floors and concrete countertops were something that I hadn’t really done before either.
I left some of the more minor things out of this process, like wiring some light switches and installing the sink. I am happy to provide more details on these if someone is curious.
If you have any questions about this process then please leave a comment below.
What a beautiful job/transformation !! Thinking of starting woodworking for fun, appreciate your site, tips, instruction, etc..
I got a kitchen just about like yours. The information was very educational.
thank you