

There are many different types of sanders used for woodworking. If you are not familiar with each one, it can be difficult to decipher what you need to use for what.
For example, you don’t want to use a belt sander on a corner of a table top that you are trying to round off. It is too bulky to handle with such a fine task, and the sander is generally too powerful. It could take off too much or damage the workpiece. In this case a small palm sander or a random orbital sander might be better.
This post is part of a series I am doing on explaining beginner woodworking. For more woodworking tips go here, or for beginning woodworking projects you can go here.
The Different Types of Sanders
[toc]
So what are all of the sander options for someone looking to get into woodworking? We are just sticking to the handheld variety:
- Belt
- Random Orbital
- Sheet
- Detail
I will talk about the differences and similarities between each one of these in this post.
Even if you are somewhat familiar with these tools there may be one or two that you didn’t know about. If you are a beginner then this will go a good ways toward advancing your knowledge and skillset.
I will stick to handheld sanders for this post. There are several types of floor and benchtop sanding machines too, but those are best saved for their own post.
Belt Sander
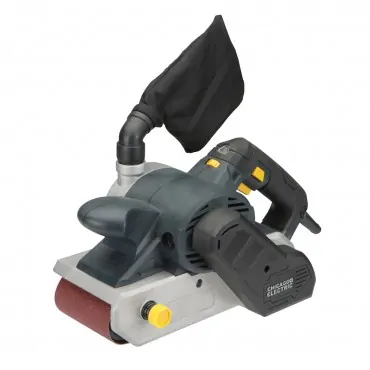
A belt sander is a popular tool that will work quickly and remove a lot of wood, especially with a rougher grit. This is a tool that you should have in your woodshop because there are certain applications where it will work way better than the others.
I like to use it to even out a rough, glue-up table top. It also works well on larger pieces. For example, I used it one time to sand 75-100 feet of handrail on a cedar deck.
Here are some details about belt sanders:
- They use 2 to 3 pulleys to run a sandpaper belt. The size of this belt can vary, but most of the time the sanding surface area is about 6 inches long by 3-4 inches wide.
- It will remove large amounts of wood quickly. This is due to the large contact area and the speed at which the belt is moving.
- It should always be used where the belt is moving parallel with the grain of the wood. Otherwise it can leave scratches or even deep grooves in the wood (I can attest to this through experience)
- Some better models will come with efficient dust extracting ports – they can produce a lot of dust particles in the air because of how much material is being removed.
Random Orbital Sander
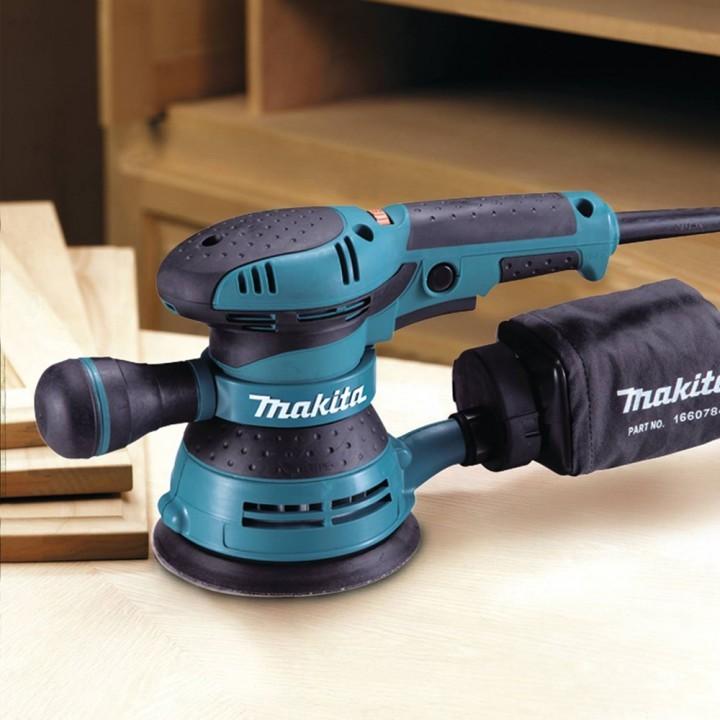
Random orbital sanders are one of the best tools in the shop for woodworking. I use it on nearly every project.
Buy the Best Random Orbital Sander Here
These sanders are relatively cheap to buy and generally safer to use than a belt sander. They also work well on refinishing projects where you need to sand down some paint or other finish. If you plan on doing DIY work or building furniture, a random orbital sander is a must have in my opinion.
Here are the most important details:
- They use an eccentric orbital motion to sand. This is different from a purely circular motion; it orbits around a center position, but not in a round fashion. This works to eliminate scratches on the surfaces.
- The sandpaper comes with holes in the surface to facilitate dust removal. Hook a shop vac or other system to the sander and it helps remove dust in the air and it also improves sanding efficiency.
- Sandpaper is attached to the machine via a velcro hook and loop system. This makes changing out the pads quick and easy.
- There is no need to worry about the wood grain direction.
- One disadvantage of this sander is that the round nature of it makes it difficult to get into corners.
Sheet Sander
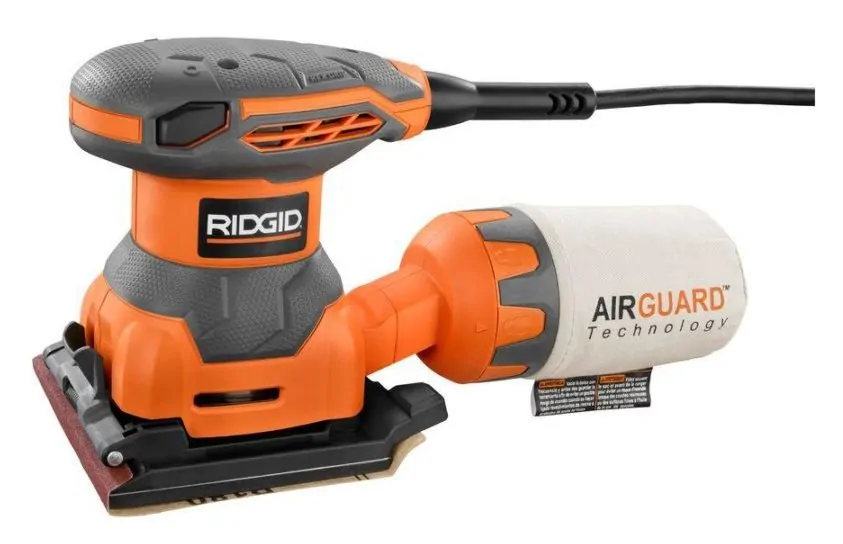
I consider the sheet sander to be a cousin of the random orbital sander. It works in a familiar fashion, but it is different in a few crucial ways.
First of all, it is square or rectangular instead of round.
Also, it does not use a velcro system to attach the sanding pads. You use ¼ or ½ of a standard sheet of sandpaper. This is then clipped in place to the bottom of the sander.
Other notable aspects of a sheet sander include:
- Square design allows it to get into corners easily.
- Can have either a linear motion, a circular motion, or both (a switch toggles between each mode). The back and forth straight sanding motion will need to be done in line with the wood grain.
- The circular motion is not like the random orbital style – this one will be a purely round motion that may scratch the wood, but it is aggressive and will remove wood quickly.
- They are generally small and easy to handle allowing it to be versatile and handy.
- The larger sheet sanders work great for finishing large, flat surfaces like a table top.
- Dust collection is not as common but still availble for many models.
Detail Sander
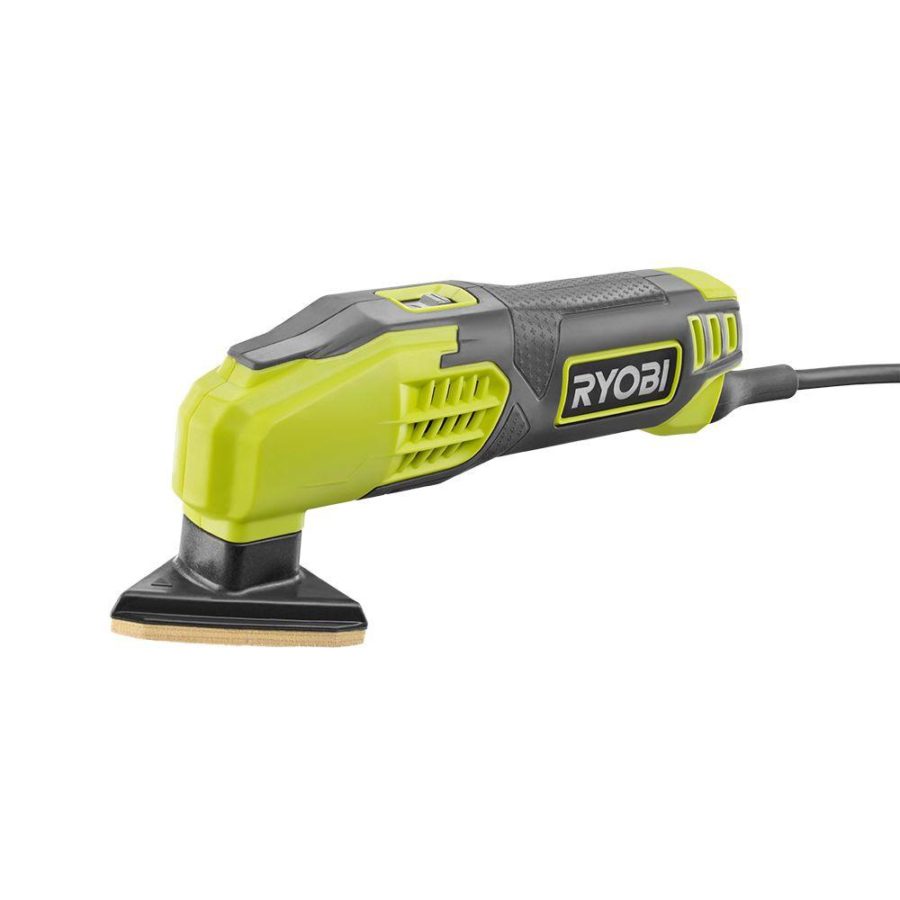
The name says it all for this sander. The detail sander uses small triangular pads design to fit into tight spaces where others can’t reach.
So what would you use one for? Furniture work, cabinetry, etc. For example, you may need to sand a tight corner on a table apron, or round off an imperfection on a chair spindle. These tasks can be done with care and precision.
Some aspects include:
- Triangular sanding pads that usually stick to the tool via an adhesive.
- Uses a random orbital style sanding motion – the grain direction of the wood does not matter.
- Small size of sanding pad and tool allows for detail work in tight spaces.
Other Considerations
When looking at some of these sanders there are some things you should take into consideration. You want to know if it will fit in with your shop and what you are trying to do.
Dust Collection Ability
I recommend buying a sander that has a good dust collection port. Many of the sanders produced now have this feature, but some of the cheaper ones may not.
There are two main reasons I suggest this.
First, it will keep your shop cleaner and your work surface free of sawdust. This has many benefits such as less cleanup later and a safer shop.
The second reason is that the sanding efficiency and effectiveness of your work will be increased. Without a vacuum the sawdust can collect between the sandpaper and the workpiece, thus making it harder to actually sand the wood.
Compatibility
You will want a tool that meshes well with the rest of your shop. By this I mean do you need a 120v tool, cordless, etc? Maybe you need to buy the same brand as you already have because some brands will have matching accessories (like dust port hookups and cordless batteries).
Also, does your local store carry the sandpaper you need for your tool, or is it a proprietary type of paper? It is not a big deal to have something that you can only buy online, but it’s something you need to know before you haul off and start buying.
Which One to Get?
You probably don’t need every type of sander that I have discussed here. Do you know what type of projects you will be working on? Get a sander that will work for it.
I generally recommend a random orbital sander starting out because it is the most versatile, but if you have a more specific requirement then choose the one that suits you the most.
Conclusion
There are several different types of handheld sanders meant for woodworking. A few are really versatile while the others are meant for more specific and detailed work.
You should study the pros and cons of each tool and also determine what you plan on working on. These two factors will guide your decision on which tool you should get.
For more information about woodworking and getting started, go here.