
This was a fun and simple project that I did for my wife (who is a teacher). She needed some way to display artwork and other projects that her students did.
I wanted to do something that was quick and simple so that others would be able to accomplish it quickly too.
At first I thought I would make something more fancy (and with more wood), but then decided against it because it would be too heavy. That is one of the advantages of this project, it is really lightweight. That is great for at the school since people change classrooms or you may move it from wall to wall.
The materials are basic and the skills needed to put it together are minimal. It is really a great beginner style project if you are not experienced.
If you are familiar with woodworking and DIY projects then you should be able to bang this craft out in no time at all.
Materials Needed
The materials are fairly simple and easy to acquire. You will only need a few things that you can buy at the hardware store and Wal-Mart.
Tools
- Pocket Hole Jig
- Cordless Drill or Screwdriver
- Sandpaper or Random Orbital Sander
- Stapler/Staple gun
Materials
- 1×4 (2 eight foot boards)
- Kreg Screws (8 1-1/4″ coarse thread)
- Burlap (I bought this at Wal-Mart in the sewing area)
- Make this as big as you want your frame to be – it is the background. Leave enough overlap to staple to the back of the frame.
- Small eye hooks (2 for each line you stretch across the frame)
- A roll of small twine (Length depends on how many lines you stretch across the frame)
- Picture hanging kit
Finishing
- Quart of Unsweet tea (this needs to be just plain tea with no additives)
- Ball of steel wool.
- Distilled White Vinegar
- Brush
Step by Step Assembly
I will lay out the assembly steps here. It is important to remember that this is completely customizable: you don’t have to make it the same size I do. The steps are all the same regardless of the size of your frame.
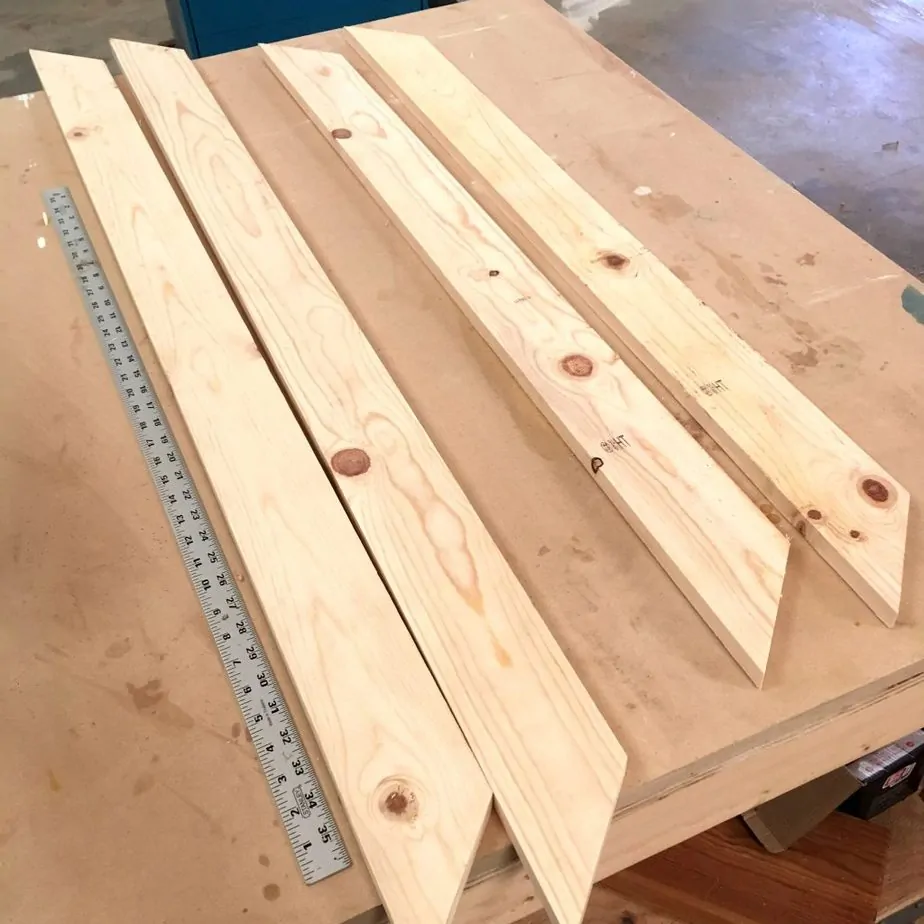
1. Cut 1×4 Boards to Length
Cut your boards to length. You will need to make a decision on this part: do you want to have mitered corners or butt joints?
If you aren’t sure which take a look at the basic graphic I made below:
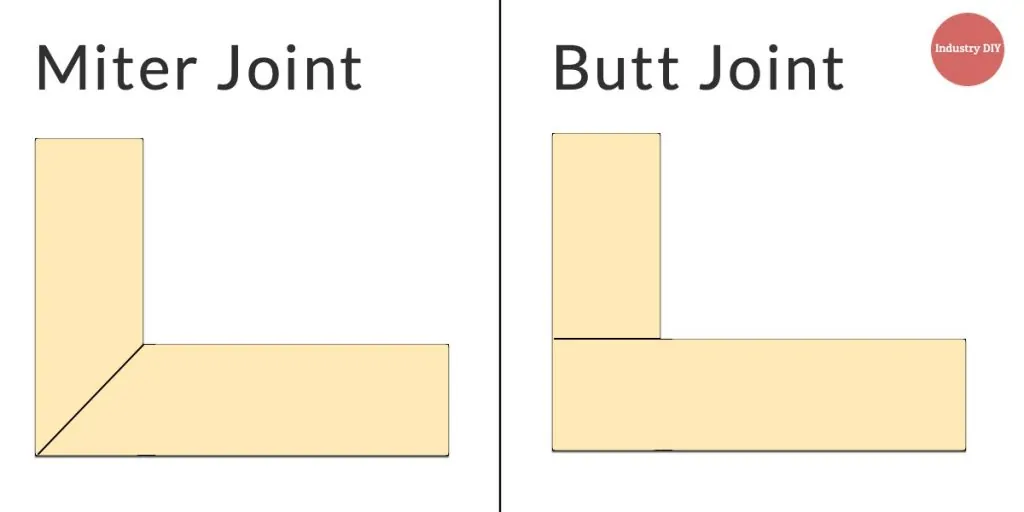
This decision is strictly personal preference. I used a mitered corner on my frame.
The difficulty of assembly is not much different when using a Kreg Jig, but a butt joint is generally easier. In this case I didn’t find much challenge with the mitered joint.
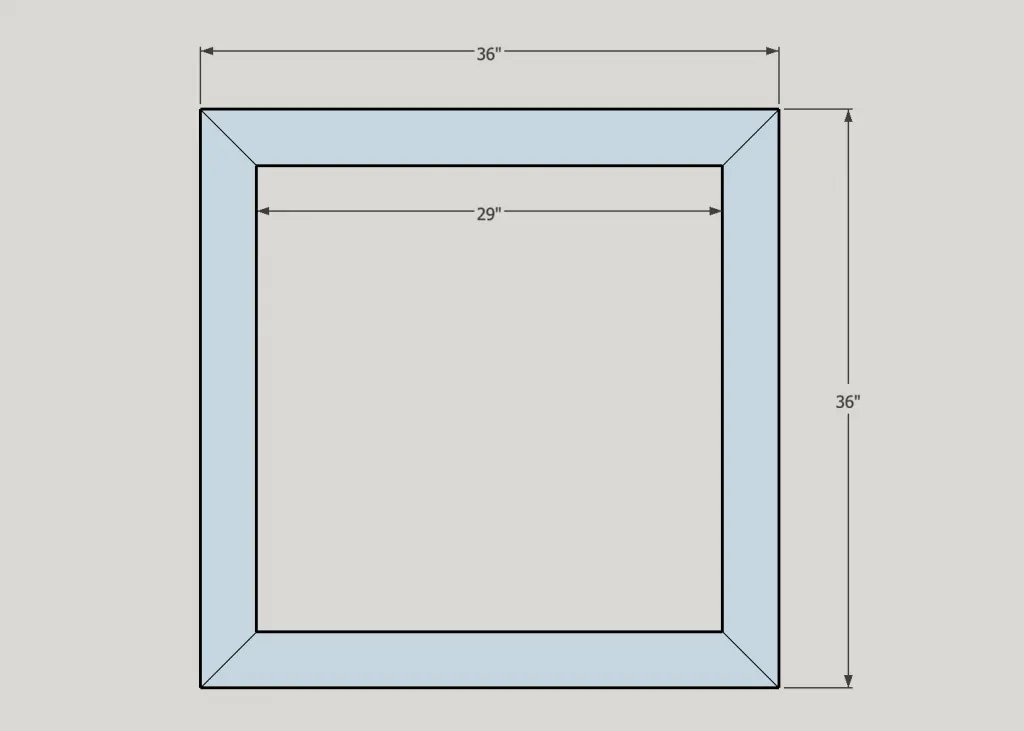
Choose which one you will use so you can cut your boards correctly. Butt joints will be cut differently than miters (of course). Here is a rough sketch of how I planned my frame (The dimensions are not the same as my actual frame).
And here are my cut boards:
2. Drill Pocket Holes and Join Boards
This step requires a pocket hole jig and drill. If you need help on this step, I recommend looking at my How to Edge Join Boards article.
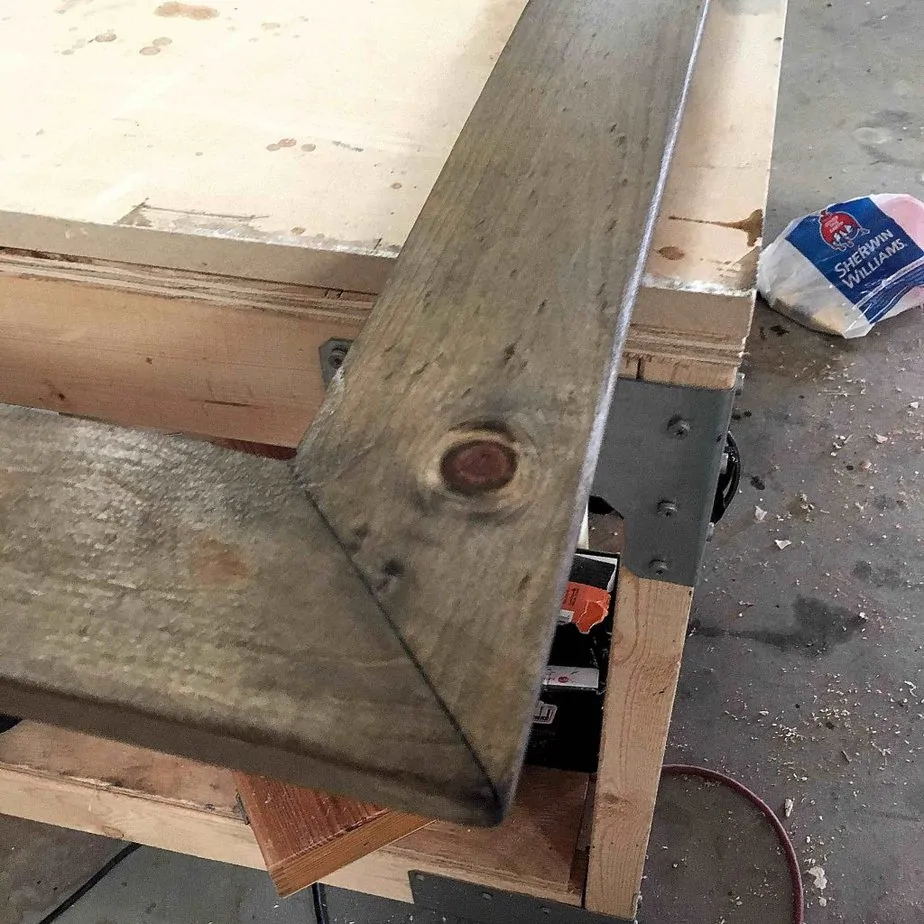
Here is a picture of my pocket holes drilled. If you use miter joints then make sure to drill your pocket holes more towards the inside of the corner.
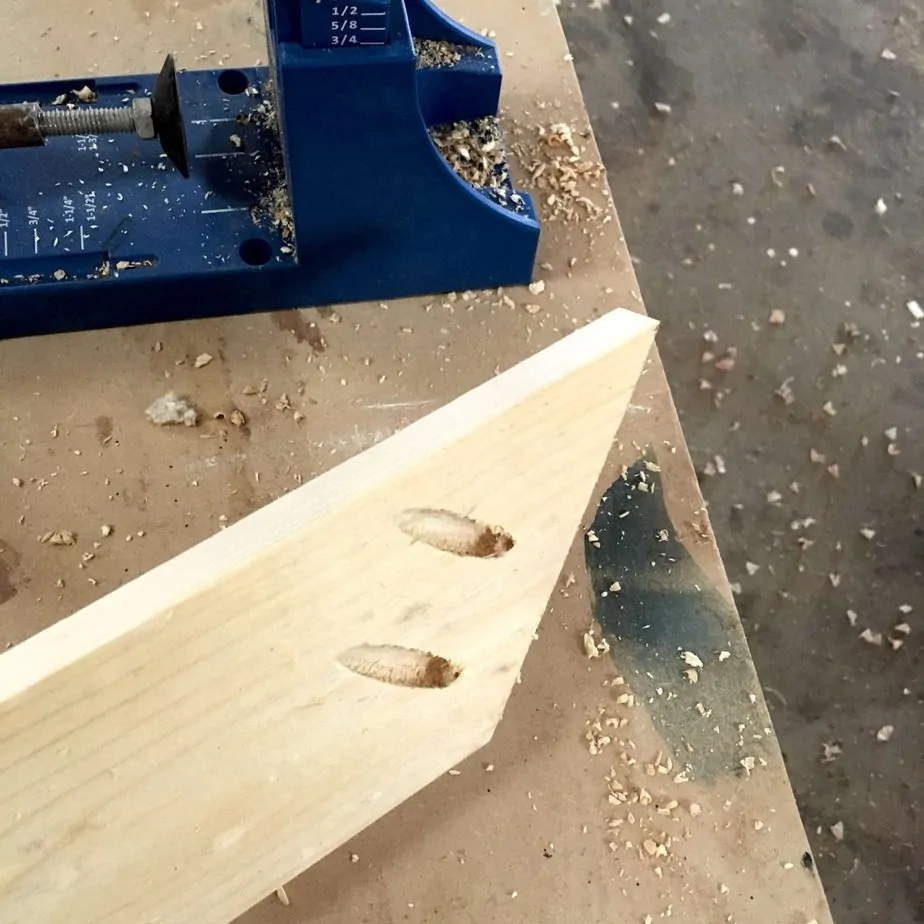
You only need to drill pocket holes on one side of each miter corner. (8 total pocket holes)
Hold the corners together and drive your pocket hole screws. You can use clamps to help with this step, but I just made sure to line up the corners and held it with my hand.
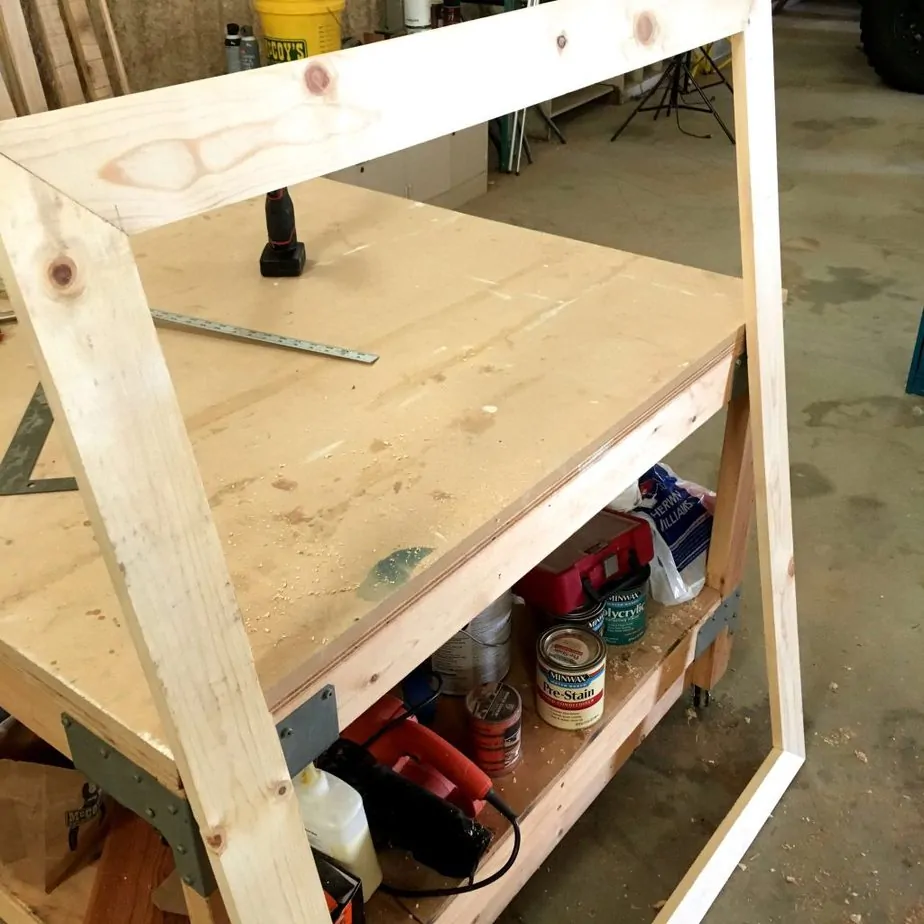
Assembled frame:
3. Sand and Stain Frame
Sand all of the edges and face smooth with some sandpaper or a random orbital sander if you have one.
I used a tea+vinegar stain on this frame to give it a vintage look. If you are not familiar with this, it is a simple mixture that you can make yourself.
Simply let a ball of steel wool soak in a mason jar with vinegar for a couple days. Then you brush on some brewed tea like in the image below:
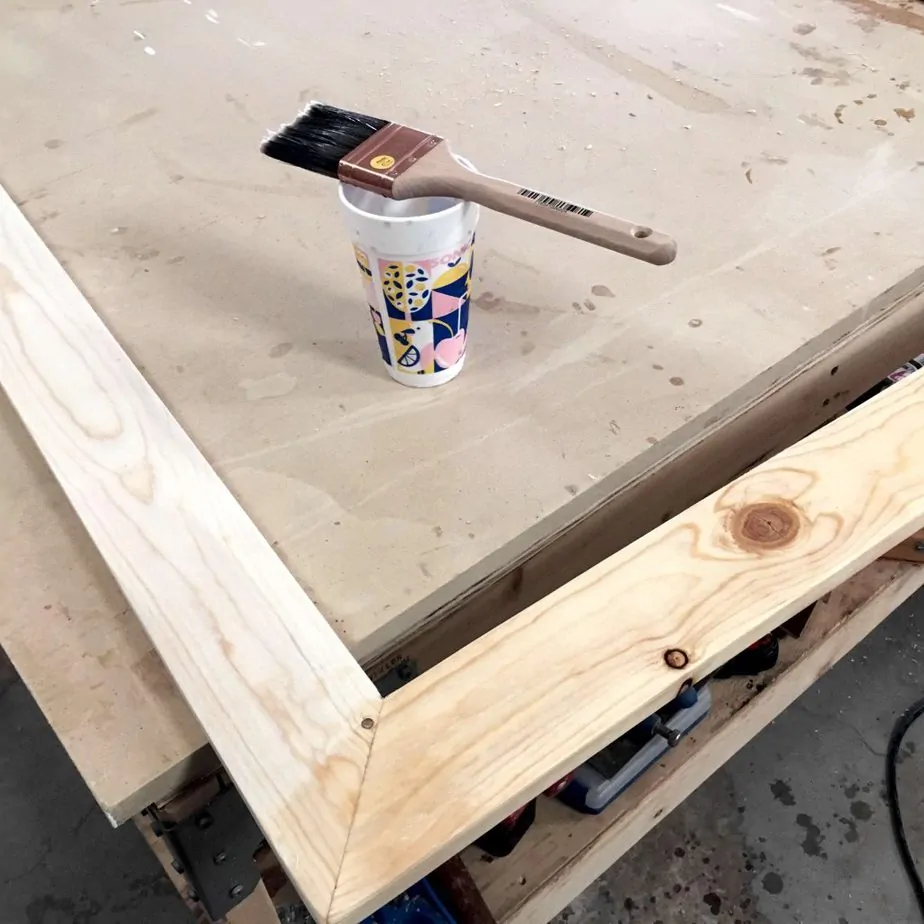
It won’t do anything at this step except get a little wet. Let the tea dry and then brush on the vinegar mixture (you can remove the steel wool from the jar).
The vinegar will react with the tannins from the tea and make a pretty cool looking “stain”:
Let this dry before moving on to the next step (I’ve found that it dries quickly).
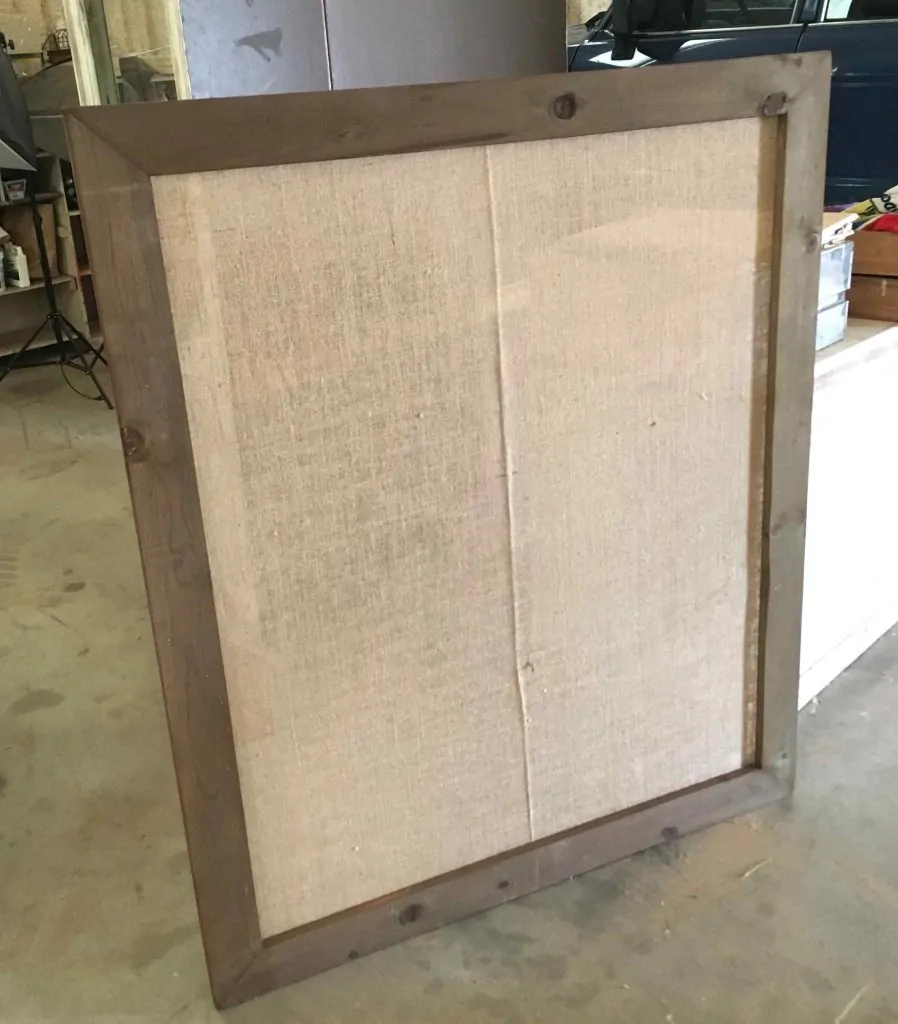
4. Staple Burlap Backing
This step is straightforward.
Cut your burlap background to size (you can use a different material if you like). Use the inside dimensions + a couple inches on each side so that you have material to staple to the back.
5. Add Picture Hanging Hardware and Twine Hanging Lines
The picture hanging hardware will go on the back. For this project I used some picture hanging D-rings and wire across the back.
I didn’t think that sawtooth hangers would work well in this situation, but you can try them if you want.
Then I screwed in the eyehooks on either side of the front frame and put twine across to hang artwork from.
You can screw the eyehooks into the actual front of the boards or the inside edge like I did. The inside gives it a closer profile against the burlap backing.
You can use any kind of clips to hang the actual papers with.
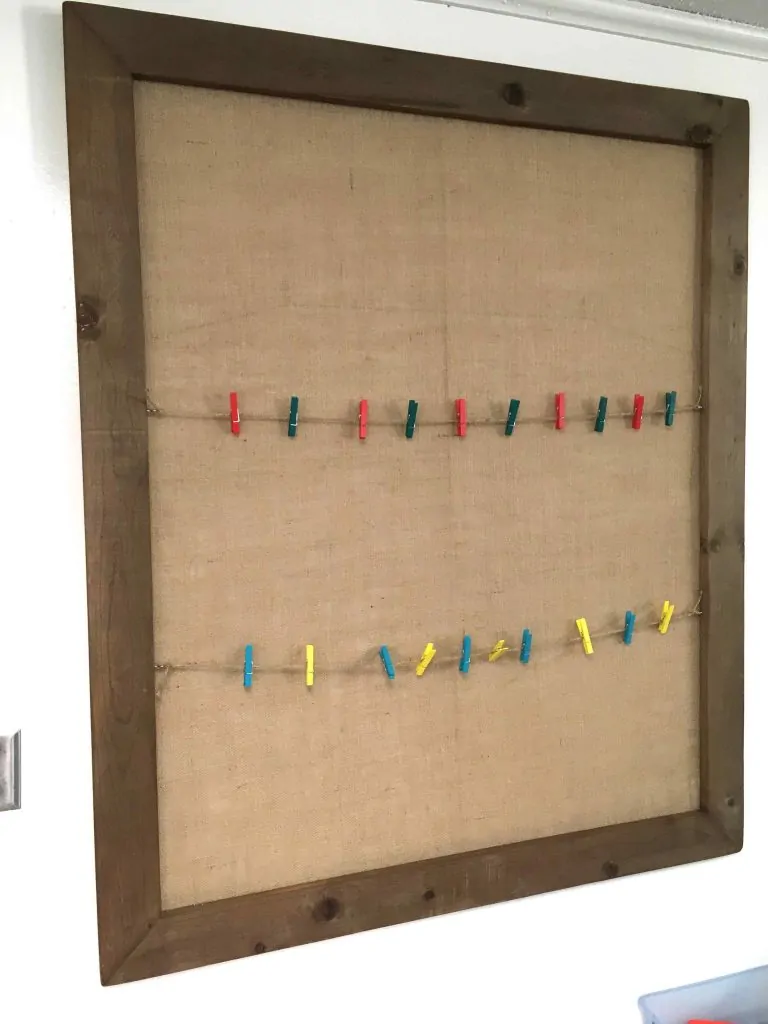
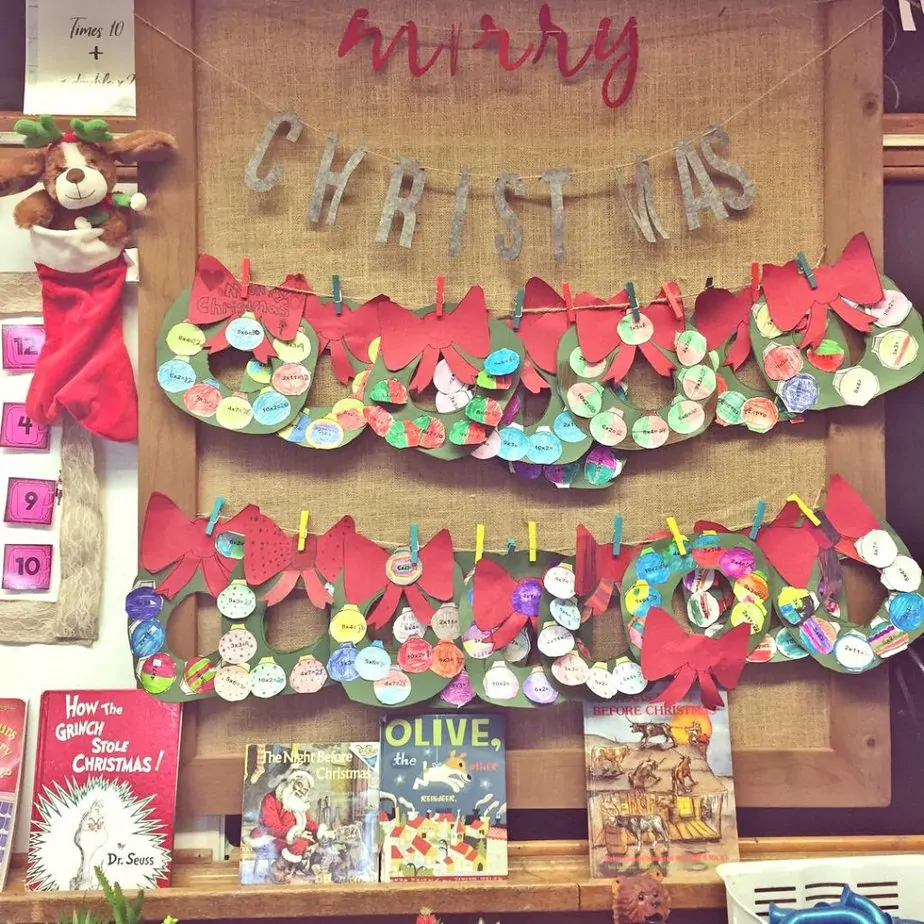
Add as many lines as you would like. I left a space up top so that some letter decorations could be added.
6. Hand and Add Artwork
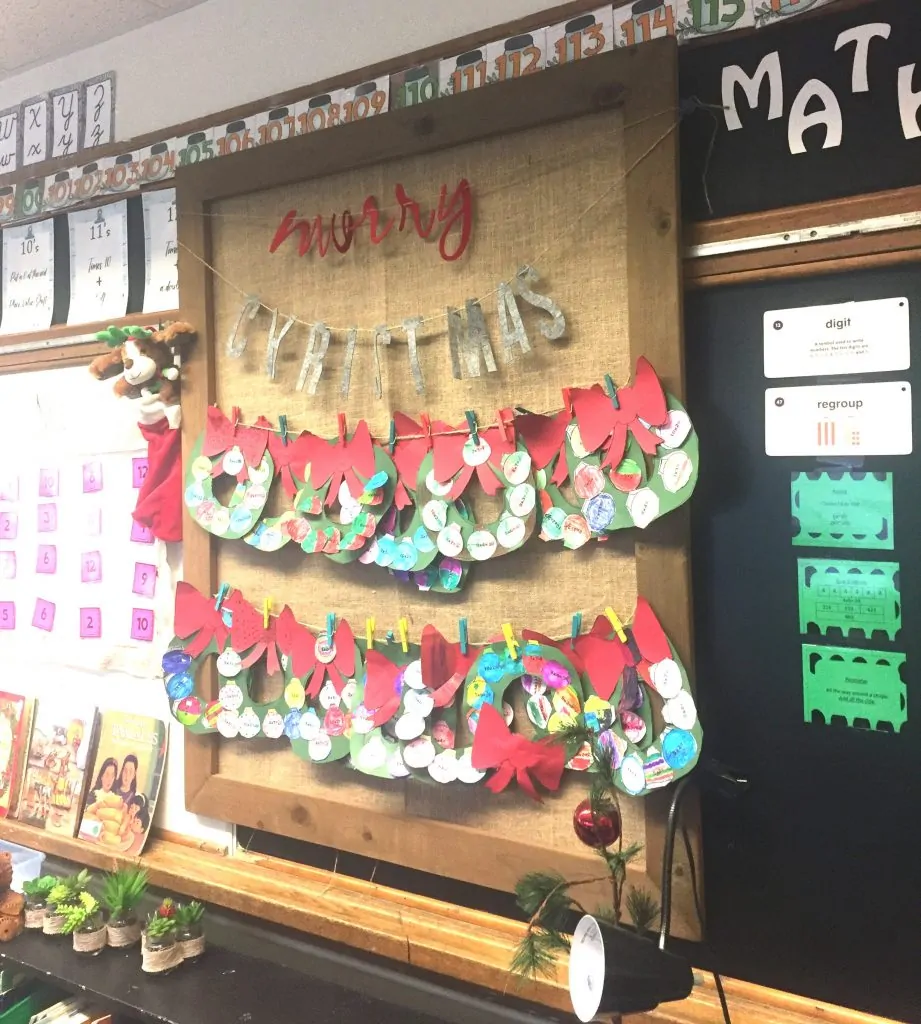
This is the fun part. Hang it up on the wall and start using it!

Conclusion
I hope you enjoyed this project! It is sure a nice addition to the classroom. I can see using this in a number of other situations as well.
If you enjoyed this project please pin it on Pinterest!